22
System Clock
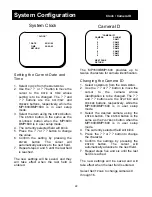
Setting the Current Date and
Time
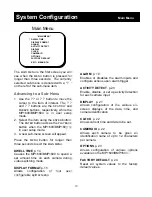
1. Select
CLOCK
from the
MAIN MENU
.
2. Use the
? ?
or
? ?
button to move the
cursor to the
DATE
or
TIME
whose
setting is to be changed. The
? ?
and
? ?
buttons are the
SPLIT/SW
and
FREEZE
buttons, respectively, while the
MP1600/BMP1600 is in user setup
mode.
3. Select the item using the
ENTER
button.
The
ENTER
button is the same as the
PLAYBACK
button when the MP1600/
BMP1600 is in user setup mode.
4. The currently selected field will blink.
5. Press the
? ?
or
? ?
button to change
the value.
6. Confirm the setting by pressing the
ENTER
button. The cursor will
automatically advance to the next field.
7. Repeat steps 4 and 5 until the last field
is reached.
The new settings will be saved, and they
will take effect when the last field is
entered.
Camera ID
The MP1600/BMP1600 provides up to
twelve characters for camera identification.
Changing the Camera ID
1. Select
CAMERA ID
from the
MAIN MENU
.
2. Use the
? ?
or
? ?
button to move the
cursor to the camera whose
identification is to be changed. The
? ?
and
? ?
buttons are the
SPLIT/SW
and
FREEZE
buttons, respectively, while the
MP1600/BMP1600 is in user setup
mode.
3. Select the desired camera using the
ENTER
button. The
ENTER
button is the
same as the
PLAYBACK
button when the
MP1600/BMP1600 is in user setup
mode.
4. The currently selected field will blink.
5. Press the
? ?
or
? ?
button to change
the character.
6. Confirm the settings by pressing the
ENTER
button. The cursor will
automatically advance to the next field.
7. Repeat steps five and six until the last
field is reached.
The new settings will be saved and will
take effect when the last field is entered.
Select
NEXT PAGE
to change cameras 9
through 16.
* CAMERA ID*
CAMERA ALARM
1
CAM 1
2
CAM 2
3
CAM 3
4
CAM 4
5
CAM 5
6
CAM 6
7
CAM 7
8
CAM 8
NEXT PAGE
RETURN
System Configuration
Clock / Camera ID
* CLOCK *
?
DATE
05/01/00
TIME
00:00:00
RETURN

