background image


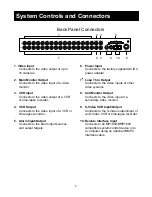
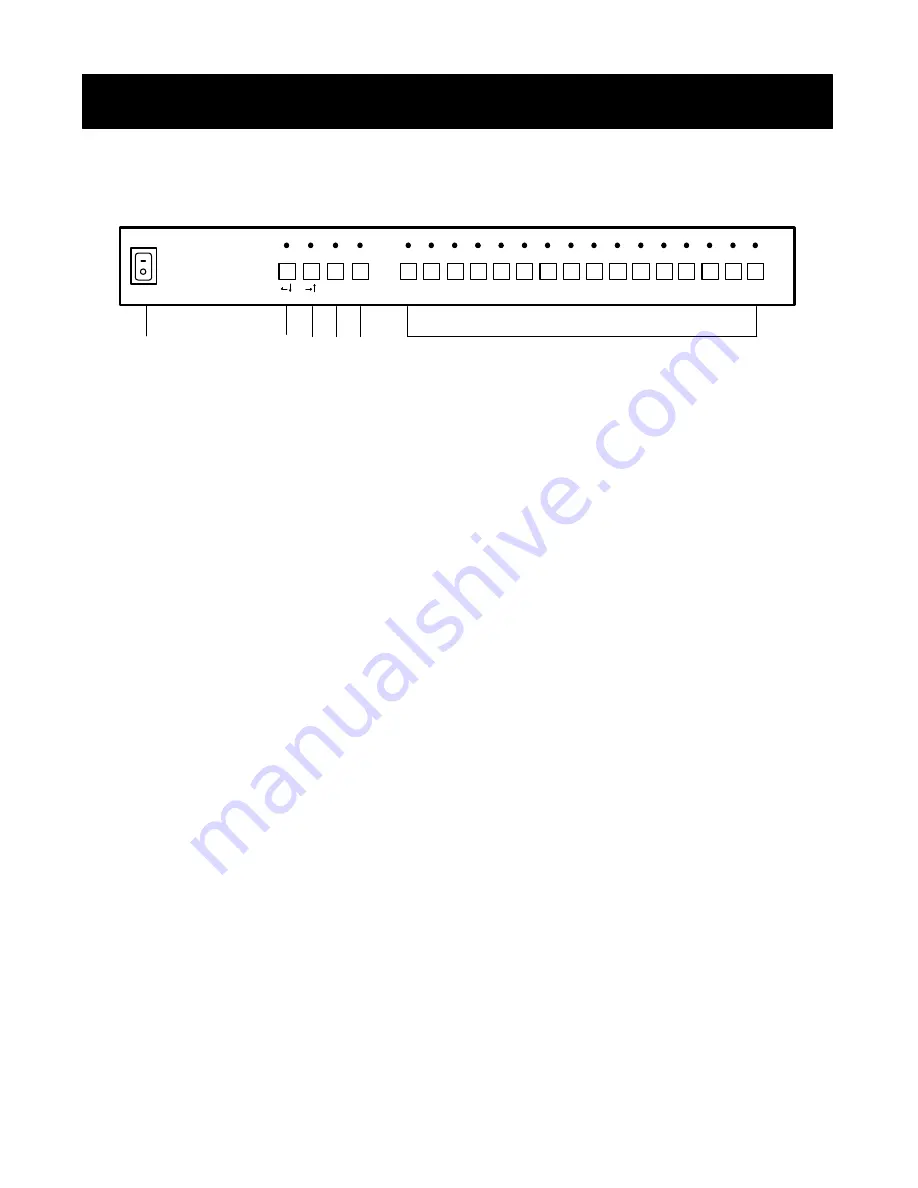
1.   Power Switch

 p. 7 


Turns the MP1600/BMP1600 on 
and off. 


2.  Video Selector 

p. 7 


Selects a camera input to be 
displayed in full-screen mode to 
the main monitor output. 


3. 

SPLIT/SW

 Selector 

p. 7 


Selects a preset multi-screen 
mode and the multi-screen/full- 
screen switching mode’s main 
monitor output. 


? ?

 Function

 p. 12 


The 

SPLIT/SW 

button provides 

down and left navigation while in 
user setup mode. 


4.  

FREEZE

 Button 


Freezes the currently selected video 
input’s main monitor output or returns to 
normal video. 


? ?


Function

 p. 12 


The 

FREEZE

 button provides up and 

right navigation while in user setup 
mode. 

 
5. 

PLAYBACK

 Button 

p. 9 


Selects a VCR input to be displayed to 
main monitor output.  This button does 
not affect the VCR output during duplex 
operation. 


ENTER

 Function 

p. 12 


The 

PLAYBACK

 button acts as the 

ENTER


button while in user setup mode.  


6. 

CALL

 Button

 p. 10 


If this pressed for less than three 
seconds, this button will enable or 
disable call monitor select mode. 


MENU

 Function

 p. 11 


If pressed for longer than three 
seconds, the MP1600/BMP1600 will 
enter user setup mode. 

System Controls and Connectors 

Front Panel Controls 


 1                          3   4   5   6                                         2 

10

11 

12 

13 

14 

15 

16 

SPLIT/SW  FREEZE 

ENTER 

VCR 

MENU 

CALL 

HyperView MP 1600 

Summary of Contents for BMP1600

Page 1: ...Color B W Duplex Multiplexer MP1600 BMP1600 USER S MANUAL...

Page 2: ...force the system s plug into a power outlet It has one blade that is wider than the other for safety purposes If any liquid or solid object falls into the cabinet unplug the system and have it checke...

Page 3: ...nst harmful interference when the equipment is operated in a commercial environment This equipment generates uses and can radiate radio frequency energy and if not installed and used in accordance wit...

Page 4: ...Monitor System Configuration Understanding Menu Buttons Main Menu Dwell Time Display Formats Alarm Settings Activity Detection Display Date Time Settings Clock Camera ID Advanced Configuration Options...

Page 5: ...12 The FREEZE button provides up and right navigation while in user setup mode 5 PLAYBACK Button p 9 Selects a VCR input to be displayed to main monitor output This button does not affect the VCR out...

Page 6: ...ther video systems 8 Call Monitor Output Connects to the video input of a secondary video monitor 9 S Video VCR Input Output Connects to the S Video output input of an S Video VCR or time lapse record...

Page 7: ...nput connector on a video monitor using coaxial cable Video Tape Recorder Connect the VCR input with the video output on a VCR or a time lapse tape recorder using coaxial cable Connect the VCR output...

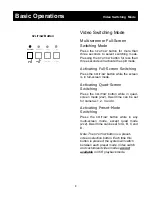
Page 8: ...on when connecting the AC DC adapter to the POWER IN connector on the MP1600 BMP1600 and the AC outlet Full Screen Mode To select a desired camera input to be displayed press the button number corresp...

Page 9: ...Screen Switching Press the SPLIT SW button while in quad screen mode 2x2 Dwell time can be set for cameras 1 2 3 and 4 Activating Preset Mode Switching Press the SPLIT SW button while in any multi scr...

Page 10: ...e main monitor The VCR output will remain unchanged Returning to Live Mode Press the VCR button in VCR playback mode to restore the mode prior to VCR playback mode Note Pressing MENU button in VCR pla...

Page 11: ...desired call monitor by pressing the number of the desired camera on the front panel 4 The light will go off to indicate the completion of the call monitor selection When the alarm inputs are enabled...

Page 12: ...modify operations Entering User Setup Menu Press the MENU button for longer than three seconds from any live video mode to display the main setup menu on screen Exiting User Setup Menu Press the MENU...

Page 13: ...utton changes or decreases the value of the selected item right up Function This button moves the cursor to the right or up When an item is selected this button changes or increases the value of the s...

Page 14: ...d a set amount time on each camera during video switching mode DISPLAY FORMAT p 15 Allows configuration of four user configurable split screens ALARM p 19 Enables or disables the alarm inputs and conf...

Page 15: ...se the dwell time to the desired time 4 Save the setting by pressing the ENTER button You may repeat steps two through five above for each camera that requires changes to dwell time Quad Mode Switchin...

Page 16: ...screen you were in before turning off the system Saving a Mode 1 Select SAVE MODE from DISPLAY FORMAT 2 Use the or button to change the setting to ON or OFF The and buttons are the SPLIT SW and FREEZ...

Page 17: ...MP1600 is capable of allowing each camera s screen size 1 4 1 8 or 1 16 to be set independently Changing Screen Mode 1 Select MODE from DISPLAY FORMAT 2 Use the or button to move the cursor to quadran...

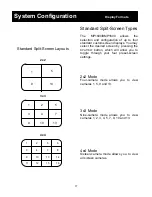
Page 18: ...ressing the SPLIT SW button which will allow you to toggle through your four preset screen settings 2x2 Mode Four camera mode allows you to view cameras 1 5 9 and 13 3x3 Mode Nine camera mode allows y...

Page 19: ...displayed in one of the two left quadrants while the right half of the camera 2 6 10 or 14 input is displayed on the right half of the screen Triple B Screen Cameras 2 6 10 or 14 and 4 8 12 or 16 are...

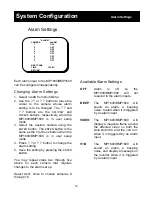
Page 20: ...You may repeat steps two through five above for each camera that requires changes to the alarm set up Select NEXT PAGE to choose cameras 9 through 16 Available Alarm Settings OFF Alarm is off so the...

Page 21: ...he ENTER button You may repeat steps two through five above for each camera that requires changes to set up an alarm Select NEXT PAGE to choose cameras 9 through 16 Available Detection Settings OFF Ac...

Page 22: ...Date Settings OFF No date information is displayed MM DD YY Month Day Year DD MM YY Day Month Year DD MM Day Month Available Time Settings OFF No time information is displayed HH MM Hour Minute HH MM...

Page 23: ...acters for camera identification Changing the Camera ID 1 Select CAMERA ID from the MAIN MENU 2 Use the or button to move the cursor to the camera whose identification is to be changed The and buttons...

Page 24: ...umber of cameras you wish to record This will allow you to take advantage of the faster recording speed and better quality of nine camera recording You may view as many cameras as you wish in LIVE mod...

Page 25: ...recording up to 256 events Once 256 events are reached the oldest log entry is overwritten when new events are logged Factory Default Reset Resetting System Values to Factory Defaults 1 Move the curso...

Page 26: ...roper installation and use of standard video equipment will maximize the capabilities of the MP1600 BMP1600 However in certain installations or with the use of non standard video equipment it is possi...

Page 27: ...nt panel The selected video will be boxed in cyan Adjusting the Gain Use the or button to increase or decrease the gain The and buttons are the SPLIT SW and FREEZE buttons respectively while the MP160...

Page 28: ...will be restored Note The MENU button in VCR playback mode will select a VCR bypass see p 28 or a VCR tracking adjustment see p 29 Full Screen Mode To select a desired camera input to be displayed pre...

Page 29: ...er the last bypass mode Monitoring VCR Recording By entering VCR bypass mode the actual video images being recorded by the MP1600 BMP1600 can be monitored Due to the fact that the MP1600 BMP1600 recor...

Page 30: ...he or button to adjust the tracking while the MP1600 BMP1600 is in user setup mode 2 Confirm the settings by pressing the ENTER button 3 Press EXIT button to exit VCR Tracking Adjustment Mode The new...

Page 31: ...The alarm input type is automatically detected by the MP1600 BMP1600 GND Ground Should be connected to the ground reference of the alarm detection device N O Normally Open alarm output This can be co...

Page 32: ...the alarm input type therefore either a normally open or normally closed type of alarm device can be used with the MP1600 BMP1600 Note Because the type of alarm is detected whenever the MP1600 BMP1600...

Page 33: ...emote Interface Diagram The MP1600 BMP1600 s remote interface allows the remote control of MP1600 BMP1600 with a standard 6 conductor cable that is terminated with a 6 conductor RJ45 cable With its us...

Page 34: ...de Set Reset Freeze Mode Cursor Up in Menu Mode Toggle Live VCR Modes Select in Menu Mode Enter Exit Menu Setup Mode V a Set to Live Mode V b Set to VCR Mode v d Split Screen Mode v e Sequence Mode Ma...

Page 35: ...ormats Video Decoding NTSC CCIR601 858x525 native res Encoding PAL CCIR601 864x625 native res Video Processing Fully Digital Main Monitor 8 channel parallel processing VCR Output 4 channel semi parall...

Reviews: