JPK Instruments NanoWizard
®
Handbook Version 2.2a
23
Measurement of the spring constant using a reference cantilever
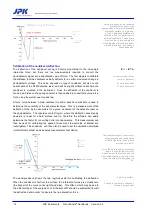
When a reference cantilever with a known spring constant
k
r
is available, other
cantilever spring constants
k
c
can be calculated by measuring the slope of the
repulsive contact part of a force-distance curve. The two cantilevers must be
placed over each other, and the deflection of the unknown cantilever measured as
it is pushed against the reference cantilever. This calculation is most accurate if
the two cantilevers have similar values of k.
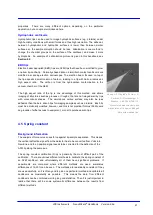
If s
r
is the slope measured on the reference cantilever, and s
s
is the slope
measured on a solid support (e.g. a piece of glass or mica), then the calculation is:
−
=
1
r
s
r
c
s
s
k
k
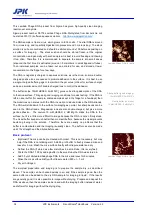
Ideally, the two cantilevers are brought in contact with their very tips. If there is a
significant offset away from the end of the reference lever a correction needs to be
made:
3
∆
−
=
L
L
L
k
k
c
corr
,
where L is the length of the reference lever and
∆
L is the offset away from the end.
Hinterdorfer et al
. PNAS
93
(1996)
3477-3481. “Detection and
localization of individual antibody-
antigen recognition events by atomic
force microscopy”
Measurement of the spring constant using the thermal noise
It is also possible to measure the spring constant of a cantilever by looking at the
thermal noise spectrum. The possibility to measure the thermal noise and
calculate the spring constant is offered in the JPK SPM software, so more
information on the method can be found in the NanoWizard User manual.
The theory for the thermal noise calibration can be found in this Handbook in
Section 8.2


