2.3.8
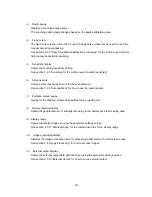
Data No.
Data is recorded and numbered when externally output. The data number (Data No.) is
incremented each time data is recorded.
In order to change the data No., select “Data No.” from the set up items using the
▲▼
cursor
keys (invert display) and switch to item selection using the
cursor keys.
Select the position that you would like to correct using the
cursor keys and change the
values using the
▲▼
keys.
Switch to item selection using the
keys.
Remarks
When data is to be recorded again, it can be easily managed by changing the value of Data No.
2.3.9
Distance compensation
This unit determines distance using the number of rotations the wheels make. Thus, wear of the
wheels causes an error in calculating the scanning distance. If the scanning distance has an error,
compensate the distance error.
In order to change the distance error correction value, select “Distance Correction” from the set up
items using the
▲▼
cursor keys (invert display) and switch to item selection using the
cursor
keys.
Set the “distance error correction value” using the
▲▼
cursor keys and use the
cursor keys
to switch to item selection.
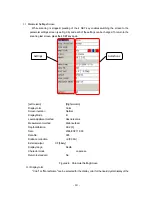
(Example of distance error compensation)
a)
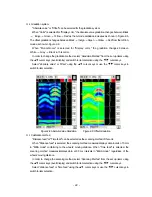
Perform a 1m (actual value) scan test and stop the scanning.
b)
Press the 4 SET key and switch to the parameter settings screen
c)
Select the settings item “Distance Correction” using the
▲▼
cursor keys (invert display) and
switch to item selection using the
cursor keys.
d)
d) Using the
▲▼
cursor keys, set the correction value so that the distance of the last line
(displayed by [ ] to the right of the correction value) is as close as possible to 1 m.
e)
Use the
cursor keys to switch to item selection and press the 4 SET key to return to the
scan test screen.
Remarks
●
The distance of the last scan test line is displayed to the right of the compensation value.
When the compensation value is changed, the distance is also changed in accordance with
the new compensation value.
With this value as a rough standard, set a new compensation value.
‑ 24 ‑
Summary of Contents for Handy Search NJJ-95B
Page 1: ...Handy Search Instruction Manual...
Page 8: ...Appearance of the NJJ 95B vii...
Page 21: ...Rear view Units in trigonometry mm 9...
Page 24: ...8 14 15 Figure 2 2 Side View 16 17 14 18 Figure 2 3 Rear View 12...
Page 73: ...Display of thumbnails Figure 3 17 CF Control Screen 61...
Page 83: ...B Terminals ACharge confirmation mark Figure 3 22 Battery Pack 71...
Page 85: ...Shutter Charge lamp Figure 3 23 Battery Charger 73...
Page 96: ...Concrete Rebar D 75mm L 75mm D 75mm Difficult to implement 84...
Page 103: ...Dimensions Weight About 149 W x 147 H x 216 D mm Approximately 1 1kg 91...


