3.2
Scan Test
3.2.1
Power-on Procedure
The 1 liquid crystal display lights up roughly 5 seconds after the power is turned on by turning on
the 16 power switch, and next the initialization screen is displayed. After the initialization screen
completes, the scan test screen is displayed.
After confirming that the scan test screen is displayed on the liquid crystal display, start the scan
test.
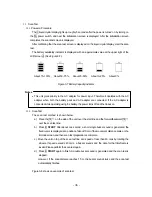
The battery availability indicator is displayed with an approximate value at the upper right of the
LCD screen 1. (See Figure 3-7.)
About 75~100% , About 50~75%, About 25~50%, About 0~25%, About 0%
Figure 3-7 Battery Capacity Indicator
Notes
•
This unit gives priority to the AC adapter for power input. Therefore it operates with the AC
adapter when both the battery pack and AC adapter are connected. If the AC adapter is
connected while operating using the battery, the power turns off and then back on.
3.2.2
Scan Test
The scan test method is shown below.
a) Place
the 14
V
on the side of the unit over the start line and the forward/backward 14
V
over the scan test line.
b) Press 9
START
. After about one second, a short single buzzer sound is generated, the
fixed cursor is displayed at a position of about 10cm of the movement distance scale on the
B mode screen, and then scan test preparation is complete.
c) Move the unit on top of the scan test line at a speed of less than 40 cm/s by rotating the
wheels. If speed exceeds 40 cm/s, a buzzer sounds and the data for that timeframe is
invalid. Please perform the scan test again.
d) Press 9
START
again to finish. A double buzzer sound is generated and the scan test is
stopped.
However, if the scan distance reaches 15 m, the buzzer sounds twice and the scan test
automatically finishes.
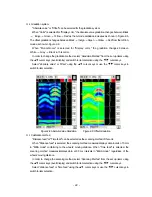
Figure 3-8 shows an example of scan test.
‑ 36 ‑
Summary of Contents for Handy Search NJJ-95B
Page 1: ...Handy Search Instruction Manual...
Page 8: ...Appearance of the NJJ 95B vii...
Page 21: ...Rear view Units in trigonometry mm 9...
Page 24: ...8 14 15 Figure 2 2 Side View 16 17 14 18 Figure 2 3 Rear View 12...
Page 73: ...Display of thumbnails Figure 3 17 CF Control Screen 61...
Page 83: ...B Terminals ACharge confirmation mark Figure 3 22 Battery Pack 71...
Page 85: ...Shutter Charge lamp Figure 3 23 Battery Charger 73...
Page 96: ...Concrete Rebar D 75mm L 75mm D 75mm Difficult to implement 84...
Page 103: ...Dimensions Weight About 149 W x 147 H x 216 D mm Approximately 1 1kg 91...


