PAGE 4
SCENECONTROL 100 OPERATING INSTRUCTIONS
PORTABLE CONTROL PENDANT
Some SceneControl 100 systems use a portable control pendant as either the main controller or as an auxiliary
control point. The pendant is equipped with a cable (usually 10m or 30’ long, but optionally as much as 25m
long). This cable is plugged into designated pendant receptacles.
Design, Manufacture and Installation of Theatrical Equipment Worldwide
(315) 451-3440
Fax (315) 451-1766
www.jrclancy.com
Rev 3: October 7, 2009
e and maintain motion; releasing
the E-
these
ges are attached to a latching mechanism; pulling on the plug by any other part will not release the latch.
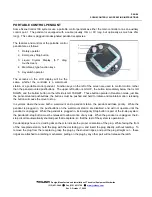
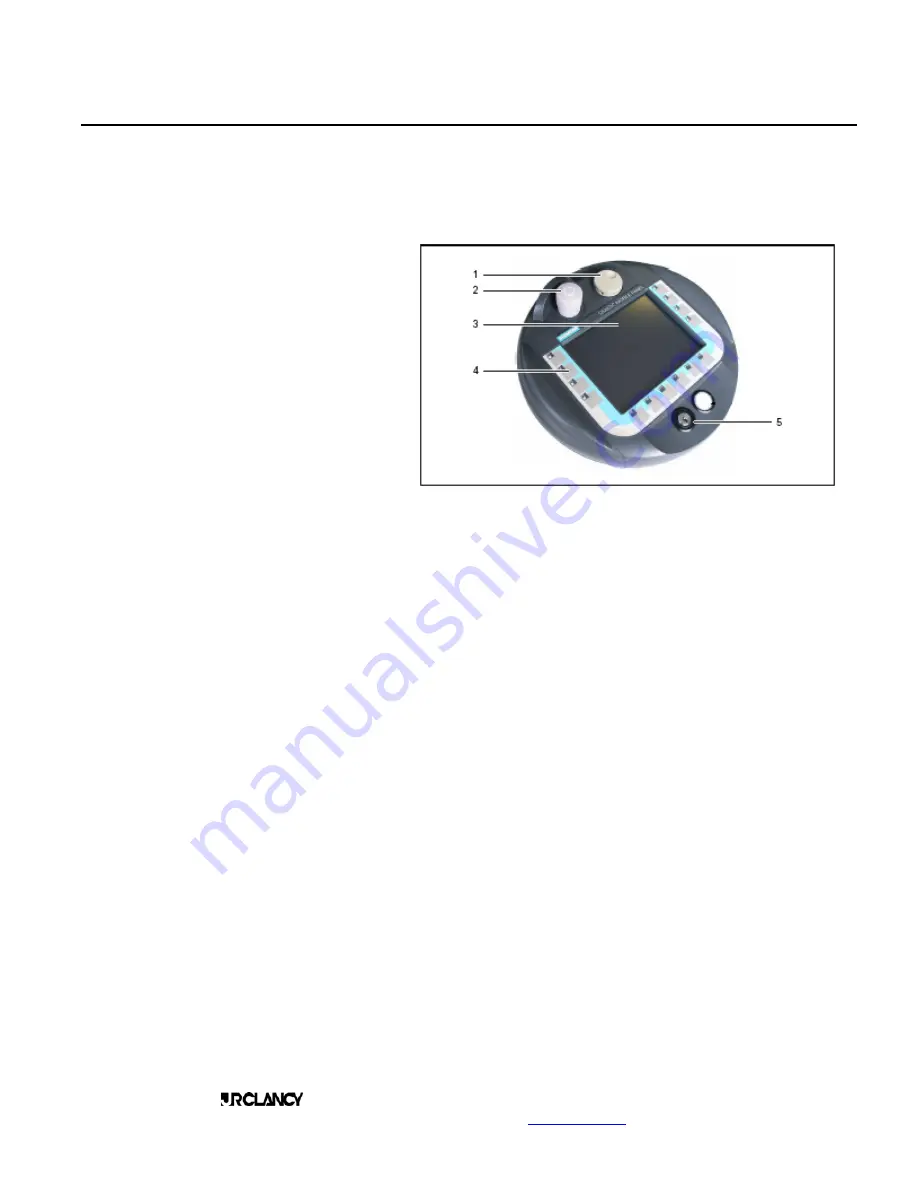
The features and controls of the portable control
pendant are as follows:
1. Rotary
operator
2. Emergency Stop button
3. Liquid Crystal Display (5.7” diag.
touchscreen)
4. Membrane type function keys
5. Keyswitch operator
The screens on the LCD display will be the
same, whether the controller is a wall-mount
station or a portable control pendant. Function keys on the left of the screen are used to control motion, rather
than the panel-mounted pushbuttons. The upper left button is GO UP, the button immediately below that is GO
DOWN, and the bottom button on the left side is GO TARGET. These button operate in Deadman mode, just like
the panel-mounted pushbuttons; the buttons must be pushed and held to initiat
the button will cause the move to stop.
In systems where there are both a wall-mount and a pendant station, the pendant will take priority. While the
pendant is plugged in, the pushbuttons on the wall-mount station are disabled, and will not operate until the
pendant is unplugged. While the pendant is plugged in, its Emergency Stop button is part of the E-stop system;
the pendant E-stop button must be released to allow motion of any axis. When the pendant is unplugged,
stop circuit is automatically shunted past that receptacle, so that the rest of the system is operational.
Pendant plugs have a red coding dot on them to indicate the proper orientation of the plug. While facing the front
of the receptacle station, hold the plug with the dot facing you, and insert the plug directly, without twisting. To
remove the plug from the receptacle, grasp the plug by the knurled ridges, and pull the plug straight out –
rid


