


– 20 –
1
2
WARNING :
Turn OFF the power before starting the work so as to prevent accidents caused by abrupt start or
the sewing machine.
1-15. Adjusting the
fl
oating amount of the tension disc
To adjust
fl
oating amount of the tension disc,
remove the top cover and crank rod cover,
loosen thread tension controller unit
3
fi
screw
1
and move thread tension loosening
unit
2
to the right or left for adjustment.
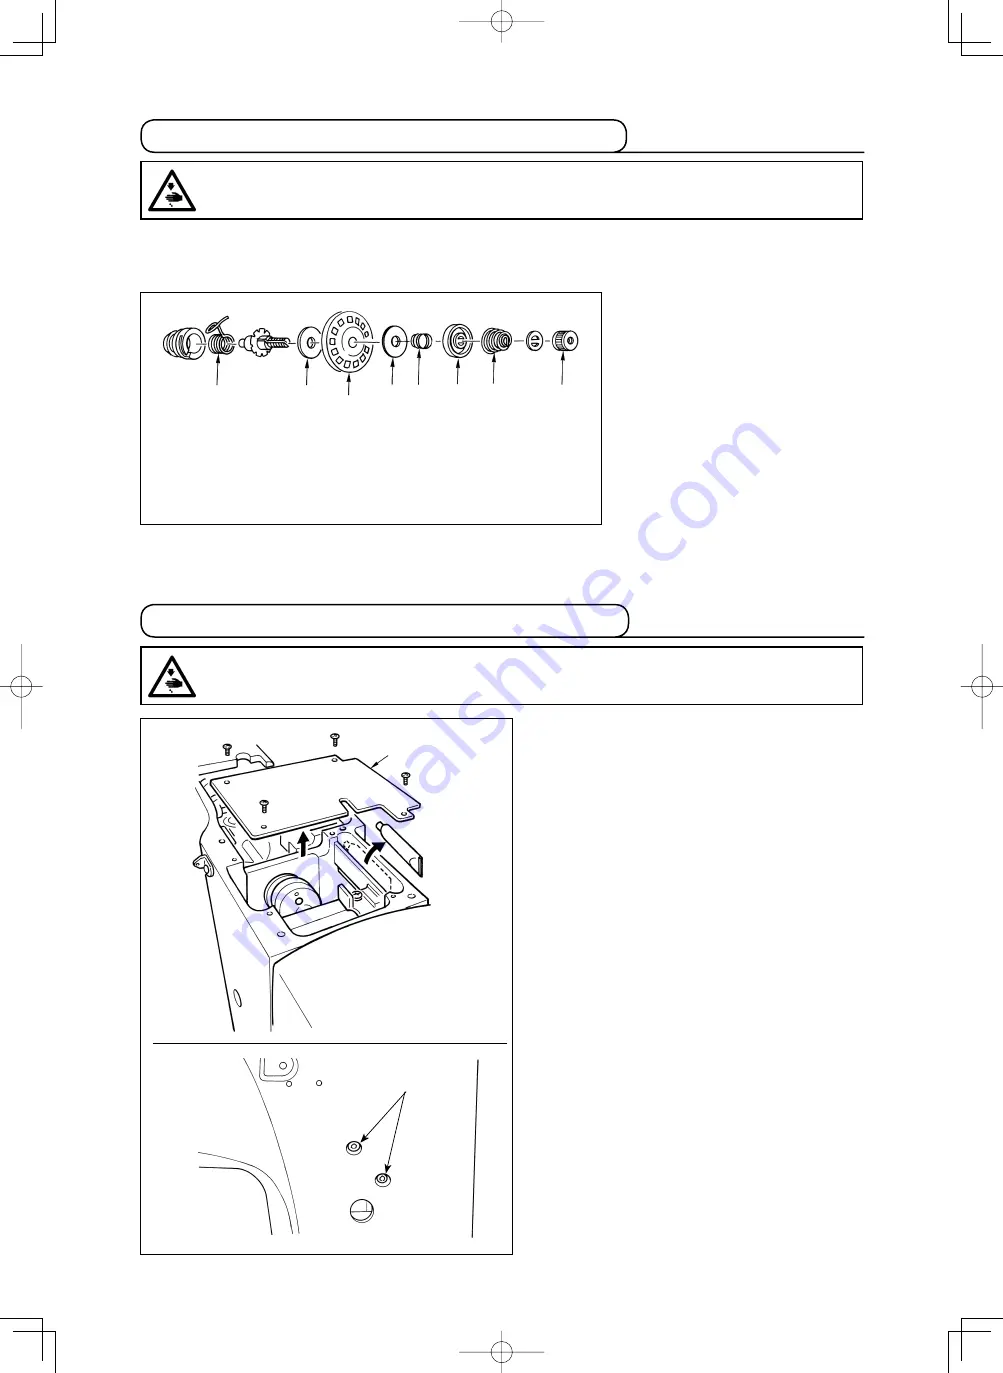
1-14. Replacing the felt and the thread tension spring
A
B
C
B D
E
F
1
WARNING :
Turn OFF the power before starting the work so as to prevent accidents caused by abrupt start or
the sewing machine.
Replace the soiled felt with a new one or change the existing thread tension spring with the optional
thread tension spring (B3129012A00), follow the steps of procedure described below:
1) Loosen and remove knob
1
.
Then, you can disassemble the
components from
B
shown in
the
fi
gure at right.
2) Replace two pieces of felt
B
or
thread tension spring
F
with a
new one or optional one. Then,
re-place them in the order as
shown in the
fi
gure.
A
Thread take-up spring
B
Felt
C
Thread tension T compl.
D
Idling prevention spring
E
Tension disc holder
F
Thread tension spring
Summary of Contents for AMS-210EN-7450
Page 2: ......
Page 3: ...日本語 日本語 ...
Page 26: ... 22 ...
Page 27: ...ENGLISH ENGLISH ...
Page 50: ... 22 ...
Page 51: ...中 文 ...
Page 74: ... 22 ...
Page 75: ...PARTS LIST PARTS LIST ...


