– 8 –
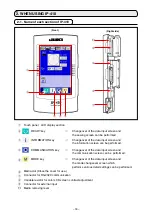
a
a
1
2
3
4
5
6
7
8
9
!0
!1
!5
!2
!8
!4
!3
!6
!7
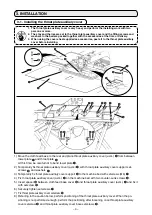
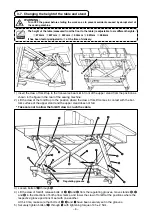
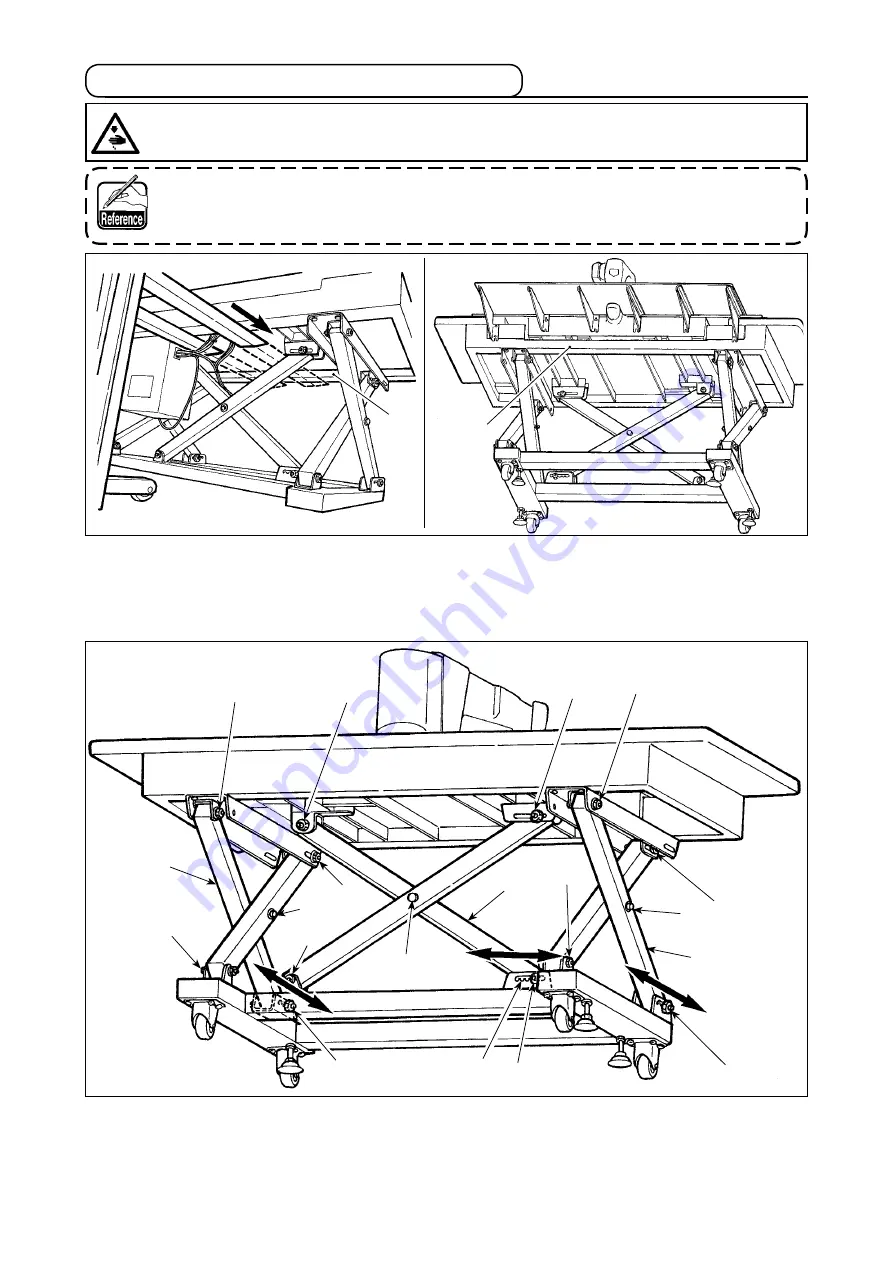
3) Loosen bolts of
1
through
!5
.
4) Lft the claw of forklft, release bolts of
3
,
9
and
!3
from the regulatng grooves, move stands
!6
,
!7
and
!8
n the drectons of both arrow marks, and lower the claw of forklft at the postons where the
respectve groove postons meet wth one another.
At ths tme, make sure that bolts of
3
,
9
and
!3
have been securely set n the grooves.
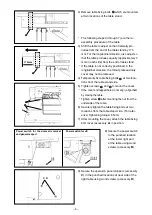
5) Securely tghten bolts of
1
through
!5
wth tghtenng torque of 45 ± 2 N•m.
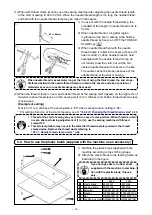
3-7. changing the height of the table and stand
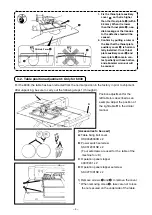
1) Insert the claw of forklft up to the transverse beam
a
n front of the upper stand from the poston as
shown in the figure in the rear of the sewing machine.
2) Lft the claw of the forklft up to the poston where the claw of forklft comes n contact wth the bot-
tom surface of the upper stand and the upper stand does not fall.
* take care not to allow the forklift claw to crush the cable.
regulating grooves
WarNING :
turn oFF the power before starting the work so as to prevent accidents caused by abrupt start of
the sewing machine.
The height of the table (measured from the floor to the table) is adjustable to six different heights.
1
870mm
2
897mm
3
922mm
4
945mm
5
967mm
6
988mm
It has been factory-adjusted to
2
at the time of delivery.


