− 105 −
8. ADJuStING tHE corNEr KNIFE
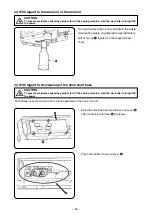
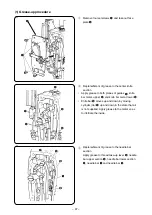
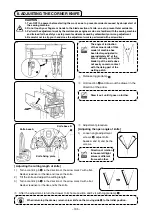
1
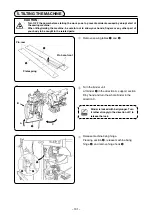
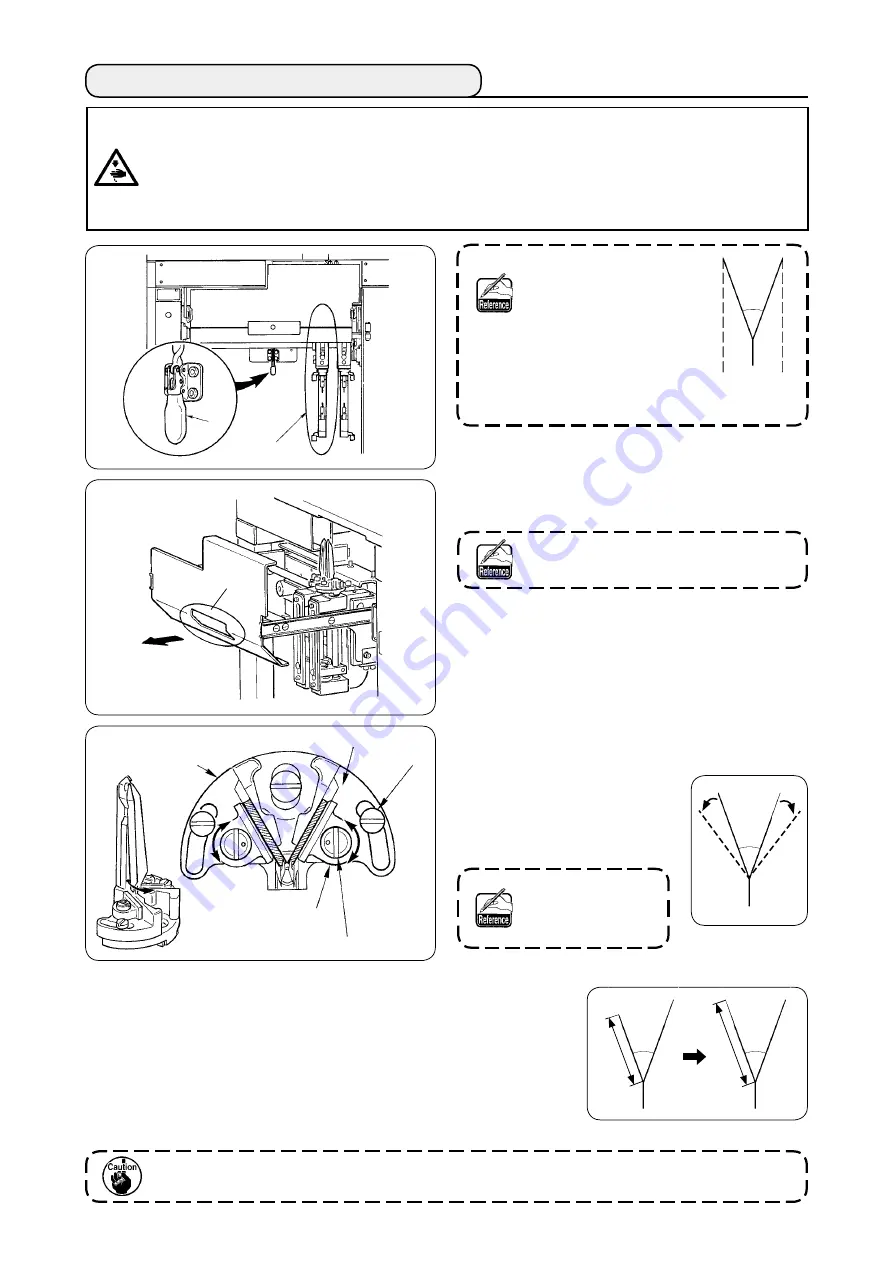
Release toggle clamp
1
.
2
Hold secton
A
and draw out the drawer n the
direction of the arrow.
Draw it out. until it goes no further.
60°
the angle of inclination
of the corner knife of this
model of machine has
been factory-adjusted to
approximately 60° at the
time of delivery so that the
blade tip of the knife does
not easily come in contact
with the rising part of the
welting patch.
1
4
A
3
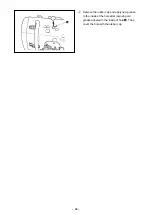
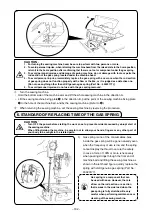
Adjustment procedure
[ Adjusting the cutting length of knife ]
1) Turn eccentrc pn
3
in the direction of the arrow mark Y with a flat-
blade screwdriver or the like and loosen the knife.
2) Tilt the knife and adjust the cutting length.
3) Turn eccentrc pn
3
in the direction of the arrow mark X with a flat-
blade screwdriver or the like and fix the knife.
4
After the adjustment, return the drawer to its home position and fix it with toggle clamp
1
.
When returning the drawer, return corner knife on the moving side
4
to the initial position.
Knife base A
Knife base B
2
X
X
Y
Y
3
Knife fixing plate
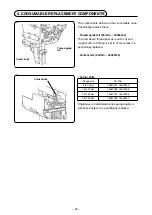
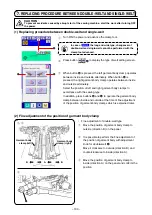
[ Adjusting the open angle of knife ]
Direction of rotation
to loosen left/right
knives is different
from each other.
cAutIoN
:
1. Turn OFF the power before starting the work so as to prevent accidents caused by abrupt start of
the sewing machine.
2. Do not touch your fingers or hands to the blade section of knife. so as to prevent fatal accidents.
3.
Perform the adjustment work by the maintenance engineers who are familiar with the sewing machine
and trained for the safety so as to prevent accidents caused by unfamiliarity or wrong adjustment.
4.
Be careful not to slip your hand since the adjustment work is performed with a screwdriver.
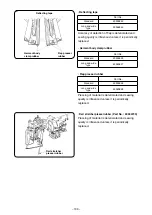
1) Loosen angle adjustment
screws
2
, adjust knife
bases A and B, and fix the
screws.

