– 6 –
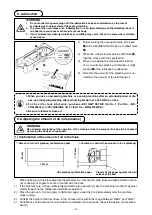
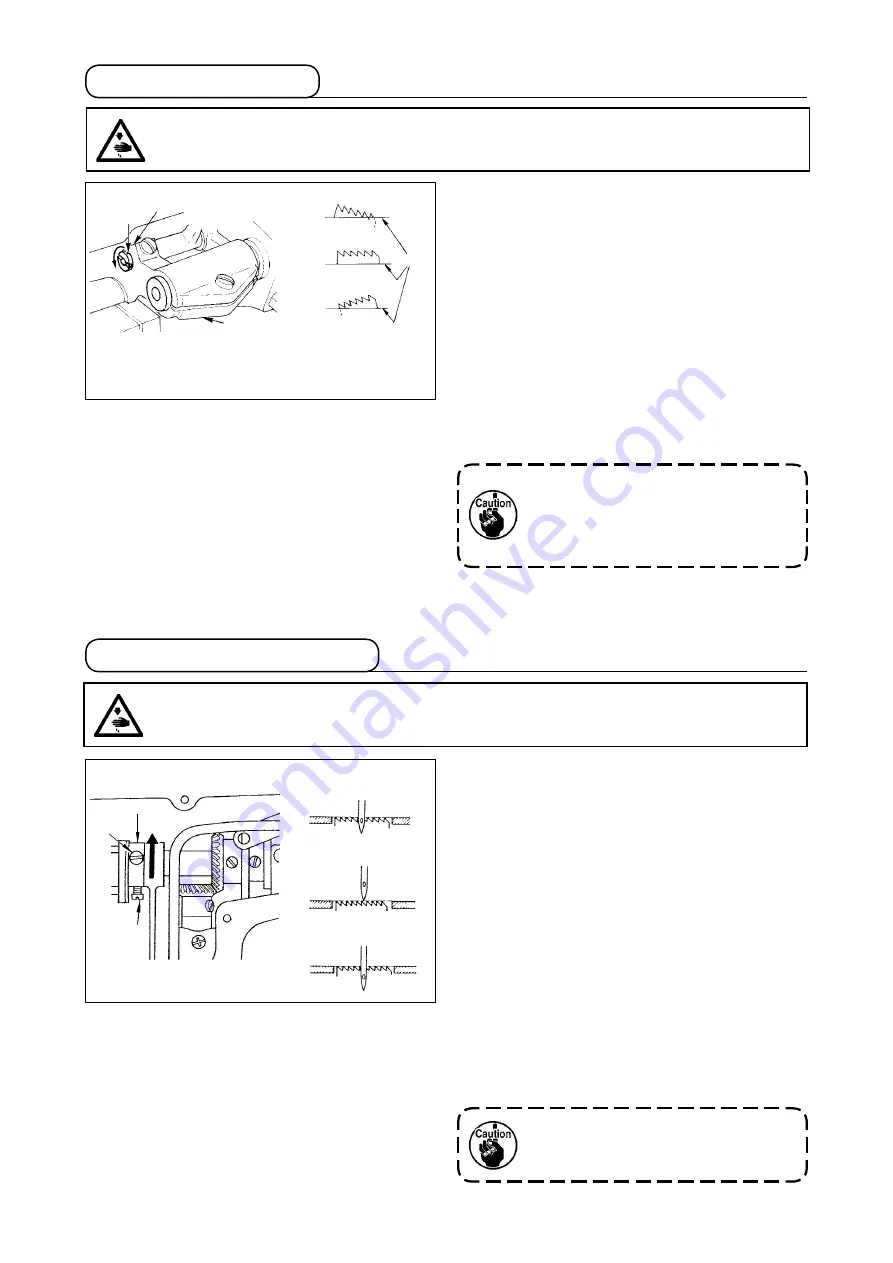
) Loosen screws
2
and
3
n feed eccentrc cam
1
, move the feed eccentrc cam n the drecton
of the arrow or opposte drecton of the arrow,
and firmly tighten the screws.
2) For the standard adjustment, adjust so that the
top surface of feed dog and the top end of needle
eyelet are flush with the top surface of throat plate
when the feed dog descends below the throat
plate.
3) To advance the feed tmng n order to prevent
uneven materal feed, move the feed eccentrc
cam n the drecton of the arrow.
4) To delay the feed tmng n order to ncrease
sttch tghtness, move the feed eccentrc cam n
the opposte drecton from the arrow.
Be careful not to move the feed eccen-
tric cam too far, or else needle breakage
may result.
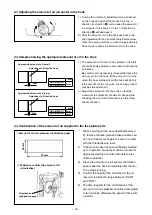
) The standard tlt (horzontal) of the feed dog
s obtaned when marker dot
A
on the feed
bar shaft s algned wth marker dot
B
on feed
rocker
1
.
2) To tlt the feed dog wth ts front up n order to
prevent puckerng, loosen the setscrew, and
turn the feed bar shaft 90˚ in the direction of the
arrow, usng a screwdrver.
3) To tlt the feed dog wth ts front down n order
to prevent uneven materal feed, turn the feed
bar shaft 90˚ in the opposite direction from the
arrow.
Whenever the feed dog tilt is adjusted,
the feed dog height will be changed. So,
it is necessary to check the height after
tilt adjustment.
1
A
B
a
b
c
d
a
Front up
b
Standard
c
Front down
d
throat plate
Standard feed timing
advanced feed timing
Delayed feed timing
1
2
3
22. tilt of the feed dog
23. adjusting the feed timing
WarNING :
Be sure to turn the power oFF before the following work in order to prevent personal injury due to
unintentional starting of the sewing machine.
WarNING :
Be sure to turn the power oFF before the following work in order to prevent personal injury due to
unintentional starting of the sewing machine.


