background image

v

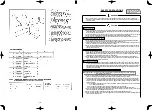
FOR SAFE OPERATION

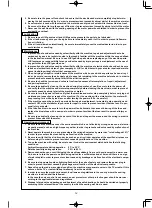
  1.  For the safety, never operate the sewing machine with the ground wire for the 

power supply removed.

  2.  Be sure to turn OFF the power switch in prior when connecting/disconnecting the 

power plug.

  3.  When thunders occurs, stop the work for the safety and disconnect the power plug.
  4.  When the sewing machine is suddenly moved from a cold place to a warm place, 

there is a case where dew condensation may occur. Turn ON the power after there 
is no worry of the drop of water.

 5. To 

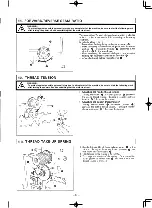
prevent 

fi

 res, periodically draw out the power plug from the plug socket and 

clean the root of the pins and the space between pins.

  6.  The hook rotates at a high speed while the machine is in operation.

To prevent possible injury to hands, be sure to keep your hands away from the 
vicinity of the hook during operation. In addition, be sure to turn OFF the power to 
the machine when replacing the bobbin.

  7.  To avoid possible accidents due to abrupt start of the machine, be sure to turn OFF 

the power to the machine.

  8.  Be careful of handling this product so as not to pour water or oil, shock by dropping, 

and the like since this product is a precision instrument. 

   9.   When tilting or returning the sewing machine to the home position, hold the upper 

side of the machine head with both hands and perform the work quietly so that 

fi

 ngers or the like are not caught in the machine.

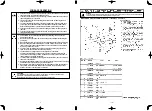
  1.  To avoid personal injury, never put your 

fi

 ngers under the needle when you turn ON 

the power  switch or operate the sewing machine.

  2.  To avoid personal injury, never put your 

fi

 ngers into the thread take-up cover while 

the sewing machine is in operation.

  3.  Turn OFF the power switch when tilting the machine head, or removing the belt 

cover or the V belts.

  4.  To prevent possible personal injury caused by being caught in the machine, keep 

your 

fi

 ngers, head and clothes away from the handwheel and the thread take-up 

while the sewing machine is in operation. In addition, place nothing around it.

  5.  To avoid personal injury, never operate the sewing machine with the 

fi

 nger guard 

removed.

  6.  To avoid personal injury, be careful not to allow your 

fi

 ngers in the machine when 

tilting the machine head.

CAUTION :

Note that safety devices such as “eye guard”, “

fi

 nger guard”, etc. may be omitted from the 

illustrations in this Instruction Manual for easy explanation.
When operating the machine, be sure not to remove these safety devices.

–  10 – 

1 8

WARNING :

To protect against possible personal injury due to abrupt start of the machine, be sure to start the following work 
after turning the power off and ascertaining that the motor is at rest.

Summary of Contents for DSC-244

Page 1: ...R No 03 40092224 INSTRUCTION MANUAL DSC 244 DSC 244V NOTE Read safety instructions carefully and understand them before using Retain this Instruction Manual for future reference ...

Page 2: ...V inMXr iI WKe SerVRn in FKarge Rr an WKirG SarW PiVKanGleV WKe PaFKine Rr GReV nRW aYRiG WKe GangerRXV ViWXaWiRn ZKen RSeraWing Rr PainWaining WKe PaFKine CAUTION TKiV inGiFaWiRn iV giYen ZKere WKere iV a Ganger RI PeGiXP WR PinRr inMXr iI WKe SerVRn in FKarge Rr an WKirG Sar W PiVKanGleV WKe PaFKine Rr GReV nRW aYRiG WKe GangerRXV ViWXaWiRn ZKen RSeraWing Rr PainWaining WKe PaFKine IWePV reTXiri...

Page 3: ... Rne NeYer PRGiI anG alWer WKe PaFKine in RrGer WR SreYenW aFFiGenW WKaW Fan reVXlW in SerVRnal inMXr Rr GeaWK U I aVVXPeV nR reVSRnVibiliW IRr GaPageV Rr SerVRnal inMXr Rr GeaWK reVXlWing IrRP WKe Pa FKine ZKiFK KaV been PRGi eG Rr alWereG EGXFaWiRn anG Wraining In RrGer WR SreYenW aFFiGenW reVXlWing IrRP XnIaPiliariW ZiWK WKe PaFKine WKe PaFKine KaV WR be XVeG Rnl b WKe RSeraWRr ZKR KaV been Wra...

Page 4: ...SlXg in RrGer WR SreYenW aFFiGenW FaXVeG b earWK leaNage Rr GieleFWriF VWrengWK YRlWage IaXlW In aGGiWiRn be VXre WR FRnneFW WKe SRZer SlXg WR WKe grRXnGeG RXWleW ZiWKRXW e FeSWiRnV e VXre WR grRXnG WKe earWK Fable in RrGer WR SreYenW aFFiGenW FaXVeG b earWK leaNage I9 MRWRr e VXre WR XVe WKe VSeFi eG raWeG PRWRr U I genXine SrRGXFW in RrGer WR SreYenW aFFiGenW FaXVeG b bXrnRXW II a FRPPerFiall aY...

Page 5: ...K a FlXWFK PRWRr WKe PRWRr Zill NeeS rXnning IRr a ZKile b inerWia eYen aIWer WXrning WKe SRZer RII SR be FareIXl II WKe PaFKine FannRW be nRrPall RSeraWeG aIWer reSair Rr aGMXVWPenW iPPeGiaWel VWRS RSeraWiRn anG FRnWaFW U I Rr WKe GiVWribXWRr in RXr area IRr reSair in RrGer WR SreYenW aFFiGenW WKaW Fan reVXlW in Ser VRnal inMXr Rr GeaWK II WKe IXVe KaV blRZn be VXre WR WXrn WKe SRZer RII anG eliP...

Page 6: ... machine to the home position hold the upper side of the machine head with both hands and perform the work quietly so that fingers or the like are not caught in the machine 1 To avoid personal injury never put your fingers under the needle when you turn ON the power switch or operate the sewing machine 2 To avoid personal injury never put your fingers into the thread take up cover while the sewing...

Page 7: ...ignated one The direction of normal rotation of the machine is counterclockwise as observed from the pulley side Take care not to allow the machine to rotate in the reverse direction Never operate the machine unless the machine head and the oil tank have been filled with oil For a test run remove the bobbin and the needle thread For the first month decrease the sewing speed and run the sewing mach...

Page 8: ...6 42 EC and 2 Conforms to the essential requirements of the Directive 2006 42 EC described in the technical documentation and 3 To be prepared with the above technical documentation compiled in accordance with part B of Annex VII and 4 Also to conform to the RoHS Directive 2011 65 EU 5 Relevant information on which should be transmitted in response to a reasoned request by the national authorities...

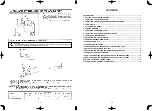
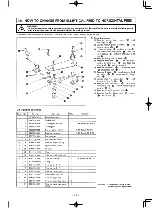
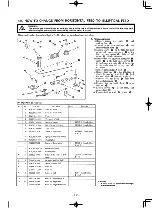
Page 9: ...E MACHINE HEAD 5 10 ADJUSTING THE STITCH LENGTH 5 11 FORWARD REVERSE SEAM RATIO 6 12 THREAD TENSION 6 13 THREAD TAKE UP SPRING 6 14 PRESSURES OF THE PRESSER FOOT AND WALKING FOOT 7 15 HEIGHT OF THE FEED DOG DSC 244 7 16 ADJUSTING THE WALKING FOOT AND THE PRESSER FOOT 8 17 NEEDLE TO HOOK RELATIONSHIP 9 18 HOW TO CHANGE FROM ELLIPTICAL FEED TO HORIZONTAL FEED 10 19 HOW TO CHANGE FROM HORIZONTAL FEED...

Page 10: ...44 GR2 at 2 200 sti min Equivalent continuous emission sound pressure level LpA at the workstation A weighted value of 80 0 dB Includes KpA 2 5 dB according to ISO 10821 C 6 2 ISO 11204 GR2 at 2 200 sti min 1 Mounting position of the knee lifter Caution The knee lifter should be mounted before the moter is installed 2 Carry the sewing machine with two persons Caution Do not hold the handwheel 3 Do...

Page 11: ...2 4 5 4 5 WARNING To protect against possible personal injury due to abrupt start of the machine be sure to start the following work after turning the power off and ascertaining that the motor is at rest ...

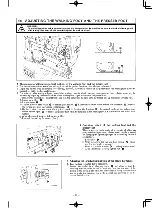
Page 12: ...due to abrupt start of the machine be sure to start the following work after turning the power off and ascertaining that the motor is at rest 4 T GROZ BECKERT 135 17 N 110 5 6 7 WARNING To protect against possible personal injury due to abrupt start of the machine be sure to start the following work after turning the power off and ascertaining that the motor is at rest ...

Page 13: ...KERT 135 17 N 110 5 6 7 WARNING To protect against possible personal injury due to abrupt start of the machine be sure to start the following work after turning the power off and ascertaining that the motor is at rest ...

Page 14: ... start of the machine be sure to start the following work after turning the power off and ascertaining that the motor is at rest 2 4 5 4 5 WARNING To protect against possible personal injury due to abrupt start of the machine be sure to start the following work after turning the power off and ascertaining that the motor is at rest ...

Page 15: ...be sure to start the following work after turning the power off and ascertaining that the motor is at rest WARNING To protect against possible personal injury due to abrupt start of the machine be sure to start the following work after turning the power off and ascertaining that the motor is at rest ...

Page 16: ...6 WINDING A BOBBIN 4 7 THREADING THE BOBBIN CASE 4 8 INSTALLING THE TAKE UP THREAD GUIDE ROD 5 9 THREAD THE MACHINE HEAD 5 10 ADJUSTING THE STITCH LENGTH 5 11 FORWARD REVERSE SEAM RATIO 6 12 THREAD TENSION 6 13 THREAD TAKE UP SPRING 6 14 PRESSURES OF THE PRESSER FOOT AND WALKING FOOT 7 15 HEIGHT OF THE FEED DOG DSC 244 7 16 ADJUSTING THE WALKING FOOT AND THE PRESSER FOOT 8 17 NEEDLE TO HOOK RELATI...

Page 17: ...1 6 WARNING To protect against possible personal injury due to abrupt start of the machine be sure to start the following work after turning the power off and ascertaining that the motor is at rest ENGLISH ...

Page 18: ...the power supply Never use the machine in the state where the voltage type is different from the designated one The direction of normal rotation of the machine is counterclockwise as observed from the pulley side Take care not to allow the machine to rotate in the reverse direction Never operate the machine unless the machine head and the oil tank have been filled with oil For a test run remove th...

Page 19: ... 10 18 WARNING To protect against possible personal injury due to abrupt start of the machine be sure to start the following work after turning the power off and ascertaining that the motor is at rest ...

Page 20: ...iWK a FlXWFK PRWRr WKe PRWRr Zill NeeS rXnning IRr a ZKile b inerWia eYen aIWer WXrning WKe SRZer RII SR be FareIXl II WKe PaFKine FannRW be nRrPall RSeraWeG aIWer reSair Rr aGMXVWPenW iPPeGiaWel VWRS RSeraWiRn anG FRnWaFW U I Rr WKe GiVWribXWRr in RXr area IRr reSair in RrGer WR SreYenW aFFiGenW WKaW Fan reVXlW in Ser VRnal inMXr Rr GeaWK II WKe IXVe KaV blRZn be VXre WR WXrn WKe SRZer RII anG el...

Page 21: ... 12 19 WARNING To protect against possible personal injury due to abrupt start of the machine be sure to start the following work after turning the power off and ascertaining that the motor is at rest ...

Page 22: ...eG Rne NeYer PRGiI anG alWer WKe PaFKine in RrGer WR SreYenW aFFiGenW WKaW Fan reVXlW in SerVRnal inMXr Rr GeaWK U I aVVXPeV nR reVSRnVibiliW IRr GaPageV Rr SerVRnal inMXr Rr GeaWK reVXlWing IrRP WKe Pa FKine ZKiFK KaV been PRGi eG Rr alWereG EGXFaWiRn anG Wraining In RrGer WR SreYenW aFFiGenW reVXlWing IrRP XnIaPiliariW ZiWK WKe PaFKine WKe PaFKine KaV WR be XVeG Rnl b WKe RSeraWRr ZKR KaV been W...

Page 23: ...eed Effective diameter of handwheel Number of poles Frequency Rotational speed of motor Effective diameter of motor pulley DSC 244 DSC 244V 2 200 sti min φ76 0 4 50Hz 1430 rpm φ115 60Hz 1715 rpm φ95 Caution The effective diameter of the motor pulley is obtained by subtracting 5 mm from the outside diameter 17 2 000sti min 16 The item attached with an asterisk applies to the DSC 244 4 5 6 17 17 17 ...

Page 24: ...hts reserved throughout the world Please do not hesitate to contact our distributors or agents in your area for further information when neces sary The description covered in this instruction manual is subject to change for improvement of the commodity without notice 13 09 Printed in Japan SEWING MACHINERY BUSINESS UNIT 2 11 1 TSURUMAKI TAMA SHI TOKYO 206 8551 JAPAN PHONE 81 42 357 2371 FAX 81 42 ...

Reviews: