


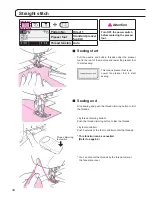
Thread to guide
A
.
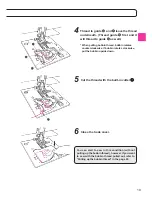
Hold the thread end and thread according
to the arrow marking.
* Make sure that the presser foot is raised.
Otherwise the machine is not correctly threaded.
3
4
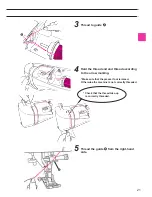
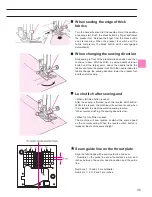
Thread the guide
B
from the right-hand
side.
* It is easier to thread by pulling thread towards
left back side.
20
5
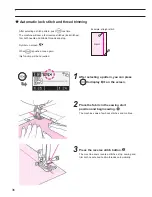
A
* Check that the thread take-up
is correctly threaded.
B
21
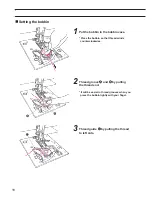
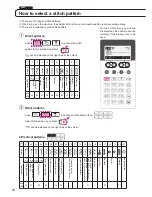
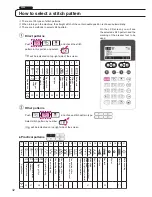
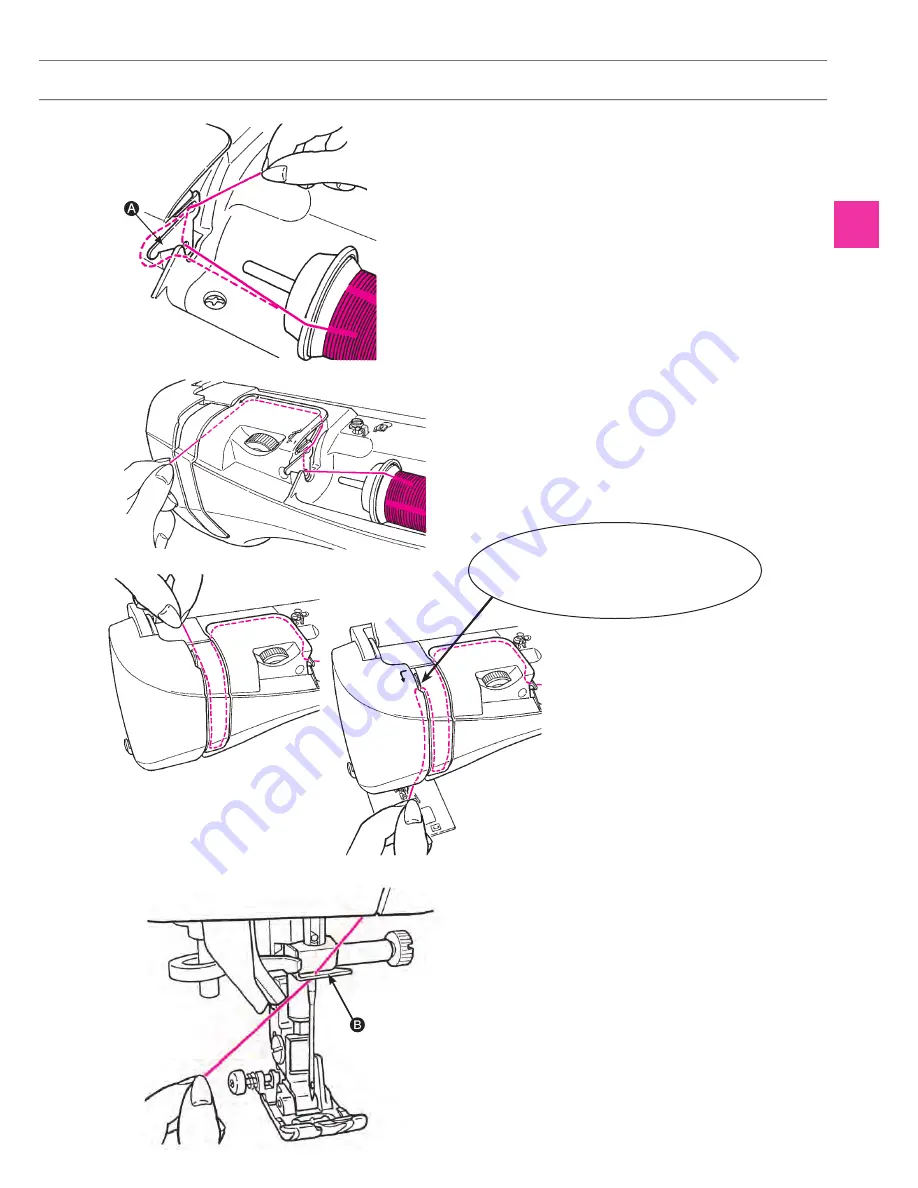
1
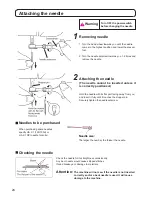
Lift the presser foot lifting lever.
1
2
3
4
5
Make sure to push the
needle to the top.
It is impossible to perform
stitching if the needle is not
correctly installed or a bent
needle is used. Pay close
attention as this will cause
machine malfunction.
Note:
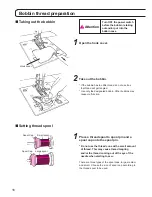
2
Place a thread spool to the spool pin and
a spool cap onto the spool pin.
There are three types of the spool caps, large, medium
and small. Choose the size of spool cap according to
thread spool to be used.
19
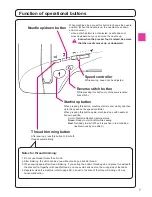
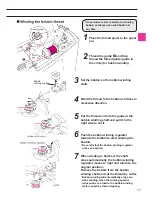
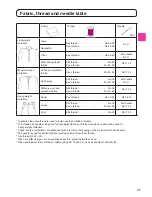
Threading the needle thread
* Use the needle: No.11-16
and the thread: No.30-90.
* When twin needle is used,
the automatic needle
threader can not be used.
* Align the marking at the
hand wheel with the one
on the machine body.
Small spool
Large spool
Spool cap
Spool cap
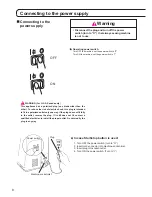
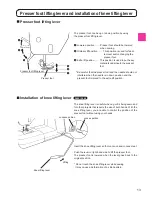
Needle thread preparation
Attention Turn OFF the power switch
before winding the bobbin thread.
Summary of Contents for HZL-600
Page 2: ......
Page 12: ...10 ...
Page 75: ...73 ...
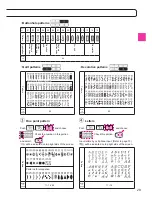
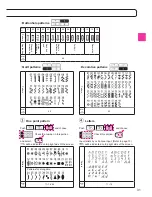
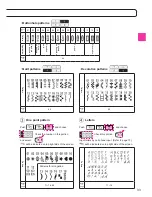
Page 100: ...List of stitch patterns 97 F600 Patterns for crazy quilt 98 ...
Page 101: ...Pattern for elongation 98 Letters numbers signs One point 99 ...
Page 102: ...List of stitch patterns 99 F400 100 ...
Page 103: ...100 One point Pattern for elongation Letters numbers signs 101 ...
Page 104: ...List of stitch patterns 101 F300 102 ...
Page 105: ...102 One point Pattern for elongation Letters numbers signs 103 ...
Page 107: ......