

55
5
cm
0.7 to 1 cm
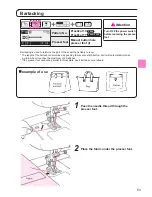
Basting
Reverse
stitches
Basting stitches
Zipper
Fabric
(wrong side)
Fabric (right side)
Fabric
(right side)
5 cm
0.3 cm
Slider
Move up the
slider
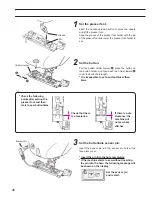
1
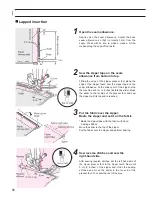
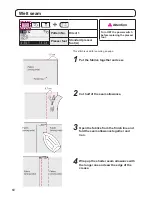
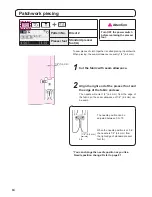
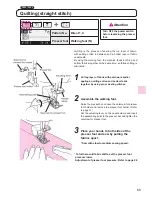
Open the seam allowance.
Neatly open the seam allowance. Adjust the back
seam allowance so that it projects 3 mm from the
seam. Press with an iron to make a crease. Fit the
crease along the edge of the teeth.
2
Sew the zipper tape on the seam
allowance from bottom to top.
Fitting the edge of the zipper presser foot along the
edge of the zipper teeth, sew the zipper tape on the
seam allowance. At the slider part of the zipper, stop
the machine at 5 cm (2 inches) before the slider. Move
the slider to the far side of the presser foot and sew
the zipper until its top end is reached.
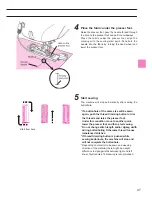
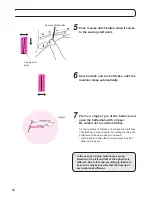
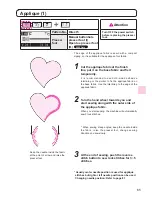
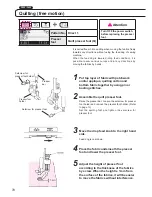
3
Put the fabric over the zipper.
Baste the zipper and set it on the fabric.
* Baste the zipper tape with the fabric with hand
basting stitches.
Move the slider to the top of the zipper.
Put the fabric over the zipper and perform basting.
Zipper
Fabric
(wrong side)
Zipper opening size
1 cm
Teeth
Slider
0.3 cm
Crotch end
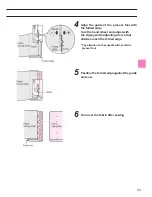
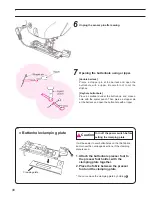
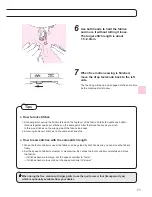
4
Sew reverse stitches and sew the
right-hand side.
After sewing reverse stitches, set the left hand side of
the zipper presser foot to the zipper teeth. Sew until
5 cm (2 inches) of the zipper end. Undo the basting
stitches and move the slider to the far end of the
presser foot. Then sew the rest of the way.
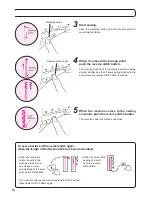
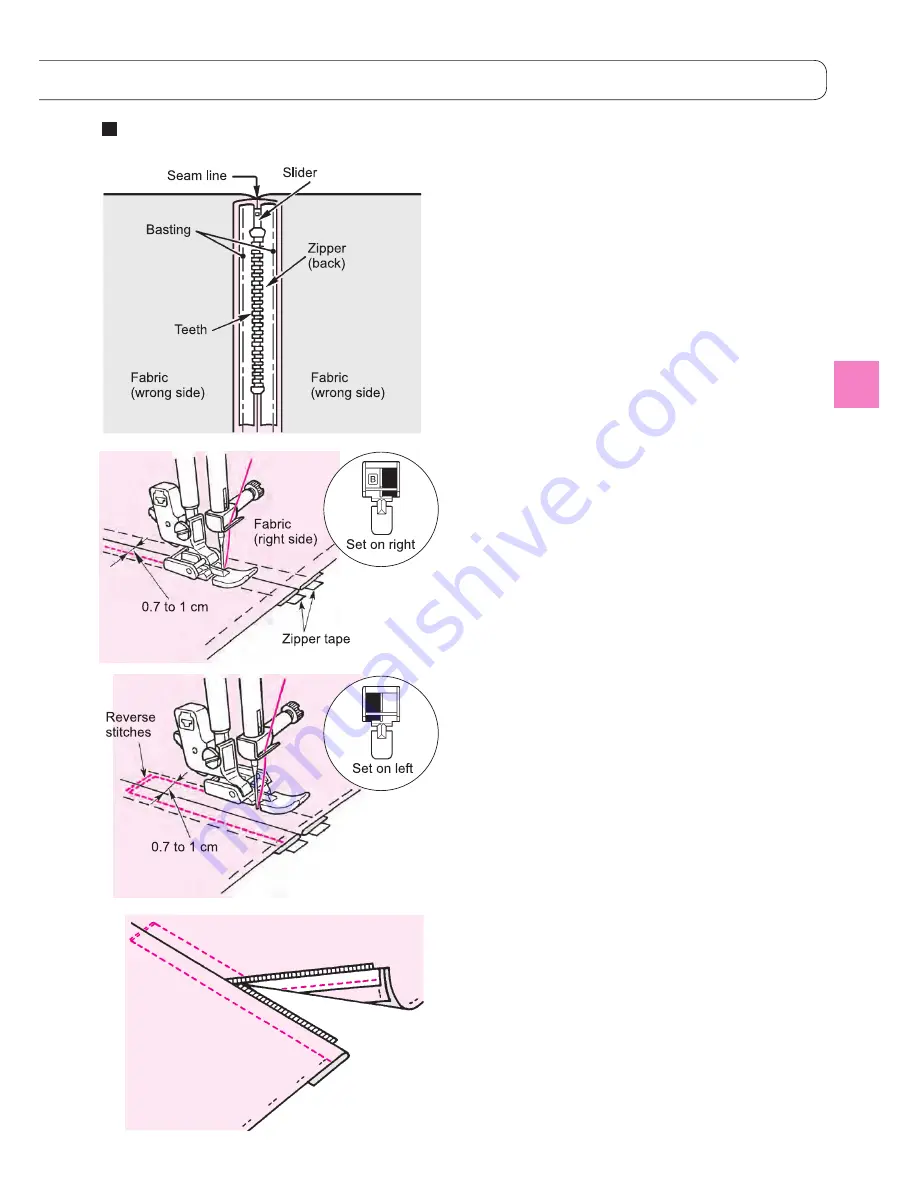
Lapped insertion
Set on right
Set on left
56
Fabric
(wrong side)
Teeth
Seam line
Basting
Zipper
(back)
Slider
Fabric
(wrong side)
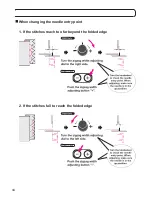
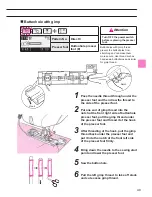
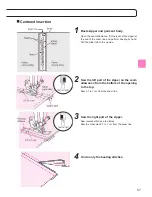
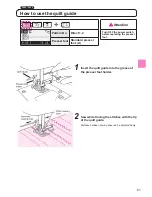
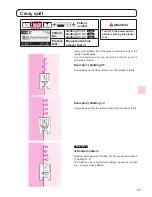
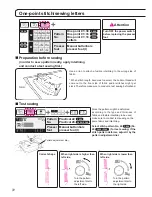
1
Baste zipper and garment body.
Open the seam allowance. Fit the teeth of the zipper at
the end of the seam line and perform basting by hand.
Pull the slider tab to the up side.
0.7 to 1 cm
0.7 to 1 cm
Fabric
(right side)
Zipper tape
Reverse
stitches
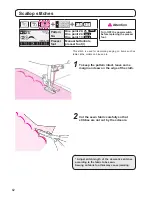
2
Sew the left part of the zipper on the seam
allowance from the bottom of the opening
to the top.
Sew 0.7 to 1 cm from the seam line.
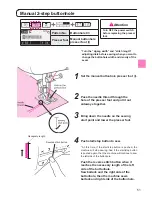
3
Sew the right part of the zipper.
Sew reverse stitches a few times.
Sew the other side 0.7 to 1 cm from the seam line.
4
Undo only the basting stitches.
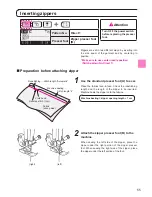
Centered insertion
Set on right
Set on left
57
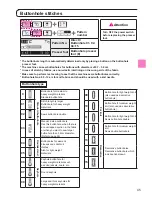
Summary of Contents for HZL-600
Page 2: ......
Page 12: ...10 ...
Page 75: ...73 ...
Page 100: ...List of stitch patterns 97 F600 Patterns for crazy quilt 98 ...
Page 101: ...Pattern for elongation 98 Letters numbers signs One point 99 ...
Page 102: ...List of stitch patterns 99 F400 100 ...
Page 103: ...100 One point Pattern for elongation Letters numbers signs 101 ...
Page 104: ...List of stitch patterns 101 F300 102 ...
Page 105: ...102 One point Pattern for elongation Letters numbers signs 103 ...
Page 107: ......


