– 6 –
9. HOW TO WIND A BOBBIN THREAD
10. ON THE SAFETY DEVICE
The bobbin thread winder of this machine is built-in to the frame of the machine.
To wind the bobbin thread,
fi
rst insert the bobbin to the bobbin winding shaft
❶
as far as it will go. Next, pass the thread to bobbin thread guide base
❸
and
bobbin thread winder guide
❷
, as shown in the
fi
gure, and wind the thread to
the bobbin several times from the bottom. Then, push in the bobbin trip latch
❹
and rotate the machine. When the
fi
xed amount of thread is wound, the winding
will stop automatically.
During the running of the machine, sometimes the thread gets caught by the
sewing hook, causing an unnecessary exertion to the machine. In such cases,
the safety device goes into action automatically to prevent damages to the ma-
chine. When the safety device is acting, the feed and the sewing hook do not
move even if the handwheel is rotated.
When the safety device is acting, remove the cause of the defect and set the
safety device to the original status by the following method:
1. While pushing the push button
❶
, push the auxiliary handwheel and rotate
strongly toward the left direction.
Be sure to verify that the safety device is set and then operate the machine.
2. When the safety device jumps into action quickly, remove the timing belt and
rotate the adjusting screw
❷
to right.
Conversely, when the safety device does not go into action and the machine is
damaged (needle, sewing hook, etc.), rotate the adjusting screw
❷
to left. With
a slight force, the safety device will spring to action.
❶
❷
❸
❹
❶
❷
– 3 –
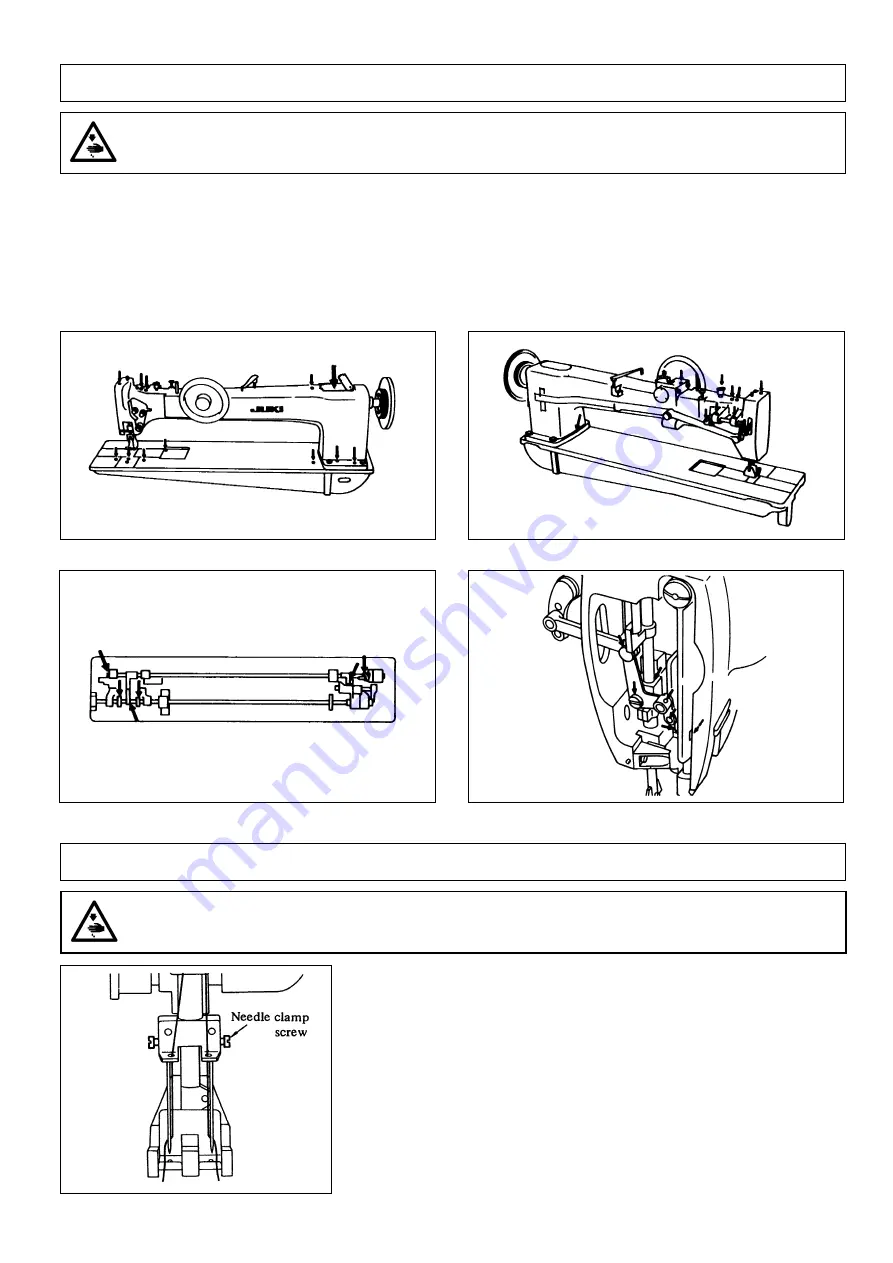
3. LUBRICATION
WARNING :
To protect against possible personal injury due to abrupt start of the machine, be sure to start the following
work after turning the power off and ascertaining that the motor is at rest.
4. HOW TO INSTALL THE NEEDLE
WARNING :
To protect against possible personal injury due to abrupt start of the machine, be sure to start the following
work after turning the power off and ascertaining that the motor is at rest.
*
Before starting the machine:
1. For lubrication, use JUKI New Defrix Oil No.1 which is in the accessory box.
2. Before operating the machine, lubricate the parts shown by arrows in the
fi
gure. To lubricate the face part, loosen the face plate
set screw and by placing the face plate on top, lubricate the oil wick and the moving parts.
3. When the machine is to be used continuously, lubricate it at least twice a day.
4. Finally, when the machine is to be used for the
fi
rst time or when it is used to sew long length material continuously, be sure to
lubricate it often.
Use DD×1 needle. There are many types and size numbers of needles but all of
them depend upon the thickness of the thread or kinds of sewing material, so be
sure to select appropriate type and size number.
Standard is #25.
To install the needle:
1. Raise up the needle bar to its highest position.
2. Long grooves of both right and left needles should be facing inside (both long
grooves facing each other) and insert the needles deep into the needle hole
as far as they will go in and set them tightly with needle clamp screw.


