


Operating manual
English
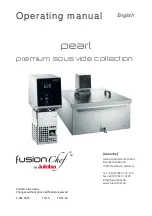
pearl
premium sous vide collection
fusionchef
Julabo Labortechnik GmbH
Eisenbahnstraße 45
77960 Seelbach / Germany
Tel. +49 (0) 7823 / 51-170
Fax +49 (0) 7823 / 2491
info@fusionchef.de
www.fusionchef.de
Printed in Germany
Changes without prior notification reserved
1.951.0545
11/10
19.11.10


