background image

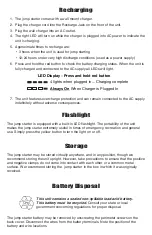
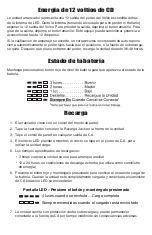
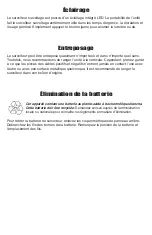
Press and hold the red battery level status button to display the battery status.

Battery Status

 Quand le Chargeur Est Branché sur

Toujours Sur

 Cuándo Corcel se Conecta

Siempre En

 When Charger is Plugged In*

3 lights . . . . . . . . . . Good

2 lights . . . . . . . . . . Medium

1 light . . . . . . . . . . . Low

Flashing . . . . . . . . . Recharge Unit

Always On

*

Please note this light indicates the charger is working.

LED Display - Press and hold red button


4 lights when plugged in... Charging complete

Always On When Charger is Plugged In

 wenn Auflader angeschlossen ist*

3 Lichter. . . . . . . . . . Gut

2 Lichter. . . . . . . . . . Mitte

1 Licht . . . . . . . . . . . Tiefpunkt

Aufleuchten . . . . . . . Laden Sie auf

Immer auf,

*

Bitte merken Sie dieses Licht anzeigt, dass der Auflader arbeitet. 

LED Ausstellung - Presse und hŠlt roten Knopf


4 Lichter

. . . . . . . . .

Laden vollständig

Immer auf, wenn Auflader angeschlossen ist

 Cuándo Corcel se Conecta*

3 luces . . . . . . . . . . Bueno

2 luces . . . . . . . . . . Medio

1 luz .

. . . . . . . . . . . Bajo

Destellar. . . . . . . . . Recargue la Unidad

Siempre En

*

Note por favor que esta luz indica el corcel trabaja. 

Despliegue LED - La prensa y tiene el bot—n rojo


4 luces

.

. . . . . . . . .

Cargar completo

 Quand le Chargeur Est Branché sur*

3 lumières. . . . . . . . Bon

2 lumières. . . . . . . . Milieu

1 lumière. . . . . . . . . Niveau bas

Flashing . . . . . . . . . Recharger l'Unité

Toujours Sur

*

S'il vous plaît noter cette lumière indique que le chargeur travaille.

Exposition LED - La presse et tient le bouton rouge


4 lumières

. . . . . . . .

Charger complet

 Quando il Caricatore è Inserito In

Sempre Su

 Quando il Caricatore è Inserito In*

3 luci . . . . . . . .

Buono

2 luci . . . . . . . .

Mezzo

1 luce . . . . . . .

Basso

Lampeggiare. .

.

.

.

.

.

.

.

. Ricaricare l'Unità

Sempre Su

*

Per favore di notare questa luce indica il caricatore lavora. 

La Mostra LED - la stampa e tiene il bottone rosso


4 luci

. . . . . . . .

L'addebitamento completo

.

.

.

.

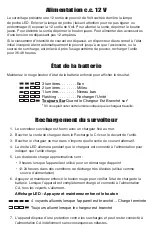
The jump starter features a 12 Volt power outlet hidden behind the LED flashlight. 

Remove the flashlight (taking care not to misplace or damage it) to expose the 12 Volt 

outlet. To turn on the outlet, depress the yellow button. To turn off the outlet, depress the 

yellow button. 
Accessories up to 12 Amps can be powered by the unit. If the amperage rating is 

exceeded, a built-in auto-reset circuit breaker automatically shuts power off until the 

accessory, or overload source, is removed. After extreme power usage, recharge the unit 

for 36-48 hours.

12 Volt DC Power

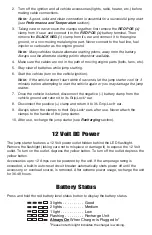
2.  Turn off the ignition and all vehicle accessories (lights, radio, heater, etc.) before 

making cable connections.

  Note:  A good, solid and clean connection is essential for a successful jump start 

(see Performance and Temperature section).

3.  Taking care to never touch the clamps together, first remove the RED POS (+) 

clamp from it’s ear and connect it to the RED POS (+) battery terminal. Then 

remove the BLACK NEG (–) clamp from it’s ear and connect it to the engine 

ground, or a non-moving metal engine part. Never connect to the fuel line, fuel 

injector or carburator as the engine ground.

  Note:  Many vehicles feature alt ernate starting points, away from the battery. 

Always use the alternate starting points whenever available.

4.  Make sure the cables are not in the path of moving engine parts (belts, fans, etc.).
5.  Stay clear of batteries while jump starting.
6.  Start the vehicle (turn on the vehicle ignition).
  Note:  If the vehicle doesn’t start within 6 seconds, let the jump starter cool for 3 

minutes before attempting to start the vehicle again or you may damage the jump 

starter. 

7.  Once the vehicle is started, disconnect the negative (–) battery clamp from the 

vehicle ground and return it to its Grip-Lock

®

 ear.

8.  Disconnect the positive (+) clamp and return it to it’s Grip-Lock

®

 ear.

9.  Always return the clamps to their Grip-Lock

®

 ears after use. Never attach the 

clamps to the handle of the jump starter.

10. After use, recharge the jump starter (see Recharging section).

Summary of Contents for JNC300XLC

Page 1: ...ll manufacturers instructions and safety procedures will reduce the risk of accident Working around lead acid batteries may be dangerous Lead acid batteries release explosive gases during normal operation charging and jump starting Carefully read and follow these instructions for safe use Always follow the specific instructions in this manual and on the jump starter each time you jump start using ...

Page 2: ...nce Before using the jump starter to jump start a car truck boat or to power any equipment read these instructions and the instruction manual safety information provided by the car truck boat or equipment manufacturer Following all manufacturers instructions and safety procedures will reduce the risk of accident Working around lead acid batteries may be dangerous Lead acid batteries release explos...

Page 3: ...t a frozen battery 1 Use in a well ventilated area Shield eyes with safety glasses or goggles Jump Starting Instructions To prevent arcing NEVER allow clamps to touch together or to contact the same piece of metal Use of an attachment not recommended or sold by the manufacturer may result in a risk of damage to the unit or injury to personnel When using the power extension cord pull on the plug an...

Page 4: ...radio heater etc before making cable connections Note A good solid and clean connection is essential for a successful jump start see Performance and Temperature section 3 Taking care to never touch the clamps together first remove the RED POS clamp from it s ear and connect it to the RED POS battery terminal Then remove the BLACK NEG clamp from it s ear and connect it to the engine ground or a non...

Page 5: ...ete Always On When Charger is Plugged In LED Ausstellung Presse und hŠlt roten Knopf 4 Lichter Laden vollständig Immer auf wenn Auflader angeschlossen ist Cuándo Corcel se Conecta 3 luces Bueno 2 luces Medio 1 luz Bajo Destellar Recargue la Unidad Siempre En Note por favor que esta luz indica el corcel trabaja Despliegue LED La prensa y tiene el bot n rojo 4 luces Cargar completo Quand le Chargeur...

Page 6: ... EXPRESS OR IMPLIED NEGLIGENCE STRICT TORT OR ANY OTHER THEORY Some states do not permit the limitation of warranties or limitation of consequential or incidental damages so the above disclaimer and limitation may not apply to you This warranty gives you specific legal rights and you may also have other rights which vary from state to state If this product fails within the first 30 days after reta...

Page 7: ......

Page 8: ...de inmediato con abundante agua fría por un mínimo de 10 minutos y solicite atención médica con urgencia Tenga sumo cuidado en evitar que una herramienta metálica caiga sobre la batería Podría producir chispas o provocar un cortocircuito en la batería u otras piezas eléctricas y así originarse una explosión El cargador utiliza el suministro eléctrico de 120 voltios normal de una casa que si se lo ...

Page 9: ...les NUNCA arranque ni recargue una batería congelada Para evitar la formación de un arco eléctrico NUNCA permita que las pinzas se toquen entre sí o entren en contacto con una misma pieza de metal El uso de accesorios no recomendados o comercializados por el fabricante podría representar un riesgo de daño a la unidad o lesiones al personal Si utiliza un cargador de pared o un cable de extensión al...

Page 10: ...a batería Luego quite la pinza NEGRA NEGATIVA de su cubierta y conéctela a la puesta a tierra del motor o a una pieza metálica del motor que no sea móvil Para la puesta a tierra del motor nunca conecte la pinza al conducto de gasolina al inyector o al carburador Nota Muchos vehículos traen puntos de arranque alternativos alejados de la batería Si el vehículo los tiene use siempre los puntos de arr...

Page 11: ...a 1 El arrancador viene con un corcel del monte de pared 2 Tape la cuerda del corcel en la Recarga Jack en la frente de la unidad 3 Tape el corcel de pared en cualquier salida de C A 4 El correcto LED prenderá mientras el corcel se tapa en el poder de C A para indicar la unidad carga 5 Los tiempos aproximados de recarga son 3 horas cuando la unidad se usa para arranque auxiliar 12 a 24 horas en co...

Page 12: ...ancador está equipada con una linterna incorporada La transportabilidad de la unidad hace el arrancador muy útil en tiempos de la emergencia la recreación y el uso general Apriete simplemente el botón amarillo para prender la linterna o lejos Linterna La unidad arrancador puede almacenarse prácticamente en cualquier lugar y en cualquier posición En todo caso le recomendamos que almacene el equipo ...

Page 13: ...ÑOS INCIDENTALES O FORTUITOS BAJO NINGUNA CIRCUNSTANCIA LA RESPONSABILIDAD DE CLORE AUTOMOTIVE SI ALGUNA NUNCA EXCEDERA DEL PRECIO DE COMPRA DEL APARATO SIN TENER EN CUENTA SI LA RESPONSABILIDAD SE DEBE A ROMPIMIENTO DEL CONTRATO DE GARANTIA EXPRESA O IMPLICITA NEGLIGENCIA O CUALQUIER OTRA TEORIA JURIDICA Algunos estados no permiten limitaciones de garantías o limitaciones de daños en consecuencia...

Page 14: ... Si l acide de la batterie entre en contact avec votre peau ou vos vêtements lavez les immédiatement à l eau et au savon Si l acide pénètre dans vos yeux rincez les immédiatement à l eau courante froide pendant au moins 10 minutes et consultez immédiatement un médecin Faites très attention à ne pas laisser tomber d outil métallique sur une batterie Cela pourrait créer une étincelle ou entraîner un...

Page 15: ...reçoit un choc violent ou qu il est endommagé faites le inspecter par un technicien qualifié Si de l acide de batterie s échappe du survolter ne l expédiez pas mais ramenez le au centre de recyclage de batteries le plus proche de vous Ne démontez pas le survolter Faites le inspecter par un technicien qualifié Ne laissez jamais le survolter déchargé pendant une longue période Vous risqueriez en eff...

Page 16: ... à une autre composante métallique non mobile du moteur Ne reliez jamais les câbles à la canalisation d essence à l injecteur de combustible ou au carburateur à la place du bloc moteur Note Certains véhicules sont équipés de points de démarrage alternatifs à distance de la batterie Utilisez toujours les points de démarrage alternatifs le cas échéant 4 Vérifiez que les câbles ne se trouvent pas sur...

Page 17: ...ur éteindre la sortie déprimer le bouton jaune Peut alimenter des accessoires d une tension ne dépassant pas 12 ampères Si le classement d intensité de courant est dépassé un disjoncteur d auto remet à l état initial incorporé éteint automatiquement le pouvoir jusqu à ce que l accessoire ou la source de surcharge est enlevé Après l usage extrême de pouvoir recharger l unité pour 36 48 heures Alime...

Page 18: ... des fils Pb Cet appareil contient une batterie au plomb acide à bac hermétique étanche Cette batterie doit être recyclée Demandez conseil auprès de l administration locale ou nationale pour connaître les règlements en matière d élimination Élimination de la batterie Le survolteur peut être entreposé quasiment n importe où et dans n importe quel sens Toutefois nous recommandons de ranger l unité à...

Page 19: ...ESPONSABLE DE DOMMAGES ACCESSOIRES ET CONSÉQUENTS LA RESPONSABILITÉ DE CLORE AUTOMOTIVE NE DEVRA JAMAIS EXCÉDER LE PRIX D ACHAT DE CETTE MACHINE QUE LADITE RESPONSABILITÉ DÉCOULE D UNE RUPTURE DE GARANTIE EXPRESSE OU IMPLICITE DE NÉGLIGENCE D ACTE DOMMAGEABLE OU DE TOUTE AUTRE RAISON Certaines provinces n autorisant pas la restriction des garanties ou la restriction des dommages accessoires ou con...

Page 20: ... 2015 Clore Automotive 842 404 502 A JNC300XLC Portable Jump Starter with 12 Volt Power and LED Flashlight ...

Reviews: