background image

Day One+

PTX10004

IN THIS GUIDE

Step 1: Begin | 1

Step 2: Up and Running | 7

Step 3: Keep Going | 11

Step 1: Begin

IN THIS SECTION

Meet the PTX10004 | 1

Install the PTX10004 in a Rack | 2

Power On | 6

In this guide, we provide a simple, three-step path, to quickly get you up and running with your new AC-powered router.

We've simplified and shortened the installation and configuration steps, and included how-to videos. You'll learn how to

install the PTX1004 in a rack, power it up, and configure basic settings.

Meet the PTX10004

The Juniper Networks

®

PTX10004 modular router is the ultra-compact, ultra-high-density router for today’s space-and

power-constrained facilities. The PTX10004 supports 400GbE architectures with inline Media Access Control Security

(MACsec) on all ports for uncompromised security. The compact 7-U design and the ability to scale from 19.2 Tbps to

57.6 Tbps makes the PTX10004 perfectly optimized for data center and colocation racks.

Summary of Contents for Day One+

Page 1: ...teps and included how to videos You ll learn how to install the PTX1004 in a rack power it up and configure basic settings Meet the PTX10004 The Juniper Networks PTX10004 modular router is the ultra c...

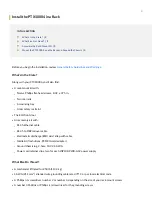
Page 2: ...rear safety restraint The EMI front door An accessory kit with RJ 45 Ethernet cable RJ 45 to DB9 rollover cable Electrostatic discharge ESD wrist strap with cable Media kit flash drives PCMCIA card a...

Page 3: ...to the rack using six rack screws 3 Slide each mounting rail into the mounting tray grooves 4 Attach the rails to the rack using eight rack screws 5 Line up the holes in the mounting rail with the hol...

Page 4: ...TS 0 BITS 1 MGMT LINK DISK1 DISK2 OFF RESET BITS 0 BITS 1 PWR STS MASTER CONSOLE XGE 1 XGE 0 LINK 1PPS 10MHz IN OUT ToD BITS 0 BITS 1 3 Carefully slide the chassis onto the shelf until the chassis fla...

Page 5: ...the slot until the handle holes line up c Rotate the handles simultaneously into the chassis until the card is fully seated and the handles are vertical 8 Install the optics and optional cable manage...

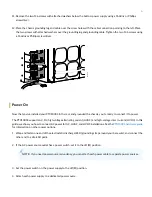
Page 6: ...power The PTX10004 supports AC DC high voltage alternating current HVAC and high voltage direct current HVDC In this guide we show you how to connect AC power for AC HVAC and HVDC installations See th...

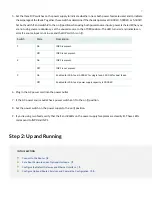
Page 7: ...P0 is not present Off INP1 is present On 2 INP1 is not present Off Enabled for 30 A feed 5 000 W for single feed 5 500 W for dual feeds On 3 Enabled for 20 A feed power supply capacity is 3 000 W Off...

Page 8: ...e CONSOLE port is located on the Routing and Control Board RCB g100912 Laptop CPU To console port CON 2 Verify that your laptop or PC has the following default values Baud Rate 9600 Flow Control None...

Page 9: ...ogin user user name authentication plain text password New password password Retype new password password 4 Optional Set the user account class to super user edit root set system login user user name...

Page 10: ...inations reachable over the management interface that should not be routed using the previously defined default route edit root set routing instances mgmt_junos routing options static route remote pre...

Page 11: ...Design Center See automate and protect your network with Juniper Security General Information Do this If you want to See Activate Junos OS Licenses in the Juniper Licensing Guide Download activate an...

Page 12: ...requirements for connecting to a factory defaulted Junos device See Learning with Juniper on Juniper Networks main YouTube page Get short and concise tips and instructions that provide quick answers c...

Reviews: