•
Connecting AC Power to an EX4300 Switch on page 173
•
Connecting DC Power to an EX4300 Switch on page 176
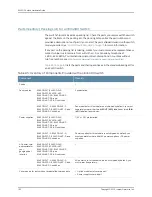
7.
Register your product by following instructions in
“Registering Products—Mandatory
for Validating SLAs” on page 153
.
8.
Perform initial configuration of the switch by following the instructions in
“Connecting
and Configuring an EX Series Switch (CLI Procedure)” on page 205
or
“Connecting and
Configuring an EX Series Switch (J-Web Procedure)” on page 208
.
9.
Set the switch’s management options by following the instructions in:
•
Connecting a Switch to a Network for Out-of-Band Management on page 181
•
Connecting a Switch to a Management Console on page 183
•
Connecting an EX4300 Switch to a Management Console Using the Mini-USB
Type-B Console Port on page 185
Related
Documentation
Rack Requirements for EX4300 Switches on page 91
•
•
Cabinet Requirements for EX4300 Switches on page 92
•
Clearance Requirements for Airflow and Hardware Maintenance for EX4300 Switches
on page 93
Mounting an EX4300 Switch
You can mount an EX4300 switch:
•
On two posts of a 19-in. rack or a 19-in. cabinet by using the mounting brackets provided
with the switch.
•
On four posts of a 19-in. rack or a 19-in. cabinet by using the separately orderable
four-post rack-mount kit.
•
In a position recessed 2 in. from the front of a 19-in. rack or a 19-in. cabinet by using the
2-in.-recess front brackets in the separately orderable four-post rack-mount kit. You
can mount the switch in this recessed position on two-post or four-post racks and
cabinets.
•
On a wall by using the separately orderable wall-mount kit.
The holes in the mounting brackets are placed at 1 U (1.75 in. or 4.45 cm) apart so that
the switch can be mounted in any rack or cabinet that provides holes spaced at that
distance.
See the Related Documentation for detailed descriptions of the various rack or cabinet
mounting options.
Related
Documentation
Mounting an EX4300 Switch on Two Posts of a Rack or Cabinet on page 157
•
•
Mounting an EX4300 Switch in a Recessed Position in a Rack or Cabinet on page 163
•
Mounting an EX4300 Switch on Four Posts of a Rack or Cabinet on page 159
Copyright © 2015, Juniper Networks, Inc.
156
EX4300 Switch Hardware Guide
Summary of Contents for EX4300
Page 1: ...EX4300 Switch Hardware Guide Modified 2015 06 29 Copyright 2015 Juniper Networks Inc ...
Page 16: ...Copyright 2015 Juniper Networks Inc xvi EX4300 Switch Hardware Guide ...
Page 22: ...Copyright 2015 Juniper Networks Inc xxii EX4300 Switch Hardware Guide ...
Page 24: ...Copyright 2015 Juniper Networks Inc 2 EX4300 Switch Hardware Guide ...
Page 102: ...Copyright 2015 Juniper Networks Inc 80 EX4300 Switch Hardware Guide ...
Page 104: ...Copyright 2015 Juniper Networks Inc 82 EX4300 Switch Hardware Guide ...
Page 128: ...Copyright 2015 Juniper Networks Inc 106 EX4300 Switch Hardware Guide ...
Page 172: ...Copyright 2015 Juniper Networks Inc 150 EX4300 Switch Hardware Guide ...
Page 176: ...Copyright 2015 Juniper Networks Inc 154 EX4300 Switch Hardware Guide ...
Page 218: ...Copyright 2015 Juniper Networks Inc 196 EX4300 Switch Hardware Guide ...
Page 236: ...Copyright 2015 Juniper Networks Inc 214 EX4300 Switch Hardware Guide ...
Page 238: ...Copyright 2015 Juniper Networks Inc 216 EX4300 Switch Hardware Guide ...
Page 250: ...Copyright 2015 Juniper Networks Inc 228 EX4300 Switch Hardware Guide ...
Page 256: ...Copyright 2015 Juniper Networks Inc 234 EX4300 Switch Hardware Guide ...
Page 278: ...Copyright 2015 Juniper Networks Inc 256 EX4300 Switch Hardware Guide ...
Page 286: ...Copyright 2015 Juniper Networks Inc 264 EX4300 Switch Hardware Guide ...
Page 292: ...Copyright 2015 Juniper Networks Inc 270 EX4300 Switch Hardware Guide ...
Page 306: ...Copyright 2015 Juniper Networks Inc 284 EX4300 Switch Hardware Guide ...
Page 312: ...Copyright 2015 Juniper Networks Inc 290 EX4300 Switch Hardware Guide ...
Page 336: ...Copyright 2015 Juniper Networks Inc 314 EX4300 Switch Hardware Guide ...


