Related
Documentation
Connecting Earth Ground to an EX Series Switch on page 167
•
•
Connecting AC Power to an EX4300 Switch on page 173
•
Connecting DC Power to an EX4300 Switch on page 176
•
Connecting and Configuring an EX Series Switch (CLI Procedure) on page 205
•
Connecting and Configuring an EX Series Switch (J-Web Procedure) on page 208
•
Mounting an EX4300 Switch in a Recessed Position in a Rack or Cabinet on page 163
•
Rack-Mounting and Cabinet-Mounting Warnings on page 278
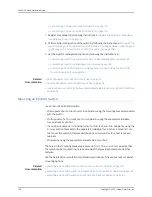
Mounting an EX4300 Switch in a Recessed Position in a Rack or Cabinet
You can mount an EX4300 switch in a recessed position on two posts of either a two-post
rack or a four-post rack such that the switch is recessed inside the rack from the rack
front by 2 inches. To mount the switch in a recessed position, use the front-mounting
brackets provided in the separately orderable four-post rack-mount kit.
Reasons to mount the switch in a recessed position include:
•
You are mounting the switch in a cabinet and the cabinet doors do not close completely
unless the switch is recessed.
•
The switch you are mounting has an uplink module with transceivers installed in it—the
transceivers in the uplink module ports protrude from the front of the switch.
To mount the switch in a recessed position, on two-posts or on four-posts, follow the
instructions in
“Mounting an EX4300 Switch on Two Posts of a Rack or Cabinet” on
page 157
or
“Mounting an EX4300 Switch on Four Posts of a Rack or Cabinet” on page 159
.
Related
Documentation
Connecting Earth Ground to an EX Series Switch on page 167
•
•
Rack-Mounting and Cabinet-Mounting Warnings on page 278
Mounting an EX4300 Switch on a Wall
You can mount an EX4300 switch on a wall by using the separately orderable wall-mount
kit.
Before mounting the switch on a wall:
•
Verify that the site meets the requirements described in
“Site Preparation Checklist
for EX4300 Switches” on page 83
.
•
Read
“General Safety Guidelines and Warnings” on page 265
, with particular attention
to
“Chassis Lifting Guidelines for EX4300 Switches” on page 275
.
•
Remove the switch from the shipping carton (see
“Unpacking an EX4300 Switch” on
page 151
).
Ensure that you have the following parts and tools available:
163
Copyright © 2015, Juniper Networks, Inc.
Chapter 11: Installing the Switch
Summary of Contents for EX4300
Page 1: ...EX4300 Switch Hardware Guide Modified 2015 06 29 Copyright 2015 Juniper Networks Inc ...
Page 16: ...Copyright 2015 Juniper Networks Inc xvi EX4300 Switch Hardware Guide ...
Page 22: ...Copyright 2015 Juniper Networks Inc xxii EX4300 Switch Hardware Guide ...
Page 24: ...Copyright 2015 Juniper Networks Inc 2 EX4300 Switch Hardware Guide ...
Page 102: ...Copyright 2015 Juniper Networks Inc 80 EX4300 Switch Hardware Guide ...
Page 104: ...Copyright 2015 Juniper Networks Inc 82 EX4300 Switch Hardware Guide ...
Page 128: ...Copyright 2015 Juniper Networks Inc 106 EX4300 Switch Hardware Guide ...
Page 172: ...Copyright 2015 Juniper Networks Inc 150 EX4300 Switch Hardware Guide ...
Page 176: ...Copyright 2015 Juniper Networks Inc 154 EX4300 Switch Hardware Guide ...
Page 218: ...Copyright 2015 Juniper Networks Inc 196 EX4300 Switch Hardware Guide ...
Page 236: ...Copyright 2015 Juniper Networks Inc 214 EX4300 Switch Hardware Guide ...
Page 238: ...Copyright 2015 Juniper Networks Inc 216 EX4300 Switch Hardware Guide ...
Page 250: ...Copyright 2015 Juniper Networks Inc 228 EX4300 Switch Hardware Guide ...
Page 256: ...Copyright 2015 Juniper Networks Inc 234 EX4300 Switch Hardware Guide ...
Page 278: ...Copyright 2015 Juniper Networks Inc 256 EX4300 Switch Hardware Guide ...
Page 286: ...Copyright 2015 Juniper Networks Inc 264 EX4300 Switch Hardware Guide ...
Page 292: ...Copyright 2015 Juniper Networks Inc 270 EX4300 Switch Hardware Guide ...
Page 306: ...Copyright 2015 Juniper Networks Inc 284 EX4300 Switch Hardware Guide ...
Page 312: ...Copyright 2015 Juniper Networks Inc 290 EX4300 Switch Hardware Guide ...
Page 336: ...Copyright 2015 Juniper Networks Inc 314 EX4300 Switch Hardware Guide ...

