a.
Secure the ring lug of the positive (+) DC power source cable to one of the +
terminals on the DC power supply.
b.
Secure the ring lug of the negative (–) DC power source cable to the – terminal
adjacent to the + terminal that you connected to on the DC power supply.
c.
Connect the ground wire to earth ground if the switch is not in a grounded rack.
d.
Tighten the screws on the power supply terminals until they are snug by using
the screwdriver. Do not overtighten—apply between 5 lb-in (0.56 Nm) and 6 lb-in
(0.68 Nm) of torque to the screws.
If you have a second installed power supply, connect it in the same way you did the
first.
•
To connect one power supply to two power sources:
a.
Secure the ring lug of the positive (+) DC power source cable from the first DC
power source to a + terminal on the power supply.
b.
Secure the ring lug of the negative (–) DC power source cable from the first DC
power source to the – terminal adjacent to the + terminal on the DC power supply
to which you connected the ring lug of the positive (+) DC power source cable
from the first DC power source.
c.
Secure the ring lug of the positive (+) DC power source cable from the second
DC power source to the other + terminal on the power supply.
d.
Secure the ring lug of the negative (–) DC power source cable from the second
DC power source to the – terminal adjacent to the + terminal on the DC power
supply to which you connected the ring lug of the positive (+) DC power source
cable from the second DC power source.
e.
Connect the ground wire to earth ground if the switch is not in a grounded rack.
f.
Tighten the screws on the power supply terminals on both the power supplies
until snug using the screwdriver. Do not overtighten—apply between 8 lb-in.
(0.9 Nm) and 9 lb-in. (1.02 Nm) of torque to the screws.
If you have a second installed power supply, connect it in the same way you did the
first.
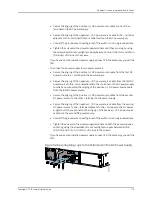
Figure 52: Securing Ring Lugs to the Terminals on the DC Power Supply
179
Copyright © 2015, Juniper Networks, Inc.
Chapter 12: Connecting the Switch to Power
Summary of Contents for EX4300
Page 1: ...EX4300 Switch Hardware Guide Modified 2015 06 29 Copyright 2015 Juniper Networks Inc ...
Page 16: ...Copyright 2015 Juniper Networks Inc xvi EX4300 Switch Hardware Guide ...
Page 22: ...Copyright 2015 Juniper Networks Inc xxii EX4300 Switch Hardware Guide ...
Page 24: ...Copyright 2015 Juniper Networks Inc 2 EX4300 Switch Hardware Guide ...
Page 102: ...Copyright 2015 Juniper Networks Inc 80 EX4300 Switch Hardware Guide ...
Page 104: ...Copyright 2015 Juniper Networks Inc 82 EX4300 Switch Hardware Guide ...
Page 128: ...Copyright 2015 Juniper Networks Inc 106 EX4300 Switch Hardware Guide ...
Page 172: ...Copyright 2015 Juniper Networks Inc 150 EX4300 Switch Hardware Guide ...
Page 176: ...Copyright 2015 Juniper Networks Inc 154 EX4300 Switch Hardware Guide ...
Page 218: ...Copyright 2015 Juniper Networks Inc 196 EX4300 Switch Hardware Guide ...
Page 236: ...Copyright 2015 Juniper Networks Inc 214 EX4300 Switch Hardware Guide ...
Page 238: ...Copyright 2015 Juniper Networks Inc 216 EX4300 Switch Hardware Guide ...
Page 250: ...Copyright 2015 Juniper Networks Inc 228 EX4300 Switch Hardware Guide ...
Page 256: ...Copyright 2015 Juniper Networks Inc 234 EX4300 Switch Hardware Guide ...
Page 278: ...Copyright 2015 Juniper Networks Inc 256 EX4300 Switch Hardware Guide ...
Page 286: ...Copyright 2015 Juniper Networks Inc 264 EX4300 Switch Hardware Guide ...
Page 292: ...Copyright 2015 Juniper Networks Inc 270 EX4300 Switch Hardware Guide ...
Page 306: ...Copyright 2015 Juniper Networks Inc 284 EX4300 Switch Hardware Guide ...
Page 312: ...Copyright 2015 Juniper Networks Inc 290 EX4300 Switch Hardware Guide ...
Page 336: ...Copyright 2015 Juniper Networks Inc 314 EX4300 Switch Hardware Guide ...


