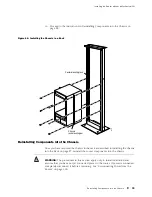
Installing the Router without a Mechanical Lift
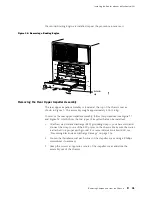
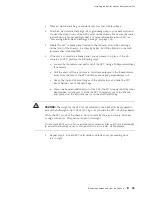
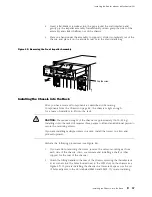
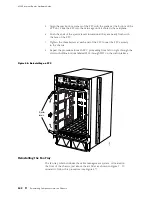
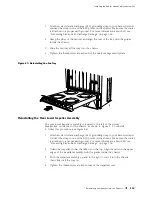
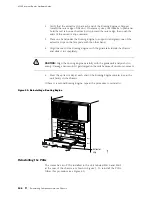
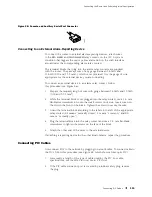
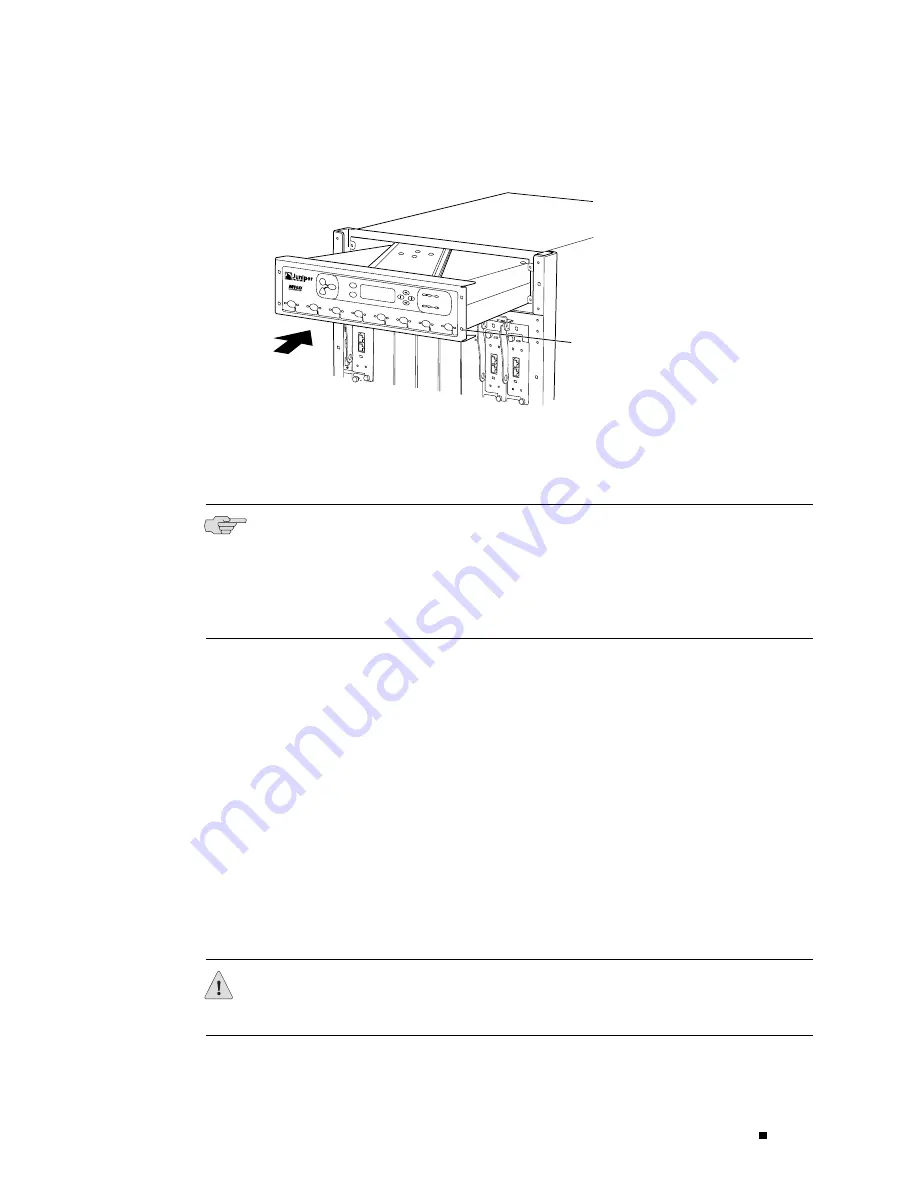
Figure 45: Reinstalling the Front Impeller Assembly
1216
R
Captive screw
Reinstalling the FPCs
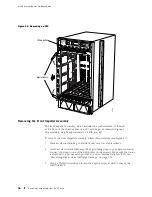
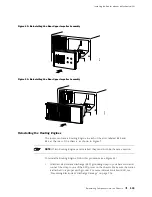
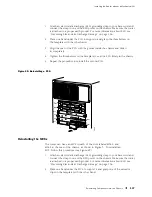
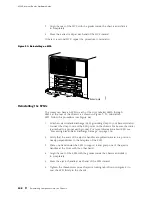
The FPCs install into the card cage at the front of the chassis, as shown in Figure 1.
NOTE:
To help you work systematically, the following procedure directs you to
reinstall FPCs starting at the left side of the card cage and working toward the right.
You can install FPCs in any order, however.
Be sure there is a blank panel over every empty slot. The blank panels must be in
place during router operation to guarantee adequate circulation of cooling air.
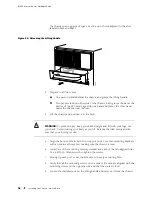
To reinstall the FPCs, follow this procedure (see Figure 46):
1.
Attach an electrostatic discharge (ESD) grounding strap to your bare wrist and
connect the strap to one of the ESD points on the chassis. Make sure the router
is attached to a proper earth ground. For more information about ESD, see
“Preventing Electrostatic Discharge Damage” on page 226.
2.
Locate the leftmost slot in the FPC card cage on the front of the chassis. It is
directly below the offline button on the craft interface that is labeled
FPC0
.
Locate the FPC that you labeled
FPC0
during removal.
3.
Verify that the ends of the ejector levers, which are located at each end of the
FPC, are pushed outward, nearly perpendicular to the face of the FPC.
4.
Grasp the front of the FPC with one hand and place the other hand under
the FPC to support it.
CAUTION:
When the FPC is out of the chassis, do not hold it by the ejector levers,
bus bars, or edge connectors. They cannot support its weight.
Reinstalling Components into the Chassis
101
Summary of Contents for Internet Router M160
Page 12: ...M160 Internet Router Hardware Guide xii Table of Contents ...
Page 16: ...M160 Internet Router Hardware Guide xvi List of Figures ...
Page 18: ...M160 Internet Router Hardware Guide xviii List of Tables ...
Page 24: ...M160 Internet Router Hardware Guide xxiv Requesting Support ...
Page 26: ...2 Product Overview ...
Page 30: ...M160 Internet Router Hardware Guide 6 Safety Requirements Warnings and Guidelines ...
Page 66: ...M160 Internet Router Hardware Guide 42 Cable Management System ...
Page 80: ...M160 Internet Router Hardware Guide 56 Routing Engine Architecture ...
Page 82: ...58 Initial Installation ...
Page 104: ...M160 Internet Router Hardware Guide 80 Unpacking the Router ...
Page 148: ...M160 Internet Router Hardware Guide 124 Configuring the JUNOS Internet Software ...
Page 150: ...126 Hardware Maintenance Replacement and Troubleshooting Procedures ...
Page 242: ...M160 Internet Router Hardware Guide 218 Troubleshooting the Power System ...
Page 244: ...220 Appendixes ...
Page 292: ...M160 Internet Router Hardware Guide 268 Packing Components for Shipment ...
Page 301: ...Part 5 Index Index 277 ...
Page 302: ...278 Index ...

