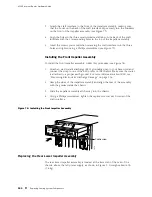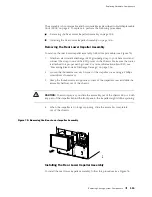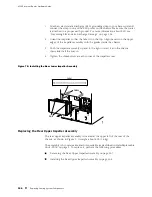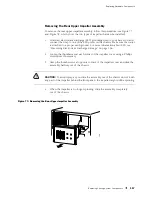
Replacing Hardware Components
Removing and Insert the PC Card
The slot labeled
PC CARD
on the Routing Engine faceplate accepts a Type I PC card,
as defined in the
PC Card Standard
published by the Personal Computer Memory
Card International Association (PCMCIA). The router is shipped with a PC card that
contains JUNOS Internet software. The PC card can be used to copy JUNOS software
from the PC card onto the Routing Engine. You can also copy JUNOS software from
the Routing Engine onto a PC card, for example, to create a backup copy of upgrade
software that you have obtained from Juniper Networks. Instructions for copying
software to a PC card are available at the Juniper Networks Support Web site
(
http://www.juniper.net/support/
); after logging in, navigate to the Customer Support
Center, then to the download page for JUNOS Internet software.
NOTE:
The appearance and position of electronic components or the PC card
slot on your Routing Engine might differ from the figures in this section. These
differences do not affect Routing Engine installation and removal or functionality.
NOTE:
The software on a PCMCIA card is loaded only onto the Routing Engine
into which the PCMCIA card is inserted. It is not automatically copied to the
other Routing Engine.
To remove and insert a PC card, perform the following procedures:
Removing the PC Card on page 163
Insert the PC Card on page 164
Removing the PC Card
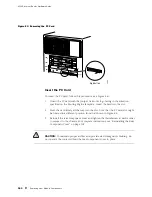
The PC card is inserted in the slot labeled
PC CARD
in the Routing Engine faceplate.
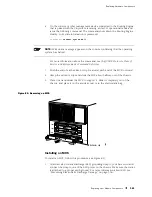
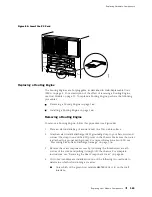
To remove the PC card, follow this procedure (see Figure 83):
1.
Remove the rear component cover by loosening the thumbscrew at each
corner of the cover and pulling it straight off the chassis. For complete
instructions, see “Removing the Rear Component Cover” on page 86.
2.
Press the eject button located next to the PC card slot in the Routing Engine
faceplate. Note that the PC card slot might be located in a different position
from that shown in Figure 83.
3.
When the PC card pops partially out of the slot, grasp the card and pull
it straight out of the slot.
Replacing Host Module Components
163
Summary of Contents for Internet Router M160
Page 12: ...M160 Internet Router Hardware Guide xii Table of Contents ...
Page 16: ...M160 Internet Router Hardware Guide xvi List of Figures ...
Page 18: ...M160 Internet Router Hardware Guide xviii List of Tables ...
Page 24: ...M160 Internet Router Hardware Guide xxiv Requesting Support ...
Page 26: ...2 Product Overview ...
Page 30: ...M160 Internet Router Hardware Guide 6 Safety Requirements Warnings and Guidelines ...
Page 66: ...M160 Internet Router Hardware Guide 42 Cable Management System ...
Page 80: ...M160 Internet Router Hardware Guide 56 Routing Engine Architecture ...
Page 82: ...58 Initial Installation ...
Page 104: ...M160 Internet Router Hardware Guide 80 Unpacking the Router ...
Page 148: ...M160 Internet Router Hardware Guide 124 Configuring the JUNOS Internet Software ...
Page 150: ...126 Hardware Maintenance Replacement and Troubleshooting Procedures ...
Page 242: ...M160 Internet Router Hardware Guide 218 Troubleshooting the Power System ...
Page 244: ...220 Appendixes ...
Page 292: ...M160 Internet Router Hardware Guide 268 Packing Components for Shipment ...
Page 301: ...Part 5 Index Index 277 ...
Page 302: ...278 Index ...

