M160 Internet Router Hardware Guide
Replacing an SFM
Up to four SFMs can be installed in the router, processing a total of 160 Mpps.
The SFMs are hot-pluggable, as described in Field-Replaceable Units (FRUs) on
page 4. Removing or inserting an SFM causes a brief interruption in forwarding
performance (about 500 ms) as the Packet Forwarding Engine reconfigures the
distribution of packets across the remaining SFMs.
To replace an SFM, perform the following procedures:
Removing an SFM on page 188
Installing an SFM on page 189
Removing an SFM
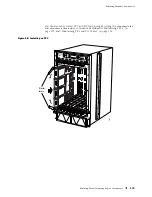
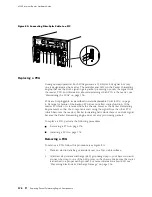
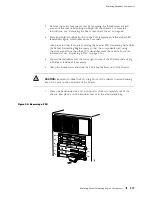
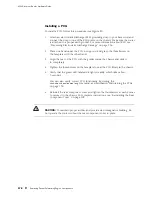
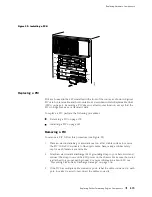
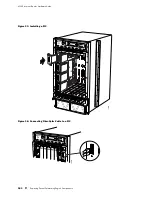
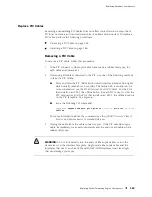
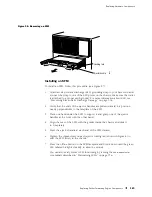
To remove an SFM, follow this procedure (see Figure 96):
1.
Remove the rear component cover by loosening the thumbscrew at each
corner of the cover and pulling it straight off the chassis. For complete
instructions, see “Removing the Rear Component Cover” on page 86.
2.
Place an electrostatic bag or antistatic mat on a flat, stable surface.
3.
Attach an electrostatic discharge (ESD) grounding strap to your bare wrist and
connect the strap to one of the ESD points on the chassis. Make sure the router
is attached to a proper earth ground. For more information about ESD, see
“Preventing Electrostatic Discharge Damage” on page 226.
4.
Press and hold the offline button on the SFM faceplate until the amber LED
labeled
FAIL
lights, in about 5 seconds.
5.
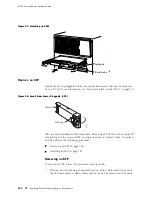
Loosen the thumbscrew on each ejector locking tab (shown in Figure 8), using
a Phillips screwdriver if necessary.
6.
Pull the end of each ejector handle outward until it is nearly perpendicular to
the SFM faceplate.
7.
Grasp the ejector handles and pull firmly to slide the SFM about halfway
out of the chassis.
8.
Place one hand under the SFM to support it, slide it completely out of the
chassis, and place it on the antistatic mat or in the electrostatic bag.
CAUTION:
When an SFM is out of the chassis, do not hold it by the ejector handles.
They cannot support its weight.
Do not stack SFMs on top of or under other components. Place each one individually
in an electrostatic bag or on its own antistatic mat on a flat, stable surface.
188
Replacing Packet Forwarding Engine Components
Summary of Contents for Internet Router M160
Page 12: ...M160 Internet Router Hardware Guide xii Table of Contents ...
Page 16: ...M160 Internet Router Hardware Guide xvi List of Figures ...
Page 18: ...M160 Internet Router Hardware Guide xviii List of Tables ...
Page 24: ...M160 Internet Router Hardware Guide xxiv Requesting Support ...
Page 26: ...2 Product Overview ...
Page 30: ...M160 Internet Router Hardware Guide 6 Safety Requirements Warnings and Guidelines ...
Page 66: ...M160 Internet Router Hardware Guide 42 Cable Management System ...
Page 80: ...M160 Internet Router Hardware Guide 56 Routing Engine Architecture ...
Page 82: ...58 Initial Installation ...
Page 104: ...M160 Internet Router Hardware Guide 80 Unpacking the Router ...
Page 148: ...M160 Internet Router Hardware Guide 124 Configuring the JUNOS Internet Software ...
Page 150: ...126 Hardware Maintenance Replacement and Troubleshooting Procedures ...
Page 242: ...M160 Internet Router Hardware Guide 218 Troubleshooting the Power System ...
Page 244: ...220 Appendixes ...
Page 292: ...M160 Internet Router Hardware Guide 268 Packing Components for Shipment ...
Page 301: ...Part 5 Index Index 277 ...
Page 302: ...278 Index ...


