NOTE:
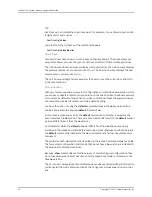
The vty session factory default is 5. Use the
line
command to configure
up to a maximum of 30 vtys. The configured vtys are shared among all types
of connections; for example, if you configure 7 vtys, then no more than a total
of 7 SSH plus FTP plus Telnet sessions can simultaneously exist on the router.
To access the system through a local console, attach a terminal to the system console
port. To access the system through Telnet, Telnet client software must be installed on
your host system. To access the system through SSH, SSH version 2.0 client software
must be installed on your host system. To access the system through FTP, FTP client
software must be installed on your host system.
You can configure Telnet to validate login requests. See “Vty Line Authentication and
Authorization” on page 413 in “Passwords and Security” on page 403
,
for more information.
Once Telnet is running on your host system, type in the E Series router name or its IP
address and press Enter. To use a name, your network must have a name server.
For example, for Microsoft Windows NT enter:
telnet 192.168.1.13
or
telnet westford2
You are connected to your E Series router when the following prompt appears:
Logging in.
host1>
NOTE:
At this point, you have access only to User Exec commands.
To connect through SSH, refer to your SSH client documentation.
Privileged-Level Access
You access the CLI Privileged Exec commands using the
enable
command.
Defining CLI Levels of Privilege
The CLI has the ability to map any command to one of 16 levels of command privilege
(0 to 15). When you access the Privileged Exec mode, you have access to those commands
that map to your access level or below. In other words, if you access the Privileged Exec
mode at access level 10 (the default), you have access to all commands with an access
level setting of 10 or lower.
In general, command privileges fall within one of the following levels:
•
0—Allows you to execute the
help
,
enable
,
disable
, and
exit
commands
•
1—Allows you to execute commands in User Exec mode plus commands at level 0
Copyright © 2010, Juniper Networks, Inc.
46
JunosE 11.3.x System Basics Configuration Guide
Summary of Contents for JUNOSE 11.3
Page 6: ...Copyright 2010 Juniper Networks Inc vi...
Page 8: ...Copyright 2010 Juniper Networks Inc viii JunosE 11 3 x System Basics Configuration Guide...
Page 24: ...Copyright 2010 Juniper Networks Inc xxiv JunosE 11 3 x System Basics Configuration Guide...
Page 32: ...Copyright 2010 Juniper Networks Inc 2 JunosE 11 3 x System Basics Configuration Guide...
Page 146: ...Copyright 2010 Juniper Networks Inc 116 JunosE 11 3 x System Basics Configuration Guide...
Page 166: ...Copyright 2010 Juniper Networks Inc 136 JunosE 11 3 x System Basics Configuration Guide...
Page 432: ...Copyright 2010 Juniper Networks Inc 402 JunosE 11 3 x System Basics Configuration Guide...
Page 488: ...Copyright 2010 Juniper Networks Inc 458 JunosE 11 3 x System Basics Configuration Guide...
Page 524: ...Copyright 2010 Juniper Networks Inc 494 JunosE 11 3 x System Basics Configuration Guide...
Page 554: ...Copyright 2010 Juniper Networks Inc 524 JunosE 11 3 x System Basics Configuration Guide...
Page 566: ...Copyright 2010 Juniper Networks Inc 536 JunosE 11 3 x System Basics Configuration Guide...
Page 588: ...Copyright 2010 Juniper Networks Inc 558 JunosE 11 3 x System Basics Configuration Guide...
Page 613: ...PART 3 Index Index on page 585 583 Copyright 2010 Juniper Networks Inc...
Page 614: ...Copyright 2010 Juniper Networks Inc 584 JunosE 11 3 x System Basics Configuration Guide...
Page 632: ...Copyright 2010 Juniper Networks Inc 602 JunosE 11 3 x System Basics Configuration Guide...

