10
Mesa Pro Rugged Tablet User’s Manual
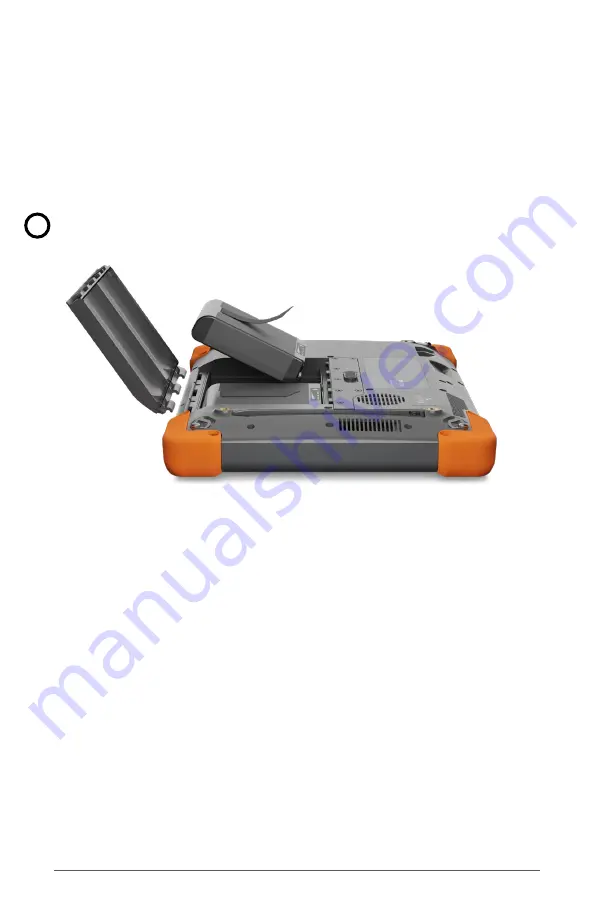
3. Insert the battery packs.
a. Hold the battery so the black tab on the back edge of the
battery and connector is facing the door latch.
b. Place the front edge in first, gently pushing it underneath
the two battery catches.
c. Rotate the back of the battery down until it sits flat inside
the battery compartment.
CAUTION: Do not insert the battery pack straight down.
Damage to the unit could occur.
4. Replace the door and press down on it while sliding the latch
into the lock position.
5. Attach the appropriate plug for your country into the AC wall
charger and plug it into a wall socket. Plug the other end into
the DC power jack on the Mesa Pro.
Note: Use the AC wall charger that came with the Mesa Pro or
another approved charger from Juniper Systems. If you use a
USB-C charger ensure it can deliver 20 V with a minimum of 60
Watts.
6. Charge the battery packs at room temperature (68°F or 20°C)
until fully charged.
While the battery packs are charging, the red LED blinks. When
batteries are fully charged and external power is applied, the red
LED is solid.
The battery packs can also be charged in the battery charger. This
is an optional accessory that allows you to charge extra batteries
outside of the Mesa Pro.
!
Summary of Contents for Mesa Pro
Page 1: ...mesa pro U S E R S M A N U A L ...
Page 6: ...1 Getting Started ...
Page 13: ...1 Getting Started 13 ...
Page 14: ...2 Standard Features ...
Page 29: ...2 Standard Features 29 ...
Page 30: ...3 Optional Features and Accessories ...
Page 41: ...3 Optional Features and Accessories 41 ...
Page 42: ...4 Storage Maintenance and Recycling ...
Page 45: ...4 Storage Maintenance and Recycling 45 ...
Page 46: ...5 Warranty and Repair Information ...
Page 52: ...6 Warnings Regulatory Information and Licensing ...
Page 59: ...6 Warnings Regulatory Information and Licensing 59 ...
Page 60: ...7 Specifications ...
Page 71: ...7 Specifications 71 ...
Page 72: ...8 Index ...


