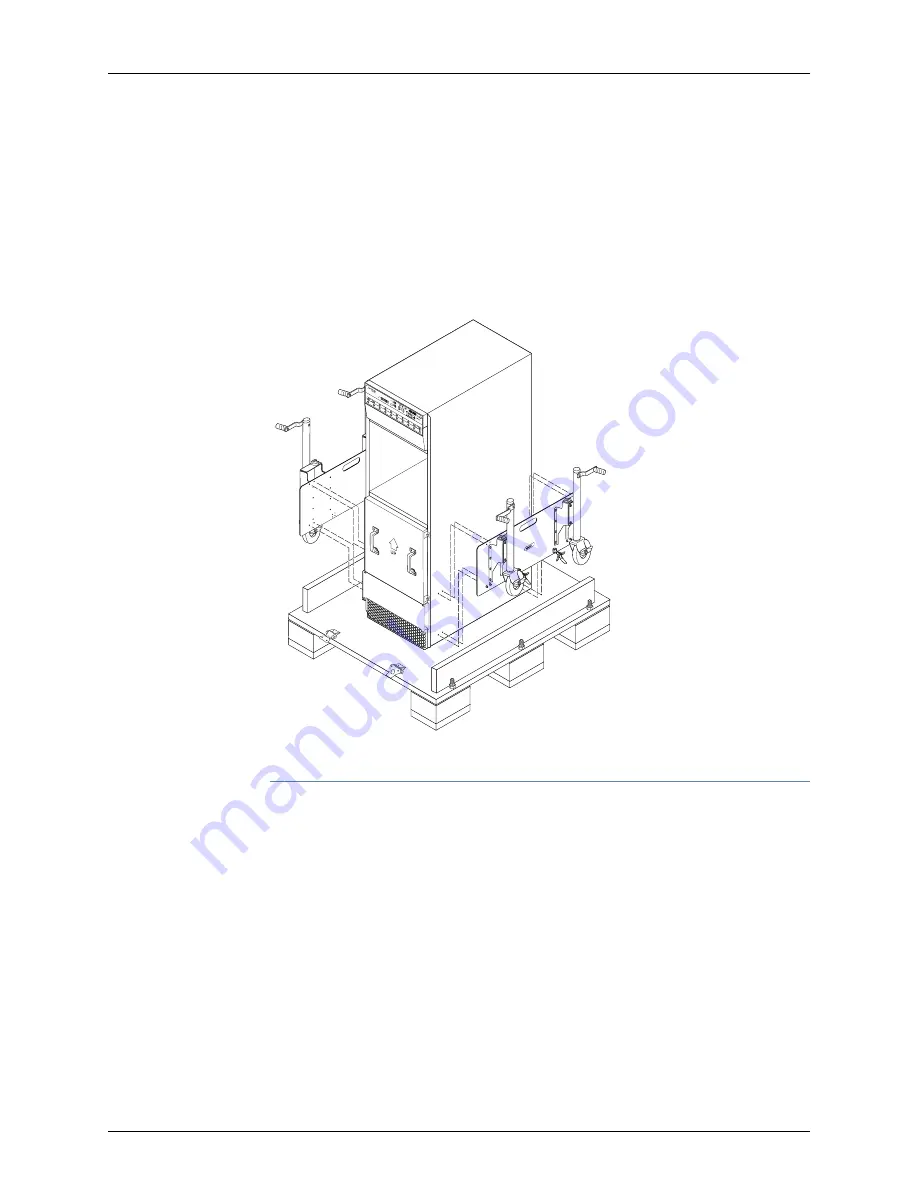
7.
Using a number 3 Phillips screwdriver tighten the captive screws to secure the router
transport mounting plate and wheel assembly to the chassis.
8.
Align the right router transport mounting plate and wheel assembly (indicated by right
arrow) with the holes on the right side of the chassis (see
9.
Using a number 3 Phillips screwdriver tighten the captive screws to secure the router
transport mounting plate and wheel assembly to the chassis.
Figure 21: Installing the Router Transport Kit onto the MX2010 Router
g000055
Secure the Router Transport Platform to the Router
1.
Ensure that the rack is in its permanent location and is secured to the building. Ensure
that the installation site allows adequate clearance for router transport kit turn ratios,
airflow, and maintenance.
2.
Using the shipping crate door as a ramp, secure the door to the crate platform using
the two metal latches (see
).
Copyright © 2014, Juniper Networks, Inc.
28
MX2010 3D Universal Edge Router Quick Start


