background image

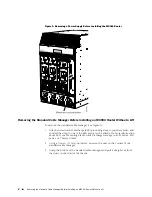
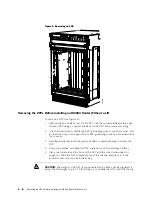
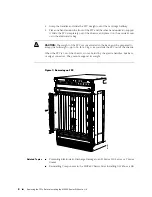
Figure 5: Removing an SCB

OK

0

FAIL

ONLINE

OK

1

FAIL

ONLINE

OK

2

FAIL

ONLINE

OK

3

FAIL

ONLINE

OK

4

FAIL

ONLINE

OK

5

FAIL

ONLINE

OK

0

FAIL

ONLINE

MASTER

ONLINE

OFFLINE

RE0

FAN

PEM

1

0

0 1 2 3

RE1

OK

1

FAIL

ONLINE

OK

7

FAIL

ONLINE

OK

8

FAIL

ONLINE

OK

9

FAIL

ONLINE

OK

10

FAIL

ONLINE

OK

11

FAIL

ONLINE

OK

2 6

FAIL

ONLINE

ACO/LT

YELL

OW ALAR

M

RED ALAR

M

NC

NO

C

NC

NO

C

1

0

1

0

1

0

1

0

1

0

1

1

0

0

1

0

1

0

1

0

g004048

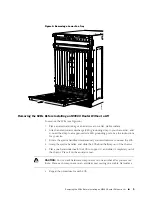
Removing the DPCs Before Installing an MX960 Router Without a Lift

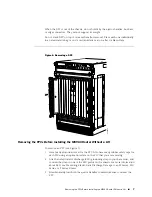
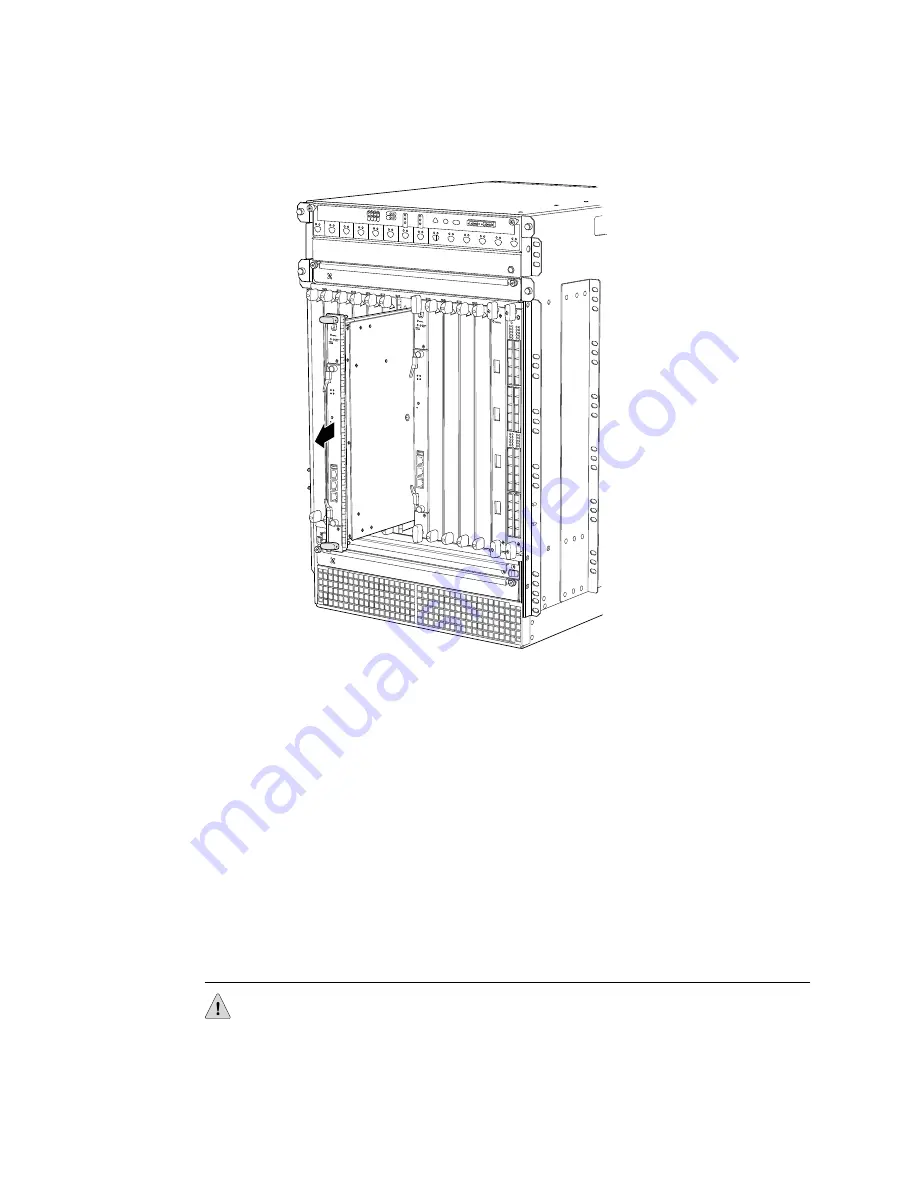
To remove a DPC (see Figure 6):

1.

Have ready an antistatic mat for the DPC. Also have ready rubber safety caps
for each DPC using an optical interface on the DPC that you are removing.

2.

Attach an electrostatic discharge (ESD) grounding strap to your bare wrist, and
connect the strap to an approved site ESD grounding point. See the instructions
for your site.

3.

Simultaneously turn both the ejector handles counterclockwise to unseat the
DPC.

4.

Grasp the handles, and slide the DPC straight out of the card cage halfway.

5.

Place one hand around the front of the DPC and the other hand under it to
support it. Slide the DPC completely out of the chassis, and place it on the
antistatic mat or in the electrostatic bag.

CAUTION:

The weight of the DPC is concentrated in the back end. Be prepared to

accept the full weight—up to 13.1 lb (5.9 kg)—as you slide the DPC out of the chassis.

6

Removing the DPCs Before Installing an MX960 Router Without a Lift

Summary of Contents for MX960

Page 1: ...your way to the right To remove the AC or DC power supplies for each power supply see Figure 1 1 Attach an electrostatic discharge ESD grounding strap to your bare wrist and connect the strap to one...

Page 2: ...connect the strap to one of the ESD points on the chassis For more information about ESD see Preventing Electrostatic Discharge Damage to an M Series MX Series or T Series Router 2 Using a 7 16 in 11...

Page 3: ...chassis For more information about ESD see Preventing Electrostatic Discharge Damage to an M Series MX Series or T Series Router 2 Loosen the captive screw on each side of the fan tray faceplate 3 Gr...

Page 4: ...IN E MASTER ONLINE OFFLINE RE0 FAN PEM 1 0 0 1 2 3 RE1 OK 1 FAIL ONLIN E OK 7 FAIL ONLIN E OK 8 FAIL ONLIN E OK 9 FAIL ONLIN E OK 10 FAIL ONLIN E OK 11 FAIL ONLIN E OK 2 6 FAIL ONLIN E ACO LT YELL O W...

Page 5: ...c bag or antistatic mat on a flat stable surface 2 Attach an electrostatic discharge ESD grounding strap to your bare wrist and connect the strap to an approved site ESD grounding point See the instru...

Page 6: ...using an optical interface on the DPC that you are removing 2 Attach an electrostatic discharge ESD grounding strap to your bare wrist and connect the strap to an approved site ESD grounding point Se...

Page 7: ...FAIL ONLIN E ACO LT YELL O W ALAR M RED ALAR M NC NO C NC NO C 1 0 1 0 1 0 1 0 1 0 1 1 0 0 1 0 1 0 g004052 OK FAIL 0 0 0 5 2 0 2 5 1 0 1 5 3 0 3 5 Removing the FPCs Before Installing the MX960 Router...

Page 8: ...not support its weight Figure 7 Removing an FPC OK 0 FAIL ONLIN E OK 1 FAIL ONLIN E OK 2 FAIL ONLIN E OK 3 FAIL ONLIN E OK 4 FAIL ONLIN E OK 5 FAIL ONLIN E OK 0 FAIL ONLIN E MASTER ONLINE OFFLINE RE0...

Page 9: ...Required to Replace Components from an M Series MX Series or T Series Router Installing the MX960 Chassis in the Rack Manually Published 2010 01 24 Removing the FPCs Before Installing the MX960 Router...

Reviews: