Required Configuration
NetScreen-5GT Wireless
15
Using a Console Connection
The Console port on the NetScreen-5GT Wireless device allows you to access the device
through a serial cable connected to your workstation or terminal. To configure the device
using a console connection, enter ScreenOS CLI commands on your terminal or in a
terminal emulation program on your workstation.
To establish a console connection:
1.
Plug the female DB-9 end of the serial cable into the serial port of your
computer. (Be sure that the DB-9 connector is seated properly in the port.)
2.
Plug the other end of the DB-9 connector into the RJ-45 DB-9 port. (Be sure that
the DB-9 connector is seated properly in the RJ-45 DB-9 port.)
3.
Plug the male RJ-45 end of the serial cable into the Console port of the
NetScreen-5GT Wireless device. (Be sure that the RJ-45 connector is seated
properly in the port.)
4.
Launch a serial terminal emulation program. (A commonly-used terminal
program is Hilgreave HyperTerminal.) The required settings to launch a console
session with your NetScreen-5GT Wireless device are as follows:
–
Baud Rate: 9600
–
Parity: No
–
Data Bits: 8
–
Stop Bit: 1
–
Flow Control: None
5.
If you have not yet changed the default user name and password, enter
netscreen in both the login and password prompts. (Use lowercase letters
only. The login and password fields are both case sensitive.)
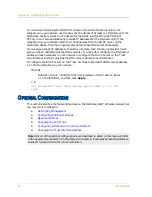
R
EQUIRED
C
ONFIGURATION
This section describes the configurations that you need to complete to use the NetScreen-
5GT Wireless devices.
Note: For the console connection, use a serial cable with a male RJ-45 connector on one
end and female DB-9 connector on the other end. See
,
connector pinouts for the serial cable.
Note: If you have any problems completing a configuration and you need to restore the
device to its default settings, see


