background image

Optional Configuration

NetScreen-5GT Wireless

25

Restricting Management

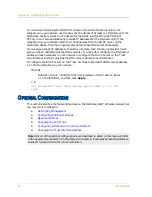
By default, anyone in your network can manage the NetScreen device if they know the 
login and password. You can configure the NetScreen device to be managed only from one 
or more specific hosts on your network. (And you can choose which services — for 
example, WebUI, Telnet, ping — you want enabled on the NetScreen device.) Refer to the 
“Administration” chapter in the “Administration” volume of the NetScreen Concepts & 
Examples ScreenOS Reference Guide 
for ScreenOS 5.0.0.

Configuring Additional Policies

The NetScreen-5GT Wireless devices are configured with a default policy that permits 
workstations in the Trust zone of your network to access any kind of service with outside 
computers, while outside computers are not allowed to access or start sessions with your 
workstations. You can configure policies that direct the NetScreen device to permit 
outside computers to start specific kinds of sessions with your computers. To create or 
modify policies, refer to the “Policies” chapter in the “Fundamentals” volume of the 
NetScreen Concepts & Examples ScreenOS Reference Guide for ScreenOS 5.0.0.

Operational Mode

The operational mode is the way an interface on a NetScreen device processes traffic 
between zones. By default, the NetScreen-5GT Wireless devices operates in Route mode 
with network address translation (NAT) enabled on the Trust interface. This means that 
when devices in the Trust zone send traffic to the Internet, the NetScreen device replaces 
the original source IP addresses with the IP address of the Untrust interface. While the 
NetScreen device assigns “private” IP addresses to the devices in your network, these 
addresses remain hidden to computers outside your network.

If all devices in your network have public IP addresses, then you can configure the 
NetScreen device for Route mode without NAT enabled. In Route mode without NAT 
enabled, the NetScreen device routes traffic by checking IP addresses. For more 
information about configuring the device for Route mode without NAT enabled, refer to 
the “Interface Modes” chapter in the “Fundamentals” volume of the NetScreen Concepts & 
Examples ScreenOS Reference Guide 
for ScreenOS 5.0.0.

Summary of Contents for NetScreen 5GT Wireless

Page 1: ...NETSCREEN 5GT WIRELESS User s Guide Version 5 0 0 P N 093 XXXX 000 Rev Beta...

Page 2: ...roduct could void the user s warranty and authority to operate this device Disclaimer THE SOFTWARE LICENSE AND LIMITED WARRANTY FOR THE ACCOMPANYING PRODUCT ARE SET FORTH IN THE INFORMATION PACKET THA...

Page 3: ...g Optional 10 Chapter 2 Configuring the Device 13 Accessing the Device 13 Using the WebUI 13 Using Telnet 14 Using a Console Connection 15 Required Configuration 15 Changing the Admin Name and Passwor...

Page 4: ...9 Verifying External Connectivity 29 Resetting the Device to Factory Defaults 29 Using the Reset Pinhole 30 Chapter 3 Hardware Descriptions 31 Port and Power Connectors 31 Status LEDs 32 Main Status L...

Page 5: ...2 G lite standards Each model supports three versions of the device The 10 user version supports up to 10 users The Plus version supports an unrestricted number of users The Extended version provides...

Page 6: ...book table appears 4 Click the New link in the upper right corner The new address configuration dialog box appears CLI CONVENTIONS The following conventions are used when presenting the syntax of a c...

Page 7: ...support case using the Case Manager link at http www juniper net support or call 1 888 314 JTAC within the United States or 1 408 745 9500 outside the United States If you find any errors or omissions...

Page 8: ...Preface 6 User s Guide...

Page 9: ...port on the NetScreen device Through an Ethernet connection from the Untrusted port on the NetScreen device Connecting the ADSL Port Connect the provided ADSL cable from the ADSL port on the NetScree...

Page 10: ...r service provider equipment If you are installing such a splitter yourself then connect the ADSL cable from the NetScreen device and the telephone line to the appropriate connectors for example data...

Page 11: ...llowing ways Connecting through one or more of the Trusted Ethernet ports on the NetScreen device Using a wireless interface on the NetScreen device Connecting Trusted Ethernet Ports The NetScreen 5GT...

Page 12: ...In addition to the NetScreen 5GT Wireless device s rack mount kit and equipment rack you also need the following Phillips head screwdriver Four screws that match the thread size of the equipment rack...

Page 13: ...ew the left and right tray plates to the equipment rack You can run power cords and Ethernet cables through the openings in the floor of the tray or out the depressions in the back wall You can also u...

Page 14: ...Chapter 1 Connecting the Device 12 User s Guide...

Page 15: ...owser To use the WebUI you must be on the same subnetwork as the NetScreen device To access the NetScreen 5GT Wireless device with the WebUI management application 1 Connect your workstation or your L...

Page 16: ...nOS Command Line Interface CLI commands in a Telnet session from your workstation 1 Connect your workstation or your LAN hub to Trust Ethernet port labeled 1 2 Start a Telnet client application to the...

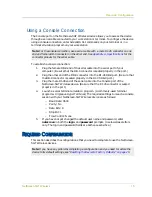
Page 17: ...onnector is seated properly in the port 4 Launch a serial terminal emulation program A commonly used terminal program is Hilgreave HyperTerminal The required settings to launch a console session with...

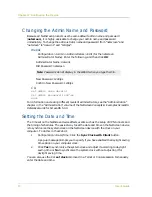
Page 18: ...n volume of the NetScreen Concepts Examples ScreenOS Reference Guide for ScreenOS 5 0 0 Setting the Date and Time The time set on the NetScreen device affects events such as the setup of VPN tunnels a...

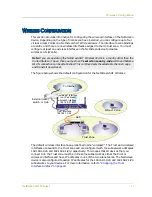
Page 19: ...nfigured with the subnetwork addresses 192 168 1 1 24 and 192 168 2 1 24 respectively This means that all devices that you connect to in the Trust zone must be in the same subnetwork as either the tru...

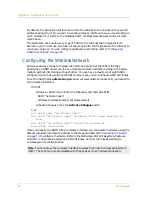
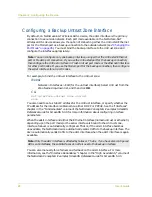
Page 20: ...of eight SSIDs configured on each device Once the SSID name is set you can configure SSID attributes To set the SSID name netscreen open allow wireless network connectivity and activate the wireless2...

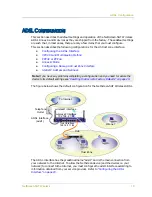
Page 21: ...The figure below shows the default configuration for the NetScreen 5GT Wireless ADSL The ADSL interface has the predefined name adsl1 and is the main connection from your network to the Internet To a...

Page 22: ...twork To do this you must obtain the following information from your service provider Virtual Path Identifier and Virtual Channel Identifier VPI VCI values Asynchronous Transfer Mode ATM Adaptation La...

Page 23: ...VCI values if one interface is configured for PPPoA and the other for PPPoE and they both use LLC multiplexing VPI VCI and Multiplexing Method Your service provider assigns a VPI VCI pair for each vi...

Page 24: ...ork PPPoE New Enter the following and then click OK PPPoE Instance poe1 Bound to Interface adsl1 select Username roswell Password area51 CLI set pppoe name poe1 username roswell password area51 set pp...

Page 25: ...lso specify that the device use the static IP address By default the NetScreen device acts as a PPPoE or PPPoA client and receives an IP address for the ADSL interface through negotiations with the PP...

Page 26: ...or configure the DHCP server on the Trust zone interface so that it provides the DNS server address to each computer To configure the DHCP server on the Trust interface to provide the DNS server addr...

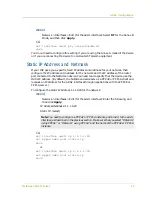
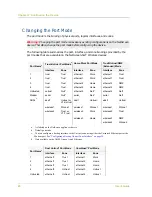
Page 27: ...dify policies refer to the Policies chapter in the Fundamentals volume of the NetScreen Concepts Examples ScreenOS Reference Guide for ScreenOS 5 0 0 Operational Mode The operational mode is the way a...

Page 28: ...ethernet1 Trust 3 trust Trust ethernet2 Home ethernet2 DMZ 4 trust Trust ethernet2 Home ethernet2 DMZ Untrusted untrust Null c c You can configure a backup interface to the Untrust zone using either...

Page 29: ...r yes Change port mode from trust untrust to home work will erase system configuration and reboot box Are you sure y n y Modem serial Null c serial Null c ADSL d adsl1 Untrust or V1 Untrust adsl1 Untr...

Page 30: ...about configuring interface parameters When the adsl1 interface and either the Ethernet interface named untrust or ethernet3 depending upon the port mode or the serial interface is bound to the Untru...

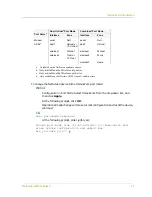
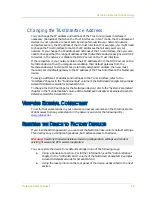
Page 31: ...assign a different IP address and netmask to the Trust interface refer to the Interfaces chapter in the Fundamentals volume of the NetScreen Concepts Examples ScreenOS Reference Guide for ScreenOS 5 0...

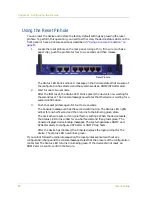
Page 32: ...message now states that the device is waiting for a second confirmation 3 Push the reset pinhole again for four to six seconds The Console message verifies the second confirmation The Status LED ligh...

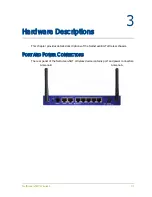
Page 33: ...Hardware Descriptions This chapter provides detailed descriptions of the NetScreen 5GT Wireless chassis PORT AND POWER CONNECTORS The rear panel of the NetScreen 5GT Wireless device contains port and...

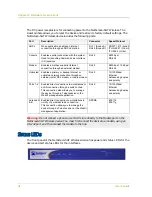
Page 34: ...rial Internet connection through an external modem RJ 45 9600 bps 115 Kbps RS 232 Untrusted Enables a primary or backup Internet or untrusted network connection through an external router DSL modem or...

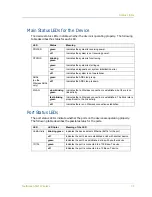
Page 35: ...ion error off Indicates the system is not operational ADSL on the Wireless ADSL only green Indicates the ADSL loop is up off Indicates the ADSL loop is down WLAN slow blinking green Indicates that a W...

Page 36: ...Chapter 3 Hardware Descriptions 34 User s Guide...

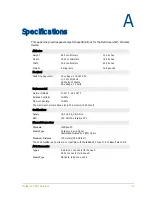
Page 37: ...12 Volts Environmental Normal altitude 0 40 C 32 105 F Relative humidity 10 90 Non condensing 10 90 The maximum normal altitude is 3 657 6 meters 12 000 feet Certifications Safety UL CUL CE CB A Tick...

Page 38: ...S In 2 Data Terminal Ready DTR In 3 Transmitted Data TD In 4 5 Signal Ground SGND N A 6 Received Data RD Out 7 Not Connected 8 Clear To Send CTS Out DB9 Signal Abbreviation DTE DCE RJ45 1 Data Carrier...

Page 39: ...G Guide Organization 3 L LEDs port status 33 Status 32 LLC encapsulation 20 Logical Link Control encapsulation 20 M managing device from specific host 25 microfilter 8 mounting device in rack 10 mult...

Page 40: ...Trust zone configuring interface address 29 U Untrust zone configuring backup interface 28 V VC multiplexing 20 verifying connectivity 29 Virtual Channel multiplexing 20 virtual circuit adding 20 Vir...

Reviews: