background image

CHAPTER 2

Hardware Component Overview

SRX220 Services Gateway Mini-Physical Interface Modules on page 9

SRX220 Services Gateway Boot Devices and Dual-Root Partitioning Scheme on page 9

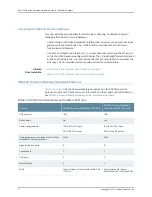
SRX220 Services Gateway Mini-Physical Interface Modules

The SRX220 Services Gateway has two slots for Mini-Physical Interface Modules
(Mini-PIMs).

A Mini-PIM is a network interface card that is installed on the services gateway to provide
physical connections to a LAN or WAN. The Mini-PIMs supported on the services gateway
are field-replaceable; they can be are removed and inserted into the device. You can
install Mini-PIMs into the two Mini-PIM slots on the front panel of the services gateway
chassis.

For more information about supported Mini-PIMs, including how to install and configure
Mini-PIMs, see the

SRX Series Services Gateways for the Branch Physical Interface Modules

Hardware Guide

.

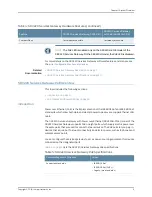
NOTE:

The Mini-PIMs available for the SRX220 Services Gateway do not

support hot swapping. You must power off the device and then unplug its
power cord or power supply adapter before removing or installing Mini-PIMs.

Related

Documentation

SRX220 Services Gateway Description on page 3

SRX220 Services Gateway Specifications on page 29

SRX220 Services Gateway Hardware Features on page 4

SRX220 Services Gateway Built-In Interfaces on page 13

SRX220 Services Gateway Boot Devices and Dual-Root Partitioning Scheme

This topic includes the following sections:

Boot Devices on page 10

Dual-Root Partitioning Scheme on page 10

9

Copyright © 2016, Juniper Networks, Inc.

Summary of Contents for SRX220

Page 1: ...SRX220 Services Gateway Hardware Guide for H Model Numbers Modified 2016 07 15 Copyright 2016 Juniper Networks Inc ...

Page 2: ...ation without notice SRX220 Services Gateway Hardware Guide for H Model Numbers Copyright 2016 Juniper Networks Inc All rights reserved The information in this document is current as of the date on the title page YEAR 2000 NOTICE Juniper Networks hardware and software products are Year 2000 compliant Junos OS has no known time related limitations through the year 2038 However the NTP application i...

Page 3: ...uction 5 PoE Classes and Power Ratings 6 Chapter 2 Hardware Component Overview 9 SRX220 Services Gateway Mini Physical Interface Modules 9 SRX220 Services Gateway Boot Devices and Dual Root Partitioning Scheme 9 Boot Devices 10 Dual Root Partitioning Scheme 10 Chapter 3 Chassis Description 11 SRX220 Services Gateway Front Panel and Back Panel Views 11 SRX220 Services Gateway Front Panel 11 SRX220 ...

Page 4: ...al Installation and Configuration Chapter 9 Installation Overview 45 Installation Overview for the SRX220 Services Gateway 45 Required Tools and Parts for Installing and Maintaining the SRX220 Services Gateway 46 SRX220 Services Gateway Autoinstallation Overview 47 Chapter 10 Unpacking the Services Gateway 49 Unpacking the SRX220 Services Gateway 49 Verifying Parts Received with the SRX220 Service...

Page 5: ...es Gateway to the CLI Locally 83 Connecting an SRX220 Services Gateway to the CLI Remotely 85 Viewing Factory Default Settings of the SRX220 Services Gateway 85 Performing Initial Software Configuration on the SRX220 Services Gateway Using the CLI 92 Performing Initial Software Configuration on the SRX220 Services Gateway Using the J Web Interface Setup Wizard 94 Establishing Basic Connectivity 94...

Page 6: ...ments Warnings and Guidelines 131 Chapter 21 Fire Safety Requirements 133 SRX220 Services Gateway Fire Safety Requirements 133 Chapter 22 Installation Safety Guidelines and Warnings 135 SRX220 Services Gateway Installation Safety Guidelines and Warnings 135 Chapter 23 Laser and LED Safety Guidelines and Warnings 141 SRX220 Services Gateway Laser and LED Safety Guidelines and Warnings 141 Laser and...

Page 7: ...als 153 SRX220 Services Gateway Compliance Statements for EMC Requirements 154 SRX220 Services Gateway Compliance Statements for Environmental Requirements 155 SRX220 Services Gateway Compliance Statements for Acoustic Noise 156 Part 7 Index Index 159 vii Copyright 2016 Juniper Networks Inc Table of Contents ...

Page 8: ...Copyright 2016 Juniper Networks Inc viii SRX220 Services Gateway Hardware Guide for H Model Numbers ...

Page 9: ...le Cable Connector 40 Part 3 Initial Installation and Configuration Chapter 12 Installing the Services Gateway 57 Figure 10 Installation of SRX220 Services Gateway in a Rack Attaching the Mounting Brackets 58 Figure 11 SRX220 Services Gateway Rack Installation Attaching the Power Supply Adapter Tray 58 Figure 12 Positioning the Power Supply in the Tray Standard Model 59 Figure 13 Positioning the P...

Page 10: ...20 Services Gateway 83 Part 5 Replacing Components Chapter 19 Contacting Customer Support and Returning Components 117 Figure 21 Location of SRX220 Serial Number and Agency Labels 120 Part 6 Safety and Regulatory Compliance Information Chapter 20 General Safety Guidelines and Warnings 125 Figure 22 Placing a Component into an Electrostatic Bag 130 Copyright 2016 Juniper Networks Inc x SRX220 Servi...

Page 11: ...fications Chapter 6 Planning and Preparing the Site 27 Table 12 Site Preparation Checklist for the SRX220 Services Gateway Installation 27 Table 13 SRX220 Services Gateway Specifications 30 Table 14 SRX220 Services Gateway Cabinet Requirements 31 Table 15 Rack Requirements for the Services Gateway 32 Table 16 Clearance Requirements for the Services Gateway 33 Chapter 7 Power Requirements and Speci...

Page 12: ...al Devices 69 Table 31 Port Settings for Connecting to the CLI at User End 71 Chapter 16 Performing Initial Configuration 77 Table 32 Mapping of the Chassis Cluster Ports on an SRX220 Services Gateway 79 Table 33 Connecting to the Console Port on an SRX220 Services Gateway 83 Table 34 Port Settings for Connecting to the Console Port 84 Table 35 Required Setup Fields 96 Table 36 Optional Setup Fiel...

Page 13: ...nformation in the latest release notes differs from the information in the documentation follow the product Release Notes Juniper Networks Books publishes books by Juniper Networks engineers and subject matter experts These books go beyond the technical documentation to explore the nuances of network architecture deployment and administration The current list can be viewed at http www juniper net ...

Page 14: ...the configure command user host configure Represents text that you type Bold text like this user host show chassis alarms No alarms currently active Represents output that appears on the terminal screen Fixed width text like this A policy term is a named structure that defines match conditions and actions Junos OS CLI User Guide RFC 1997 BGP Communities Attribute Introduces or emphasizes important...

Page 15: ...re brackets edit routing options static route default nexthop address retain Identifies a level in the configuration hierarchy Indention and braces Identifies a leaf statement at a configuration hierarchy level semicolon GUI Conventions In the Logical Interfaces box select All Interfaces To cancel the configuration click Cancel Represents graphical user interface GUI items you click or select Bold...

Page 16: ...f service portal called the Customer Support Center CSC that provides you with the following features Find CSC offerings http www juniper net customers support Search for known bugs http www2 juniper net kb Find product documentation http www juniper net techpubs Find solutions and answer questions using our Knowledge Base http kb juniper net Download the latest versions of software and review rel...

Page 17: ...For international or direct dial options in countries without toll free numbers see http www juniper net support requesting support html xvii Copyright 2016 Juniper Networks Inc About the Documentation ...

Page 18: ...Copyright 2016 Juniper Networks Inc xviii SRX220 Services Gateway Hardware Guide for H Model Numbers ...

Page 19: ...rview System Overview on page 3 Hardware Component Overview on page 9 Chassis Description on page 11 Cooling System Description on page 21 Power System Description on page 23 1 Copyright 2016 Juniper Networks Inc ...

Page 20: ...Copyright 2016 Juniper Networks Inc 2 SRX220 Services Gateway Hardware Guide for H Model Numbers ...

Page 21: ...ple interfaces that support WAN and LAN connectivity and Power over Ethernet PoE The device provides Internet Protocol Security IPsec virtual private network VPN and firewall services for small and medium sized companies and enterprise branch and remote offices SRX220 Services Gateway Models Table 3 on page 3 lists the SRX220 Services Gateway models with 1 GB memory For information on the models w...

Page 22: ...ices Gateway Hardware Features on page 4 SRX220 Services Gateway Hardware Features Table 4 on page 4 lists the hardware features supported on the SRX220 Services Gateway models with 1 GB memory For information on the models with 2 GB memory see SRX220 Services Gateway Hardware Guide for H2 Model Numbers Table 4 SRX220 Services Gateway Hardware Features SRX220 Services Gateway with PoE SRX220H POE ...

Page 23: ... Power over Ethernet PoE is the implementation of the IEEE 802 3af and IEEE 802 3at standards which allow both data and electric power to pass over a copper Ethernet LAN cable The SRX220 Services Gateway with Power over Ethernet SRX220H POE model of the SRX220 Services Gateway supports PoE on eight ports which supply electric power over the same ports that are used to connect network devices The P...

Page 24: ...evice is classified based on the maximum power that it draws across all input voltages and operational modes When the class based power management mode is configured on the services gateway power is allocated by taking into account the maximum power ratings defined for the different classes of devices Table 6 on page 6 lists the classes and their power ratings as specified by the IEEE 802 3af stan...

Page 25: ...ns on page 29 SRX220 Services Gateway Front Panel and Back Panel Views on page 11 SRX220 Services Gateway Built In Interfaces on page 13 SRX220 Services Gateway LEDs on page 16 SRX220 Services Gateway Mini Physical Interface Modules on page 9 7 Copyright 2016 Juniper Networks Inc Chapter 1 System Overview ...

Page 26: ...Copyright 2016 Juniper Networks Inc 8 SRX220 Services Gateway Hardware Guide for H Model Numbers ...

Page 27: ...ices gateway chassis For more information about supported Mini PIMs including how to install and configure Mini PIMs see the SRX Series Services Gateways for the Branch Physical Interface Modules Hardware Guide NOTE The Mini PIMs available for the SRX220 Services Gateway do not support hot swapping You must power off the device and then unplug its power cord or power supply adapter before removing...

Page 28: ...20 Services Gateway powers up it tries to boot the Junos OS from the default storage media If the device fails to boot from the default storage media it tries to boot from the alternate storage media With the dual root partitioning scheme the SRX220 Services Gateway first tries to boot the Junos OS from the primary root partition and then from the backup root partition on the default storage media...

Page 29: ... Services Gateway Front Panel on page 11 SRX220 Services Gateway Back Panel on page 12 SRX220 Services Gateway Front Panel Figure 1 on page 11 shows the front panel of the SRX220 Services Gateway models SRX220H and SRX220H POE Figure 1 SRX220 Services Gateway Front Panel g037600 Table 7 on page 11 lists the front panel components of the services gateway NOTE The numbers in Figure 1 on page 11 corr...

Page 30: ... SRX220 Services Gateway Boot Devices and Dual Root Partitioning Scheme on page 9 SRX220 Services Gateway Back Panel Figure 2 on page 12 shows the back panel of the SRX220 Services Gateway Figure 2 SRX220 Services Gateway Back Panel g037616 1 3 4 2 1 1 Table 8 on page 12 lists the back panel components of the SRX220 Services Gateway NOTE The numbers in Figure 2 on page 12 correspond to the numbers...

Page 31: ...ces Gateway Specifications on page 29 SRX220 Services Gateway Built In Interfaces on page 13 SRX220 Services Gateway LEDs on page 16 SRX220 Services Gateway Boot Devices and Dual Root Partitioning Scheme on page 9 SRX220 Services Gateway Cooling System on page 21 SRX220 Services Gateway Power Supply on page 23 SRX220 Services Gateway PoE Overview on page 5 SRX220 Services Gateway Built In Interfac...

Page 32: ... and autosensing All Gigabit Ethernet ports support Power over Ethernet on the PoE model of the SRX220 Services Gateway Gigabit Ethernet The USB ports can be used as follows To support a USB storage device that functions as a secondary boot device in case of CompactFlash failure on startup if the USB storage device is installed and configured NOTE You must install and configure the USB storage dev...

Page 33: ...ini PIMs Mini Physical Interface Module Mini PIM CAUTION If you are having a problem running a Juniper Networks device that is using a third party optic or cable the Juniper Networks Technical Assistance Center JTAC can help you diagnose the source of the problem Your JTAC engineer might recommend that you check the third party optic or cable and potentially replace it with an equivalent Juniper N...

Page 34: ...he device is functioning normally The Alarm LED has the following indicator colors Red indicates a major alarm Amber indicates a minor alarm Off indicates that the device is starting up NOTE When the system is up and running if the Alarm LED is off it indicates that no alarms are present on the device Alarm LED The Status LED shows whether the device is starting up is functioning normally or has f...

Page 35: ...s the following indicator colors Green indicates that the device is functioning normally Amber indicates that the Power button has been pressed and quickly released The device is gracefully shutting down Off indicates that the device is not receiving power Power LED The HA LED shows whether high availability is enabled on the device The HA LED has the following indicator colors Green indicates tha...

Page 36: ...is active Data communication is taking place Blinking Green TX RX LINK LED 1 Link is active No data communication is taking place On steadily Link is inactive Off Unlit Power over Ethernet PoE is on and the connected power device is receiving power On steadily Green PoE LED 2 PoE is on but the connected power device is not receiving power device fault or not enough power On steadily Yellow PoE is ...

Page 37: ...teway Specifications on page 29 SRX220 Services Gateway Front Panel and Back Panel Views on page 11 SRX220 Services Gateway Built In Interfaces on page 13 SRX220 Services Gateway Boot Devices and Dual Root Partitioning Scheme on page 9 SRX220 Services Gateway Cooling System on page 21 SRX220 Services Gateway Power Supply on page 23 19 Copyright 2016 Juniper Networks Inc Chapter 3 Chassis Descripti...

Page 38: ...Copyright 2016 Juniper Networks Inc 20 SRX220 Services Gateway Hardware Guide for H Model Numbers ...

Page 39: ...ir through the back of the chassis The airflow produced by the fans keeps device components within the acceptable temperature range Figure 5 on page 21 shows the airflow for the SRX220 Services Gateway Figure 5 Airflow Through the SRX220 Services Gateway Chassis g037603 Related Documentation SRX220 Services Gateway Specifications on page 29 SRX220 Services Gateway Front Panel and Back Panel Views ...

Page 40: ...Copyright 2016 Juniper Networks Inc 22 SRX220 Services Gateway Hardware Guide for H Model Numbers ...

Page 41: ...o the services gateway Figure 6 on page 23shows the label for the 54 V power supply Figure 6 SRX220 Services Gateway 200 W 54 V Power Supply Related Documentation Related Documentation SRX220 Services Gateway Specifications on page 29 SRX220 Services Gateway Front Panel and Back Panel Views on page 11 SRX220 Services Gateway Boot Devices and Dual Root Partitioning Scheme on page 9 SRX220 Services ...

Page 42: ... Monitoring the SRX220 Services Gateway Power System on page 110 Copyright 2016 Juniper Networks Inc 24 SRX220 Services Gateway Hardware Guide for H Model Numbers ...

Page 43: ... Site Planning and Specifications Planning and Preparing the Site on page 27 Power Requirements and Specifications on page 35 Cable Specifications and Pinouts on page 39 25 Copyright 2016 Juniper Networks Inc ...

Page 44: ...Copyright 2016 Juniper Networks Inc 26 SRX220 Services Gateway Hardware Guide for H Model Numbers ...

Page 45: ...asks you need to perform when preparing a site for installing the SRX220 Services Gateway Table 12 Site Preparation Checklist for the SRX220 Services Gateway Installation Notes Date Performed By Additional Information Item or Task Environment SRX220 Services Gateway Specifications on page 29 Verify that environmental factors such as temperature and humidity do not exceed device tolerances Power SR...

Page 46: ...mum requirements Verify that you have the required hardware to proceed with the installation Cables Interface Cable and Wire Specifications for the SRX220 Services Gateway on page 39 Acquire cables and connectors Review the maximum distance allowed for each cable Choose the length of cable based on the distance between the hardware components being connected Plan the cable routing and management R...

Page 47: ...r reduction in the flow of air across internal components NOTE Install the device only in restricted areas such as dedicated equipment rooms and equipment closets in accordance with Articles 110 16 110 17 and 110 18 of the National Electrical Code ANSI NFPA 70 Related Documentation SRX220 Services Gateway Safety Requirements Warnings and Guidelines on page 131 SRX220 Services Gateway Cabinet Requi...

Page 48: ...ormal operation ensured in temperature range of 32 F 0 C to 104 F 40 C Nonoperating storage temperature in shipping container 40 F 40 C to 158 F 70 C Temperature SRX220 Services Gateway without PoE and without Mini PIMs 126 BTU hour 37 W SRX220 Services Gateway with two Mini PIMs and without PoE 205 BTU hour 60 W SRX220 Services Gateway with PoE and without Mini PIMs 327 BTU hour 96 W SRX220 Servi...

Page 49: ... horizontally in the cabinet Cabinet size The cabinet is at least 1 U 1 75 in or 4 5 cm high The outer edges of the mounting brackets extend the width of the chassis to 19 in 48 3 cm and the front of the chassis extends approximately 0 5 in 1 27 cm beyond the mounting brackets The minimum total clearance inside the cabinet is 30 7 in 78 cm between the inside of the front door and the inside of the...

Page 50: ...ackets The maximum permissible ambient temperature is 40 C Rack requirements The holes within each rack set are spaced at 1 U 1 75 in 4 5 cm The device can be mounted in any rack that provides holes or hole patterns spaced at 1 U 1 75 in 4 5 cm increments The mounting brackets and front mount flanges used to attach the chassis to a rack are designed to fasten to holes spaced at rack distances of 1...

Page 51: ...arance requirements for maintaining the optimum airflow and the distances for facilitating easy maintenance of the device Table 16 Clearance Requirements for the Services Gateway Requirement for Clearance Recommended Clearance Location Space for service personnel to remove and install hardware components NOTE More space is required for installing and removing Mini PIMs 2 5 in 6 35 cm Front of the ...

Page 52: ...stalling the SRX220 Services Gateway on page 29 SRX220 Services Gateway Cabinet Requirements on page 31 SRX220 Services Gateway Rack Requirements on page 32 Copyright 2016 Juniper Networks Inc 34 SRX220 Services Gateway Hardware Guide for H Model Numbers ...

Page 53: ...l surge suppression devices CAUTION For devices with AC power supplies an external surge protective device SPD must be used at the AC power source Table 17 Site Electrical Wiring Guidelines for the Services Gateway Guideline Site Wiring Factor To ensure that signaling functions optimally Install wires correctly Improperly installed wires can emit radio interference Do not exceed the recommended di...

Page 54: ...ice Electromagnetic Compatibility EMC CAUTION To comply with intrabuilding lightning surge requirements the intrabuilding wiring must be shielded The shielding for the wiring must be grounded at both ends Related Documentation General Site Guidelines for Installing the SRX220 Services Gateway on page 29 SRX220 Services Gateway Electrical and Power Requirements on page 36 SRX220 Services Gateway Po...

Page 55: ...C input line frequency 1 5 A maximum for standard model without PoE 2 5 A maximum for PoE model AC system current rating WARNING The AC power cord for the services gateway is intended for use with the device only and not for any other use Related Documentation SRX220 Services Gateway Power Supply on page 23 SRX220 Services Gateway Site Electrical Wiring Guidelines on page 35 SRX220 Services Gatewa...

Page 56: ...Copyright 2016 Juniper Networks Inc 38 SRX220 Services Gateway Hardware Guide for H Model Numbers ...

Page 57: ...J 45 6 ft 1 83 m One 6 ft 1 83 m length with DB 9 RJ 45 connectors RS 232 EIA 232 serial cable Console port RJ 45 328 ft 100 m One 15 ft 4 57 m length with RJ 45 RJ 45 connectors CAT 5e Category 5 cable or equivalent suitable for 100BASE T operation Ethernet port Related Documentation RJ 45 Connector Pinouts for the SRX220 Services Gateway Ethernet Port on page 39 RJ 45 Connector Pinouts for the S...

Page 58: ...ector Pinouts for the SRX220 Services Gateway Console Port Figure 9 on page 40 shows the RJ 45 connector pinouts for the console port Figure 9 Console Cable Connector Table 21 on page 40 describes the RJ 45 connector pinouts for the console port Table 21 RJ 45 Connector Pinouts for the Services Gateway Console Port Description Signal Pin Request to Send RTS 1 Data Terminal Ready DTR 2 Transmit Dat...

Page 59: ...RXD 6 Data Set Ready DSR DCD 7 Clear to Send CTS 8 Related Documentation Interface Cable and Wire Specifications for the SRX220 Services Gateway on page 39 RJ 45 Connector Pinouts for the SRX220 Services Gateway Ethernet Port on page 39 41 Copyright 2016 Juniper Networks Inc Chapter 8 Cable Specifications and Pinouts ...

Page 60: ...Copyright 2016 Juniper Networks Inc 42 SRX220 Services Gateway Hardware Guide for H Model Numbers ...

Page 61: ...he Mounting Hardware on page 53 Installing the Services Gateway on page 57 Grounding the SRX220 Services Gateway on page 65 Connecting the SRX220 Services Gateway to External Devices on page 69 Providing Power to the SRX220 Services Gateway on page 73 Performing Initial Configuration on page 77 43 Copyright 2016 Juniper Networks Inc ...

Page 62: ...Copyright 2016 Juniper Networks Inc 44 SRX220 Services Gateway Hardware Guide for H Model Numbers ...

Page 63: ...0 Services Gateway General Safety Guidelines and Warnings on page 127 Review the relevant safety guidelines 1 Site Preparation Checklist for the SRX220 Services Gateway on page 27 Verify that you have prepared your site for the installation of the services gateway using the checklist 2 Unpacking the SRX220 Services Gateway on page 49 Verifying Parts Received with the SRX220 Services Gateway on pag...

Page 64: ... required for installing and maintaining the SRX220 Services Gateway Table 23 Required Tools and Parts for Installing and Maintaining the SRX220 Services Gateway Related Topic Tools and Parts Task Installing the SRX220 Services Gateway in a Rack on page 57 Installing the SRX220 Services Gateway on a Wall on page 60 Phillips screwdrivers numbers 1 and 3 Cable ties Installing the SRX220 Services Gat...

Page 65: ...y multiple services gateways from a central location in the network If you are setting up many devices autoinstallation can help automate the configuration process by loading configuration files onto new or existing devices automatically over the network You can use either J Web or the command line interface CLI to configure a device for autoinstallation For the autoinstallation process to work yo...

Page 66: ... Powering On and Powering Off the SRX220 Services Gateway on page 74 Copyright 2016 Juniper Networks Inc 48 SRX220 Services Gateway Hardware Guide for H Model Numbers ...

Page 67: ... Gateway on page 49 3 Store the shipping box and packing material in case you need to return or move the device at a later time Related Documentation Required Tools and Parts for Installing and Maintaining the SRX220 Services Gateway on page 46 Verifying Parts Received with the SRX220 Services Gateway on page 49 Preparing the SRX220 Services Gateway for Rack Mount and Wall Mount Installation on pa...

Page 68: ...ices Gateway For standard model SRX220 Services Gateway with 8xGE ports 2xMini PIM slot For PoE model SRX220 Services Gateway with 8xGE PoE ports 120 W total 2xMini PIM slot 1 Power supply adapter 60 W for standard model 200 W for PoE model 1 3 prong power cord 1 DB 9 to RJ 45 adapter and straight through cable 7 feet Table 25 Accessory Parts List for the SRX220 Services Gateway Quantity Part 1 Ju...

Page 69: ...ed with the device You must order them separately Contact your Juniper Networks customer service representative for more information Related Documentation Required Tools and Parts for Installing and Maintaining the SRX220 Services Gateway on page 46 Unpacking the SRX220 Services Gateway on page 49 Preparing the SRX220 Services Gateway for Rack Mount and Wall Mount Installation on page 53 51 Copyri...

Page 70: ...Copyright 2016 Juniper Networks Inc 52 SRX220 Services Gateway Hardware Guide for H Model Numbers ...

Page 71: ...all installation of the SRX220 Services Gateway must be ordered separately Contact your Juniper Networks customer service representative for more information Related Documentation Unpacking the SRX220 Services Gateway on page 49 Clearance Requirements for Airflow and Hardware Maintenance of the SRX220 Services Gateway on page 33 Preparing the SRX220 Services Gateway for Rack Mount Installation on ...

Page 72: ...for the SRX220 Services Gateway Rack mounting brackets Screws Power supply adapter tray with screws NOTE The rack mounting kit is not shipped with the device and must be ordered separately Related Documentation Clearance Requirements for Airflow and Hardware Maintenance of the SRX220 Services Gateway on page 33 Unpacking the SRX220 Services Gateway on page 49 Verifying Parts Received with the SRX2...

Page 73: ...y chassis from the shipping box Verify that you have the following parts available in your wall mounting kit to mount the SRX220 Services Gateway on a wall Wall mounting brackets Screws NOTE The wall mounting kit is not shipped with the device and must be ordered separately Related Documentation Unpacking the SRX220 Services Gateway on page 49 Preparing the SRX220 Services Gateway for Rack Mount I...

Page 74: ...Copyright 2016 Juniper Networks Inc 56 SRX220 Services Gateway Hardware Guide for H Model Numbers ...

Page 75: ...are acceptable including four post telco racks enclosed cabinets and open frame racks For more information about the type of rack or cabinet into which theSRX220 Services Gateway can be installed see SRX220 Services Gateway Rack Requirements on page 32 NOTE The rack mounting kit is not shipped with the device and must be ordered separately NOTE If you are installing multiple devices in one rack in...

Page 76: ...shown in Figure 10 on page 58 3 Orient the power supply tray as shown in Figure 11 on page 58 Figure 11 SRX220 Services Gateway Rack Installation Attaching the Power Supply Adapter Tray g037617 4 Use a number 1 Phillips screwdriver to install the screws that secure the power supply tray to the chassis as shown in Figure 11 on page 58 5 Place the power supply adapter in the tray as shown in Figure ...

Page 77: ...and Figure 13 on page 59 Also bundle the DC power cable neatly and secure it to the cable tie loops on the tray and on the services gateway as shown 7 Have one person grasp the sides of the device lift it and position it in the rack 8 Align the bottom hole in each mounting bracket with a hole in each rack rail as shown in Figure 14 on page 60 making sure the chassis is level 59 Copyright 2016 Juni...

Page 78: ...screws on the opposite side and that the device is level Related Documentation SRX220 Services Gateway General Safety Guidelines and Warnings on page 127 Required Tools and Parts for Installing and Maintaining the SRX220 Services Gateway on page 46 Preparing the SRX220 Services Gateway for Rack Mount Installation on page 53 Installing the SRX220 Services Gateway on a Wall on page 60 Installing the...

Page 79: ...page 61 Table 28 SRX220 Services Gateway Wall Installation Parts Quantity Part Number 2 Mounting bracket 1 8 Screw 2 3 Use a number 1 Phillips screwdriver to install the screws that secure the mounting brackets to the chassis 4 If you are using wall anchors to support the chassis install two pairs of anchors on the wall spaced apart equal to the width of chassis with mounting brackets attached 5 H...

Page 80: ...ed on your requirements They enable you to easily add or change physical interfaces on a device The SRX220 Services Gateway has two Mini PIM slots Each slot is covered with a blank faceplate to maintain proper airflow through the services gateway Before installing a Mini PIM in a slot you must remove the blank faceplate from the slot See the SRX Series Services Gateways for the Branch Physical Int...

Page 81: ...llation Safety Guidelines and Warnings on page 135 Installing the SRX220 Services Gateway on a Wall on page 60 Installing the SRX220 Services Gateway in a Rack on page 57 63 Copyright 2016 Juniper Networks Inc Chapter 12 Installing the Services Gateway ...

Page 82: ...Copyright 2016 Juniper Networks Inc 64 SRX220 Services Gateway Hardware Guide for H Model Numbers ...

Page 83: ...ctly attached lug can damage the device for example by causing a short circuit To ground the device before connecting power you connect the grounding cable to earth ground and then attach the lug on the cable to the chassis grounding point with the screw Table 29 on page 65 lists the specifications of the grounding cable used with the device Table 29 Grounding Cable Specifications for the Services...

Page 84: ... to the chassis grounding points using one M3 screw Table 30 on page 66 lists the specifications of the grounding cable used with the device Table 30 Grounding Cable Specifications for the Services Gateway Specification Grounding Requirement 14 AWG single strand wire cable Grounding cable Up to 4 A Amperage of grounding cable Ring type vinyl insulated TV14 6R lug or equivalent Grounding lug CAUTIO...

Page 85: ...uch or block access to the services gateway components and that it does not cause create a tripping hazard NOTE The device should be permanently connected to ground during normal operation Related Documentation Connecting the SRX220 Services Gateway to the Power Supply on page 73 Connecting and Organizing Interface Cables for the SRX220 Services Gateway on page 69 SRX220 Services Gateway Grounding...

Page 86: ...Copyright 2016 Juniper Networks Inc 68 SRX220 Services Gateway Hardware Guide for H Model Numbers ...

Page 87: ...vice To connect and organize an interface cable for the device 1 Have ready a length of the type of cable used by the interface 2 Insert the cable connector into the cable connector port on the interface faceplate 3 Arrange network cables as follows to prevent them from dislodging or developing stress points Secure cables so that they are not supporting their own weight as they hang to the floor P...

Page 88: ...green NOTE Most modems have an RS 232 DB 25 connector You must separately purchase an adapter to connect your modem to the RJ 45 to DB 9 adapter and the Ethernet cable supplied with the services gateway Related Documentation Configuring the Modem at the SRX220 Services Gateway End on page 98 Connecting to the CLI at the User End for the SRX220 Services Gateway on page 70 SRX220 Services Gateway So...

Page 89: ...ices gateway by entering ATDT remote modem number For example if the number of the modem connected to the console port on the services gateway is 0013033033030 enter ATDT 0013033033030 The services gateway login prompt appears 7 Log in as the user root No password is required at initial connection but you must assign a root password before committing any configuration settings Related Documentatio...

Page 90: ...Copyright 2016 Juniper Networks Inc 72 SRX220 Services Gateway Hardware Guide for H Model Numbers ...

Page 91: ... to an ESD point and place the other end of the strap around your bare wrist To connect the device to the power supply 1 Plug the DC connector end of the power cable into the power connector on the back of the device see Figure 18 on page 73 2 Secure the DC connector end of the power cable in the power connector using a plastic cable tie as shown in Figure 18 on page 73 3 Plug the AC adapter end o...

Page 92: ...ge 75 3 Resetting the SRX220 Services Gateway on page 76 Powering On the SRX220 Services Gateway To power on the services gateway 1 Ensure that you have connected the power supply to the device 2 Insert the plug of the power supply adapter into an AC power source receptacle 3 Turn on the power to the AC power receptacle and press the Power button The device starts automatically as the power supply...

Page 93: ...evice unplug the AC power cord or switch off the power source After powering off a power supply wait at least 10 seconds before turning it back on After powering on a power supply wait at least 10 seconds before turning it off The Power button on the services gateway is a standby power switch If you press the Power button to power off the device when it is still connected to a power source 12 V st...

Page 94: ...identally NOTE Pressing and holding the Reset Config button for 15 seconds or more deletes all configurations on the device and loads and commits the default factory configuration Related Documentation Connecting the SRX220 Services Gateway to the Power Supply on page 73 Grounding the SRX220 Services Gateway on page 66 Using the Reset Config Button on the SRX220 Services Gateway on page 112 Copyri...

Page 95: ...ay Software Configuration Overview This topic includes the following sections Preparing the SRX220 Services Gateway for Configuration on page 77 Understanding the Factory Default Configuration on page 78 Understanding Built In Ethernet Ports and Initial Configuration on page 78 Mapping the Chassis Cluster Ports on page 79 Understanding Management Access on page 80 Preparing the SRX220 Services Gat...

Page 96: ...nfigured A DHCP server is active on interfaces ge 0 0 1 through ge 0 0 7 The DHCP server assigns IP addresses in the 192 168 1 0 24 network to connected devices The default configuration also includes the following security configuration Two security zones are created trust and untrust Interface ge 0 0 0 is in the untrust zone while interfaces ge 0 0 1 through ge 0 0 7 are in the trust zone A secu...

Page 97: ...ort 0 7 Connect to the other device in the chassis cluster When you enable chassis clustering the control interface between the two devices fxp1 is automatically created on this port You must also make another connection between the two devices for the fabric link You can use any available Gigabit Ethernet port for this connection You must configure the interface you choose as the fabric link For ...

Page 98: ...the SSH client must be able to access the passphrase used to decrypt the key For information about obtaining SSH software see http www ssh com and http www openssh com If you are using a Junos XML protocol server to configure and monitor devices you can activate cleartext access on the device to allow unencrypted text to be sent directly over a Transmission Control Protocol TCP connection without ...

Page 99: ...et port To enable communication between the management device and the services gateway ports 0 1 through 0 7 are preconfigured with the IP address 192 168 1 1 and use DHCP to assign an IP address in the 192 168 1 0 24 network to any connected device To connect to the Ethernet port 1 Ensure that the IP address for the Ethernet port on the management device is configured in one of the following ways...

Page 100: ... You can enable HTTP or HTTPS access on specific interfaces and ports as needed The services gateway uses the SSL protocol to provide secure management of services gateways through the J Web SSL uses public private key technology that requires a paired private key and an authentication certificate for providing the SSL service SSL encrypts communication between your device and the Web browser with...

Page 101: ...3 Connecting to the Console Port on an SRX220 Services Gateway Component Number Console port on services gateway 1 RJ 45 cable 2 DB 9 to RJ 45 adapter 3 Serial port on management device 4 NOTE Figure 20 on page 83 shows a connection to a local management device A remote connection to the services gateway through a modem requires the cable and connector shown provided in the services gateway access...

Page 102: ...e the port settings as shown in Table 34 on page 84 Table 34 Port Settings for Connecting to the Console Port Value Port Settings 9600 Bits per second 8 Data bits None Parity 1 Stop bits None Flow control 9 Power on the services gateway by pressing the Power button on the front panel 10 Verify that the Power LED on the front panel turns green The terminal emulation screen on your management device...

Page 103: ...les ls The following sample output displays the list of factory default configuration files j series defaults conf srx210h defaults conf jsrxsme series defaults conf srx210h factory conf jsrxsme series factory conf srx210h poe defaults conf junos defaults conf srx210h poe factory conf junos factory conf srx210he defaults conf junos fips defaults conf srx210he factory conf ptx series defaults conf ...

Page 104: ...h2 poe defaults conf srx110h2 vb defaults conf srx240h2 poe factory conf srx110h2 vb factory conf srx550 6xge factory conf srx210 2xge 6xfe factory conf srx550 defaults conf srx210 poe 2xge 6xfe factory conf srx550 factory conf srx210b defaults conf srx650 4xge factory conf srx210b factory conf srx650 defaults conf srx210be defaults conf srx650 factory conf srx210be factory conf 5 View the require...

Page 105: ...lan 0 xnm clear text name server 208 67 222 222 208 67 220 220 syslog archive size 100k files 3 interfaces ge 0 0 0 unit 0 ge 0 0 1 unit 0 family ethernet switching vlan members vlan trust ge 0 0 2 unit 0 family ethernet switching vlan members vlan trust ge 0 0 3 unit 0 family ethernet switching vlan members vlan trust 87 Copyright 2016 Juniper Networks Inc Chapter 16 Performing Initial Configurat...

Page 106: ... 0 family ethernet switching vlan members vlan trust ge 0 0 7 unit 0 family ethernet switching vlan members vlan trust ge 0 0 8 unit 0 family ethernet switching vlan members vlan trust ge 0 0 9 unit 0 family ethernet switching vlan members vlan trust Copyright 2016 Juniper Networks Inc 88 SRX220 Services Gateway Hardware Guide for H Model Numbers ...

Page 107: ...12 unit 0 family ethernet switching vlan members vlan trust ge 0 0 13 unit 0 family ethernet switching vlan members vlan trust ge 0 0 14 unit 0 family ethernet switching vlan members vlan trust ge 0 0 15 unit 0 family ethernet switching vlan members vlan trust 89 Copyright 2016 Juniper Networks Inc Chapter 16 Performing Initial Configuration ...

Page 108: ...source nat interface screen ids option untrust screen icmp ping death ip source route option tear drop tcp syn flood alarm threshold 1024 attack threshold 200 source threshold 1024 destination threshold 2048 timeout 20 land zones security zone trust host inbound traffic system services all protocols all Copyright 2016 Juniper Networks Inc 90 SRX220 Services Gateway Hardware Guide for H Model Numbe...

Page 109: ...n address any application any then permit vlans vlan trust vlan id 3 l3 interface vlan 0 protocols stp Related Documentation SRX220 Services Gateway Software Configuration Overview on page 77 SRX220 Services Gateway Autoinstallation Overview on page 47 Performing Initial Software Configuration on the SRX220 Services Gateway Using the CLI on page 92 91 Copyright 2016 Juniper Networks Inc Chapter 16...

Page 110: ...t root set system root authentication plain text password New password password Retype new password password 6 Configure an administrator account on the device edit root setsystemloginuseradminclasssuper userauthenticationplain text password 7 Commit the configuration to activate it on the device edit root commit 8 Log in as the administrative user you configured in Step 6 9 Configure the name of ...

Page 111: ...n set security nat source rule set interface nat rule rule1 match source address 0 0 0 0 0 destination address 0 0 0 0 0 admin setsecuritynatsourcerule setinterface natrulerule1thensource natinterface 15 Check the configuration for validity edit admin commit check configuration check succeeds 16 Commit the configuration to activate it on the device edit admin commit commit complete 17 Optionally d...

Page 112: ... Overview on page 82 Performing Initial Software Configuration on the SRX220 Services Gateway Using the J Web Interface Setup Wizard This topic includes the following sections Establishing Basic Connectivity on page 94 Configuring Basic System Properties on page 96 Establishing Basic Connectivity To establish basic connectivity 1 Connect an Ethernet cable from any of the ports labeled 0 1 through ...

Page 113: ...illa Firefox version 3 0 or later b In the Address box enter http 192 168 1 1 c Specify the default username as root Do not enter any value in the Password box d Press Enter The J Web Setup Wizard page opens 5 Use the wizard to configure the basic settings such as hostname domain name and root password for your services gateway The upper left area of the wizard page shows where you are in the setu...

Page 114: ...continue Introduction Type the name of the services gateway Hostname Configure System Identification Type the name of the network or subnetwork to which the services gateway belongs Domain name Type the password that user root will use to log in to the device Root password Retype the root password Verify root password Specify the tab that you want to appear when J Web starts J Web starting page op...

Page 115: ...you configure the basic setup the Setup wizard is no longer available unless you reset the device to the factory default and reboot it To make changes to the configuration use the J Web interface or the CLI You can use other wizards to configure basic firewall policies VPN settings and NAT rules Choose Configure Wizards to use the available wizards Use the J Web interface or the CLI for more exten...

Page 116: ... 37 on page 98 Table 37 Port Settings for Configuring the Modem on the Services Gateway End Value Port Setting 9600 Bits per second 8 Data bits None Parity 1 Stop bits None Flow control 5 In the HyperTerminal window enter AT For more information on the AT commands see the following topics Initial Configuration for Security Devices Monitoring and Troubleshooting for Security Devices An OK response ...

Page 117: ...must configure the services gateway You can configure PoE using the Junos OS command line interface CLI For more details on configuring PoE see Interfaces for Security Devices Related Documentation SRX220 Services Gateway Description on page 3 SRX220 Services Gateway Specifications on page 29 SRX220 Services Gateway Front Panel and Back Panel Views on page 11 SRX220 Services Gateway Built In Inter...

Page 118: ...Copyright 2016 Juniper Networks Inc 100 SRX220 Services Gateway Hardware Guide for H Model Numbers ...

Page 119: ...PART 4 Maintaining and Troubleshooting Components Maintaining Components on page 103 Troubleshooting Components on page 105 101 Copyright 2016 Juniper Networks Inc ...

Page 120: ...Copyright 2016 Juniper Networks Inc 102 SRX220 Services Gateway Hardware Guide for H Model Numbers ...

Page 121: ...nd on the Mini Physical Interface Module Mini PIM that you are using Routine Maintenance The services gateway cooling system works to maintain an optimal temperature for the device If the fan controller fails the device temperature will exceed the maximum working temperature and the device will fail Ensure that you maintain the recommended clearances behind the device to enable the cooling system ...

Page 122: ...ervices Gateway to the Power Supply on page 73 Clearance Requirements for Airflow and Hardware Maintenance of the SRX220 Services Gateway on page 33 Copyright 2016 Juniper Networks Inc 104 SRX220 Services Gateway Hardware Guide for H Model Numbers ...

Page 123: ...ing the SRX220 Services Gateway Chassis Using the CLI You can monitor alarms to troubleshoot hardware problems on a services gateway The chassis properties include the status of active chassis alarms on the device environmental measurements and the status of Mini PIMs on the device To view these chassis properties select Monitor in the J Web interface or enter the following show commands on the co...

Page 124: ... alarms Alarm time Class Description 2009 05 11 10 47 47 UTC Major SRX220 Chassis Fan Failure Related Documentation Monitoring the SRX220 Services Gateway Components Using LEDs on page 106 Monitoring the SRX220 Services Gateway Using Chassis Alarm Conditions on page 109 Monitoring the SRX220 Services Gateway Power System on page 110 Maintaining the SRX220 Services Gateway Hardware Components on pa...

Page 125: ...n on the gateway that requires immediate action See Monitoring the SRX220 Services Gateway Using Chassis Alarm Conditions on page 109 The device detects a major alarm Red Alarm A minor alarm requires monitoring or maintenance If left unchecked it might cause an interruption in service or degradation in performance See Monitoring the SRX220 Services Gateway Using Chassis Alarm Conditions on page 10...

Page 126: ...wer Off Normalcondition Noaction is required The device is not configured for chassis clustering Off HA Normalcondition Noaction is required The Mini PIM is present and detected by the device Green Mini PIM1 and Mini PIM2 See Monitoring the SRX220 Services Gateway Using Chassis Alarm Conditions on page 109 The Mini PIM is not present or is not detected by the device Off Related Documentation Monit...

Page 127: ...he alternative boot device USB storage device NOTE If you configured your services gateway to boot from an alternative boot device ignore this alarm condition Reformat the CompactFlash card and install a bootable image See the Initial Configuration for Security Devices If you did not configure the services gateway to boot from an alternative boot device contact Juniper Networks Technical Assistanc...

Page 128: ... JTAC See Juniper Networks Technical Assistance Center on page 113 The services gateway fan has failed Related Documentation Monitoring the SRX220 Services Gateway Chassis Using the CLI on page 105 Monitoring the SRX220 Services Gateway Components Using LEDs on page 106 Monitoring the SRX220 Services Gateway Power System on page 110 Using the Reset Config Button on the SRX220 Services Gateway on p...

Page 129: ...es Gateway Chassis Using the CLI on page 105 Monitoring the SRX220 Services Gateway Components Using LEDs on page 106 Monitoring the SRX220 Services Gateway Using Chassis Alarm Conditions on page 109 Using the Reset Config Button on the SRX220 Services Gateway on page 112 Changing the Reset Config Button Behavior on the SRX220 Services Gateway on page 113 Juniper Networks Technical Assistance Cent...

Page 130: ...face or the CLI The Status LED is solid amber during this time By default pressing and holding the RESET CONFIG button for 15 seconds or more until the Status LED is solid amber deletes all configurations on the device including the backup configurations and rescue configuration and loads and commits the factory configuration For details about factory default settings see Viewing Factory Default S...

Page 131: ...option prevents the RESET CONFIG button from loading the rescue configuration To return the function of the RESET CONFIG button to its default behavior remove the config button statement from the device configuration Related Documentation Using the Reset Config Button on the SRX220 Services Gateway on page 112 Monitoring the SRX220 Services Gateway Chassis Using the CLI on page 105 Monitoring the ...

Page 132: ...Copyright 2016 Juniper Networks Inc 114 SRX220 Services Gateway Hardware Guide for H Model Numbers ...

Page 133: ...PART 5 Replacing Components Contacting Customer Support and Returning Components on page 117 115 Copyright 2016 Juniper Networks Inc ...

Page 134: ...Copyright 2016 Juniper Networks Inc 116 SRX220 Services Gateway Hardware Guide for H Model Numbers ...

Page 135: ...nce Center JTAC You can contact JTAC 24 hours a day 7 days a week using any of the following methods On the Web Using the Case Manager link at http www juniper net support By telephone From the US and Canada 1 888 314 JTAC From all other locations 1 408 745 9500 NOTE If contacting JTAC by telephone enter your 11 digit case number followed by the pound key if this is an existing case or press the s...

Page 136: ...re information about return and repair policies see the customer support Web page at http www juniper net support guidelines html For product problems or technical support issues open a support case using the Case Manager link at http www juniper net support or call 1 888 314 JTAC within the United States or 1 408 745 9500 outside the United States Related Documentation Locating the SRX220 Service...

Page 137: ... Engine REV 08 750 031177 AABC5285 RE SRX220H FPC 0 FPC PIC 0 Power Supply 0 NOTE In the show chassis hardware command the Mini PIM slot number is reported as an FPC number and the Mini PIM number always 0 is reported as the PIC number Most components also have a serial number ID label attached to the component body SRX220 Services Gateway Chassis Serial Number and Agency Labels The SRX220 Service...

Page 138: ...nd Components for Shipment on page 121 Return Procedure for the SRX220 Services Gateway on page 118 Contacting Customer Support on page 117 Information You Might Need to Supply to Juniper Networks Technical Assistance Center If you are returning a services gateway or hardware component to Juniper Networks for repair or replacement obtain a Return Materials Authorization RMA number from Juniper Net...

Page 139: ...strap to your bare wrist and connect the strap to the ESD point on the chassis or to an outside ESD point if the device is disconnected from earth ground 3 On the console or other management device connected to the services gateway enter command line interface CLI operational mode and issue the following command to shut down the services gateway software admin host request system power off Wait un...

Page 140: ...ey are available Place individual Mini PIMs in electrostatic bags Write the Return Materials Authorization RMA number on the exterior of the box to ensure proper tracking CAUTION Do not stack any of the services gateway components during packing Related Documentation Required Tools and Parts for Installing and Maintaining the SRX220 Services Gateway on page 46 Locating the SRX220 Services Gateway ...

Page 141: ...nstallation Safety Guidelines and Warnings on page 135 Laser and LED Safety Guidelines and Warnings on page 141 Maintenance and Operational Safety Guidelines and Warnings on page 145 Electrical Safety Guidelines and Warnings on page 151 Agency Approvals and Regulatory Compliance Information on page 153 123 Copyright 2016 Juniper Networks Inc ...

Page 142: ...Copyright 2016 Juniper Networks Inc 124 SRX220 Services Gateway Hardware Guide for H Model Numbers ...

Page 143: ...amage to the services gateway WARNING This symbol is used with laser warnings Unterminated optical connectors can emit invisible laser radiation Focusing your eye directly on a laser source even a low power laser could permanently damage the eye WARNING This symbol means danger You are in a situation that could cause bodily injury Before you work on any equipment be aware of the hazards involved w...

Page 144: ...sjon som kan føre til personskade Før du utfører arbeid på utstyr må du vare oppmerksom på de faremomentene som elektriske kretser innebærer samt gjøre deg kjent med vanlig praksis når det gjelder å unngå ulykker Aviso Este símbolo de aviso indica perigo Encontra se numa situação que lhe poderá causar danos físicos Antes de começar a trabalhar com qualquer equipamento familiarize se com os perigos...

Page 145: ... potential hazard to people or make the equipment unsafe Never install or manipulate wiring during electrical storms Never install electrical jacks in wet locations unless the jacks are specifically designed for wet environments Do not open or remove chassis covers or sheet metal parts unless instructions are provided in this guide Such an action could cause severe electrical shock Do not push or ...

Page 146: ...ess can be gained only by service personnel through the use of a special tool lock and key or other means of security and which is controlled by the authority responsible for the location WaarschuwingDittoestelisbedoeldvoorinstallatieopplaatsenmetbeperkte toegang Een plaats met beperkte toegang is een plaats waar toegang slechts door servicepersoneel verkregen kan worden door middel van een specia...

Page 147: ...t kontrolleres av den autoriteten som er ansvarlig for området Aviso Esta unidade foi concebida para instalação em áreas de acesso restrito Uma área de acesso restrito é uma área à qual apenas tem acesso o pessoal de serviço autorizado que possua uma ferramenta chave e fechadura especial ou qualquer outra forma de segurança Esta área é controlada pela autoridade responsável pelo local Atención Est...

Page 148: ...in the range of 1 to 10 Mohms When handling any component that is removed from the chassis verify that the equipment end of your ESD strap is attached to one of the ESD points on the chassis Avoid contact between the component and your clothing ESD voltages emitted from clothing can damage components When removing or installing a component always place it component side up on an antistatic surface...

Page 149: ...9 and SRX220 Services Gateway General Safety Guidelines and Warnings on page 127 NOTE Providing an exhaustive set of guidelines for working with electrical equipment is beyond the scope of this guide Related Documentation General Site Guidelines for Installing the SRX220 Services Gateway on page 29 SRX220 Services Gateway General Safety Guidelines and Warnings on page 127 Required Tools and Parts ...

Page 150: ...Copyright 2016 Juniper Networks Inc 132 SRX220 Services Gateway Hardware Guide for H Model Numbers ...

Page 151: ... the equipment at the source Then use a Type C fire extinguisher to extinguish the fire Type C fire extinguishers which use noncorrosive fire retardants such as carbon dioxide CO 2 and Halotron are most effective for suppressing electrical fires Type C fire extinguishers displace the oxygen from the point of combustion to eliminate the fire For extinguishing fire on or around equipment that draws ...

Page 152: ...verage under a service agreement We recommend that you dispose of any irreparably damaged equipment in an environmentally responsible manner Related Documentation SRX220 Services Gateway General Safety Guidelines and Warnings on page 127 SRX220 Services Gateway Installation Safety Guidelines and Warnings on page 135 Copyright 2016 Juniper Networks Inc 134 SRX220 Services Gateway Hardware Guide for...

Page 153: ...ebrancherlesystèmesurlasourced alimentation consulter les directives d installation Warnung Lesen Sie die Installationsanweisungen bevor Sie das System an die Stromquelle anschließen AvvertenzaConsultareleistruzionidiinstallazioneprimadicollegareilsistema all alimentatore Advarsel Les installasjonsinstruksjonene før systemet kobles til strømkilden Aviso Leia as instruções de instalação antes de li...

Page 154: ...ebeurt geeft moet u speciale voorzorgsmaatregelen nemen om ervoor te zorgen dat het toestel stabiel blijft De onderstaande richtlijnen worden verstrekt om uw veiligheid te verzekeren De Juniper Networks services gateway moet in een stellage worden geïnstalleerd die aan een bouwsel is verankerd Dit toestel dient onderaan in het rek gemonteerd te worden als het toestel het enige in het rek is Wannee...

Page 155: ...stell müssen Sie besondere Vorkehrungen treffen um sicherzustellen daß das System stabil bleibt Die folgenden Richtlinien sollen zur Gewährleistung Ihrer Sicherheit dienen Der Juniper Networks services gateway muß in einem Gestell installiert werden das in der Gebäudestruktur verankert ist Wenn diese Einheit die einzige im Gestell ist sollte sie unten im Gestell angebracht werden Bei Anbringung di...

Page 156: ...se prevenir contra danos corporais ao montar ou reparar esta unidade numa estante deverá tomar precauções especiais para se certificar de que o sistema possui um suporte estável As seguintes directrizes ajudá lo ão a efectuar o seu trabalho com segurança O Juniper Networks services gateway deverá ser instalado numa prateleira fixa à estrutura do edificio Esta unidade deverá ser montada na parte in...

Page 157: ...ges för att trygga din säkerhet Juniper Networks services gateway måste installeras i en ställning som är förankrad i byggnadens struktur Om denna enhet är den enda enheten på ställningen skall den installeras längst ned på ställningen Om denna enhet installeras på en delvis fylld ställning skall ställningen fyllasnedifrånochupp meddetyngstaenheternalängstnedpåställningen Omställningenärförseddmed...

Page 158: ...Copyright 2016 Juniper Networks Inc 140 SRX220 Services Gateway Hardware Guide for H Model Numbers ...

Page 159: ...uidelines and Warnings on page 141 Laser and LED Safety Guidelines and Warnings General Laser Safety Guidelines When working around Mini PIMs observe the following safety guidelines to prevent eye injury Do not look into unterminated ports or at fibers that connect to unknown sources Do not examine unterminated optical ports with optical instruments Avoid direct exposure to the beam WARNING Unterm...

Page 160: ... Alarme de produit LED Class I Warnung Class 1 LED Produktwarnung Avvertenza Avvertenza prodotto LED di Classe 1 Advarsel LED produkt i klasse 1 Aviso Produto de classe 1 com LED Atención Aviso sobre producto LED de Clase 1 Varning Lysdiodprodukt av klass 1 Laser Beam Warning WARNING Do not stare into the laser beam or view it directly with optical instruments Waarschuwing Niet in de straal staren...

Page 161: ...fiberkabel aangesloten is dient blootstelling aan straling en het kijken in open openingen vermeden te worden Varoitus Koska portin aukosta voi emittoitua näkymätöntä säteilyä kun kuitukaapelia ei ole kytkettynä vältä säteilylle altistumista äläkä katso avoimiin aukkoihin Attention Des radiations invisibles à l il nu pouvant traverser l ouverture du port lorsqu aucun câble en fibre optique n y est...

Page 162: ...e fibra conectado evite mirar directamente a las aperturas para no exponerse a la radiación Varning Osynlig strålning kan avges från en portöppning utan ansluten fiberkabel och du bör därför undvika att bli utsatt för strålning genom att inte stirra in i oskyddade öppningar Related Documentation SRX220 Services Gateway Installation Safety Guidelines and Warnings on page 135 SRX220 Services Gateway...

Page 163: ...aar als de batterij verkeerd vervangen wordt Vervang de batterij slechts met hetzelfde of een equivalent type dat door de fabrikant aanbevolen is Gebruikte batterijen dienen overeenkomstig fabrieksvoorschriften weggeworpen te worden Varoitus Räjähdyksen vaara jos akku on vaihdettu väärään akkuun Käytä vaihtamiseen ainoastaan saman tai vastaavantyyppistä akkua joka on valmistajan suosittelema Hävit...

Page 164: ...ande Följ tillverkarens anvisningar vid kassering av använda batterier Jewelry Removal Warning WARNING Before working on equipment that is connected to power lines remove jewelry including rings necklaces and watches Metal objects heat up when connected to power and ground and can cause serious burns or weld the metal object to the terminals Waarschuwing Alvorens aan apparatuur te werken die met e...

Page 165: ...em contacto com a corrente e em contacto com a ligação à terra podendo causar queimaduras graves ou ficarem soldados aos terminais Atención Antes de operar sobre equipos conectados a líneas de alimentación quitarse las joyas incluidos anillos collares y relojes Los objetos de metal se calientan cuando se conectan a la alimentación y a tierra lo que puede ocasionar quemaduras graves o que los objet...

Page 166: ...ververhit raakt dient u deze niet te bedienen op een plaats waar de maximale aanbevolen omgevingstemperatuur van 40 ο C wordt overschreden Om te voorkomen dat de luchtstroom wordt beperkt dient er minstens 15 2 cm speling rond de ventilatie openingen te zijn VaroitusEtteiJuniperNetworksservicesgateway sarjanreititinylikuumentuisi sitä ei saa käyttää tilassa jonka lämpötila ylittää korkeimman suosi...

Page 167: ...omendadade40 ο C Paraimpedir la restricción de la entrada de aire deje un espacio mínimo de 15 2 cm alrededor de las aperturas para ventilación Varning Förhindra att en Juniper Networks services gateway överhettas genomattinteanvändadeniettområdedärdenmaximaltrekommenderade omgivningstemperaturen på 40 ο C överskrids Förhindra att luftcirkulationen inskränks genom att se till att det finns fritt u...

Page 168: ... debe realizarse según todas las leyes y regulaciones nacionales Varning Slutlig kassering av denna produkt bör skötas i enlighet med landets alla lagar och föreskrifter Related Documentation SRX220 Services Gateway Laser and LED Safety Guidelines and Warnings on page 141 SRX220 Services Gateway Electrical Safety Guidelines and Warnings on page 151 Copyright 2016 Juniper Networks Inc 150 SRX220 Se...

Page 169: ...iance with the following local national or international electrical codes United States National Fire Protection Association NFPA 70 United States National Electrical Code Canada Canadian Electrical Code Part 1 CSA C22 1 Other countries International Electromechanical Commission IEC 60364 Part 1 through Part 7 Evaluated to the TN power system Locate the emergency power off switch for the room in w...

Page 170: ...al equipment and make certain they are in good condition Related Documentation SRX220 Services Gateway Electrical and Power Requirements on page 36 SRX220 Services Gateway Maintenance and Operational Safety Guidelines and Warnings on page 145 SRX220 Services Gateway Agency Approvals on page 153 Grounding the SRX220 Services Gateway on page 66 Copyright 2016 Juniper Networks Inc 152 SRX220 Services...

Page 171: ...A 60950 1 2003 Safety of Information Technology Equipment UL 60950 1 2003 Safety of Information Technology Equipment EN 60950 1 2001 Safety of Information Technology Equipment IEC 60950 1 2001 Safety of Information Technology Equipment with country deviations EN 60825 1 A1 A2 1994 Safety of Laser Products Part 1 Equipment Classification EN 60825 2 2000 Safety of Laser Products Part 2 Safety of Opt...

Page 172: ...way Compliance Statements for EMC Requirements on page 154 SRX220 Services Gateway Compliance Statements for Environmental Requirements on page 155 SRX220 Services Gateway Compliance Statements for Acoustic Noise on page 156 SRX220 Services Gateway Compliance Statements for EMC Requirements Canada This Class A digital apparatus complies with Canadian ICES 003 Cet appareil numérique de la classe A ...

Page 173: ...n which case the user will be required to correct the interference at his own expense Related Documentation SRX220 Services Gateway Agency Approvals on page 153 SRX220 Services Gateway Compliance Statements for Environmental Requirements on page 155 SRX220 Services Gateway Compliance Statements for Acoustic Noise on page 156 SRX220 Services Gateway Compliance Statements for Environmental Requireme...

Page 174: ...mum emitted sound pressure level is 52 dB A or less per EN ISO 7779 Related Documentation SRX220 Services Gateway Compliance Statements for EMC Requirements on page 154 SRX220 Services Gateway Compliance Statements for Environmental Requirements on page 155 SRX220 Services Gateway Agency Approvals on page 153 Copyright 2016 Juniper Networks Inc 156 SRX220 Services Gateway Hardware Guide for H Mode...

Page 175: ...PART 7 Index Index on page 159 157 Copyright 2016 Juniper Networks Inc ...

Page 176: ...Copyright 2016 Juniper Networks Inc 158 SRX220 Services Gateway Hardware Guide for H Model Numbers ...

Page 177: ...ments xv branch SRX factory default configuration 85 C cables console port cable chassis connecting 70 83 Ethernet cable connecting 70 83 CAT 5e 39 chassis alarms sample 109 clearance requirements 33 CLI configuring services gateway with 92 show commands 105 commands AT modem 98 CLI show 105 show chassis alarms 109 comments in configuration statements xv compliance acoustic noise 156 EMC requireme...

Page 178: ...es gateway to a modem 70 Ethernet port autoinstallation 78 cable specifications 39 chassis cluster 78 factory default configuration 78 initial configuration 78 RJ 45 40 F factory default configuration 78 112 fire safety specifications 133 font conventions xiv front panel LEDs 16 G grounding 66 cable amperage 65 lug 65 guidelines electrical 151 electrical wiring 35 installing 29 H HA LED 16 hardwar...

Page 179: ...itoring 109 removing 62 modem commands at device end 98 at remote end 70 modem connection to console port configuring modem at services gateway end 98 configuring modem at user end 70 connecting modem to device 70 overview 85 N NEBS standards 153 network 3 P parentheses in syntax descriptions xv parts list 49 pinouts RJ 45 39 40 PoE See Power over Ethernet PoE LED 18 Port LED TX RX LINK PoE 17 por...

Page 180: ...re Sockets Layer See SSL services gateway 3 autoinstallation 47 back panel 11 chassis alarms 109 components 11 configuration 77 establishing secure Web access 82 factory default configuration 78 front panel 11 grounding 66 hardware interfaces 13 HTTPS Web access 82 installation overview 45 installation process 45 installation types 53 LEDs 16 monitoring component LEDs 106 parts 46 Power over Ether...

Page 181: ...tax conventions xiv T technical support contacting JTAC xvi temperature acceptable range 29 temperature nonoperating range 29 thermal output 29 TX RX LINK LED 18 W wall mount installation performing 60 preparing for 54 warnings electrical 151 installation 135 laser and LED 141 maintenance and operational 145 wire specifications 39 163 Copyright 2016 Juniper Networks Inc Index ...

Page 182: ...Copyright 2016 Juniper Networks Inc 164 SRX220 Services Gateway Hardware Guide for H Model Numbers ...

Reviews: