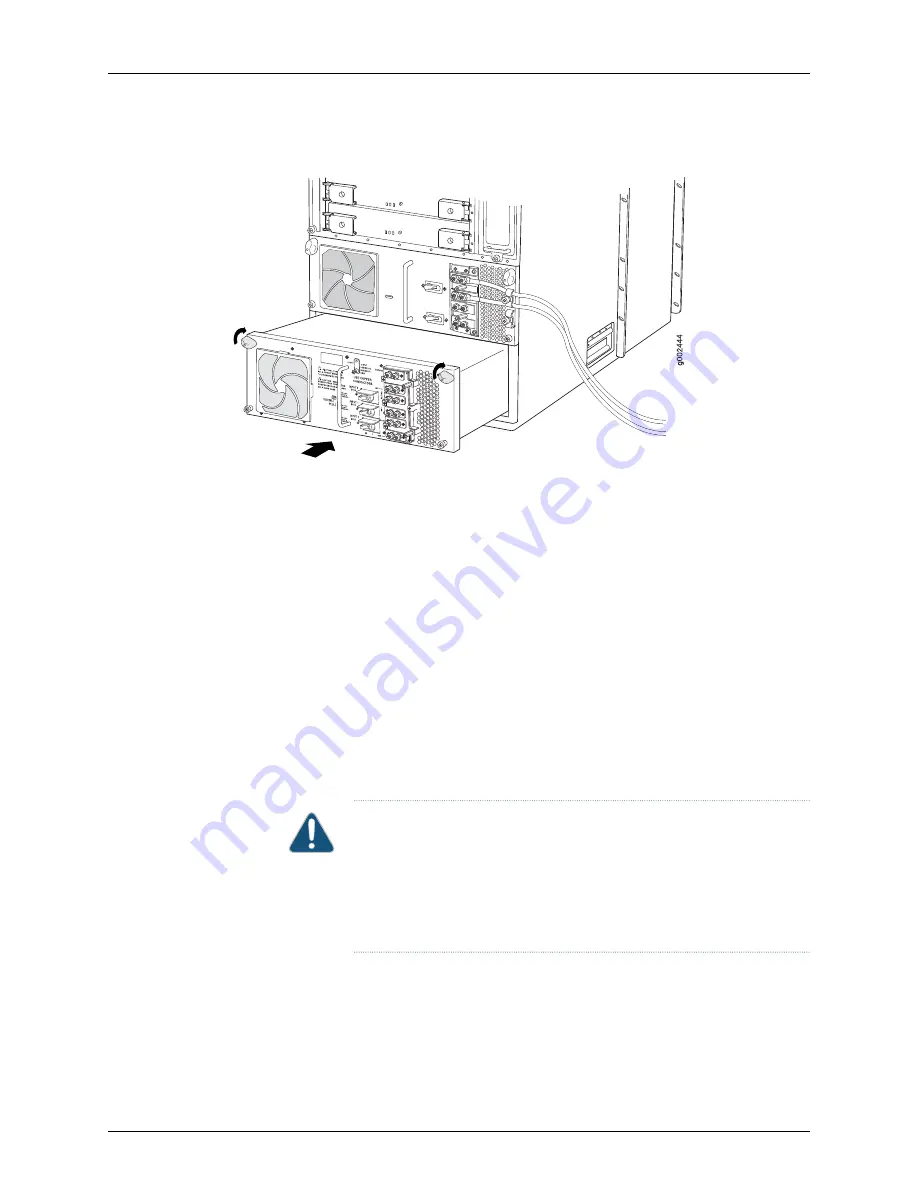
Figure 128: Installing a Three-Input 240-A Power Supply
Connecting DC Power to a TX Matrix Replacement Three-Input 240-A DC Power Supply
To connect a three-input 240-A DC power supply to the power sources:
1.
Attach an electrostatic discharge (ESD) grounding strap to your bare wrist, and connect
the strap to one of the ESD points on the chassis.
2.
Verify that a licensed electrician has attached cable lugs to the power cables that you
supply.
3.
Verify that the voltage across the DC power source cables leads is 0 V and that there
is no chance that the cables might become active during installation. If needed, switch
off the customer site circuit breakers.
4.
Verify that the circuit breakers on the power supply faceplate are in the
OFF
position (
O
).
5.
Remove the clear plastic cover protecting the terminal studs on the faceplate.
6.
Remove the nut and washer from each power terminal stud.
CAUTION:
You must ensure that power connections maintain the proper
polarity. The power source cables might be labeled
(+)
and
(–)
to indicate
their polarity. There is no standard color coding for DC power cables. The
color coding used by the external DC power source at your site determines
the color coding for the leads on the power cables that attach to the
terminal studs on each power supply.
7.
Secure the cable lugs to the terminal studs, first with a washer, then with a nut (see
Figure 129 on page 282).
a.
Attach the positive (+) DC source power cable lugs to the
RETURN
(return)
terminals.
Copyright © 2010, Juniper Networks, Inc.
280
TX Matrix Hardware Guide
Summary of Contents for TX MATRIX
Page 1: ...TX Matrix Router Hardware Guide Published 2010 10 18 Copyright 2010 Juniper Networks Inc ...
Page 18: ...Copyright 2010 Juniper Networks Inc xviii TX Matrix Hardware Guide ...
Page 24: ...Copyright 2010 Juniper Networks Inc xxiv TX Matrix Hardware Guide ...
Page 32: ...Copyright 2010 Juniper Networks Inc xxxii TX Matrix Hardware Guide ...
Page 34: ...Copyright 2010 Juniper Networks Inc 2 TX Matrix Hardware Guide ...
Page 36: ...Copyright 2010 Juniper Networks Inc 4 TX Matrix Hardware Guide ...
Page 48: ...Copyright 2010 Juniper Networks Inc 16 TX Matrix Hardware Guide ...
Page 86: ...Copyright 2010 Juniper Networks Inc 54 TX Matrix Hardware Guide ...
Page 100: ...Copyright 2010 Juniper Networks Inc 68 TX Matrix Hardware Guide ...
Page 106: ...Copyright 2010 Juniper Networks Inc 74 TX Matrix Hardware Guide ...
Page 114: ...Copyright 2010 Juniper Networks Inc 82 TX Matrix Hardware Guide ...
Page 116: ...Copyright 2010 Juniper Networks Inc 84 TX Matrix Hardware Guide ...
Page 138: ...Copyright 2010 Juniper Networks Inc 106 TX Matrix Hardware Guide ...
Page 142: ...Copyright 2010 Juniper Networks Inc 110 TX Matrix Hardware Guide ...
Page 156: ...Copyright 2010 Juniper Networks Inc 124 TX Matrix Hardware Guide ...
Page 164: ...Copyright 2010 Juniper Networks Inc 132 TX Matrix Hardware Guide ...
Page 188: ...Copyright 2010 Juniper Networks Inc 156 TX Matrix Hardware Guide ...
Page 190: ...Copyright 2010 Juniper Networks Inc 158 TX Matrix Hardware Guide ...
Page 192: ...Copyright 2010 Juniper Networks Inc 160 TX Matrix Hardware Guide ...
Page 224: ...Copyright 2010 Juniper Networks Inc 192 TX Matrix Hardware Guide ...
Page 238: ...Copyright 2010 Juniper Networks Inc 206 TX Matrix Hardware Guide ...
Page 254: ...Copyright 2010 Juniper Networks Inc 222 TX Matrix Hardware Guide ...
Page 324: ...Copyright 2010 Juniper Networks Inc 292 TX Matrix Hardware Guide ...
Page 364: ...Copyright 2010 Juniper Networks Inc 332 TX Matrix Hardware Guide ...
Page 366: ...Copyright 2010 Juniper Networks Inc 334 TX Matrix Hardware Guide ...
Page 380: ...Copyright 2010 Juniper Networks Inc 348 TX Matrix Hardware Guide ...
Page 388: ...Copyright 2010 Juniper Networks Inc 356 TX Matrix Hardware Guide ...
Page 389: ...PART 6 Index Index on page 359 357 Copyright 2010 Juniper Networks Inc ...
Page 390: ...Copyright 2010 Juniper Networks Inc 358 TX Matrix Hardware Guide ...


