Installing and Connecting an Access Point
4
Copyright © 2012, Juniper Networks, Inc.
Mounting the Unit
You can mount the WLA620 using either the pole-mounting bracket or the
wall-mounting bracket. Use one of the following procedures.
Using the Pole-Mounting Bracket
Perform the following steps to mount the unit to a 3.81 to 5.08 cm (1.5 to 2 inch)
diameter steel pole or tube using the mounting bracket:
1.
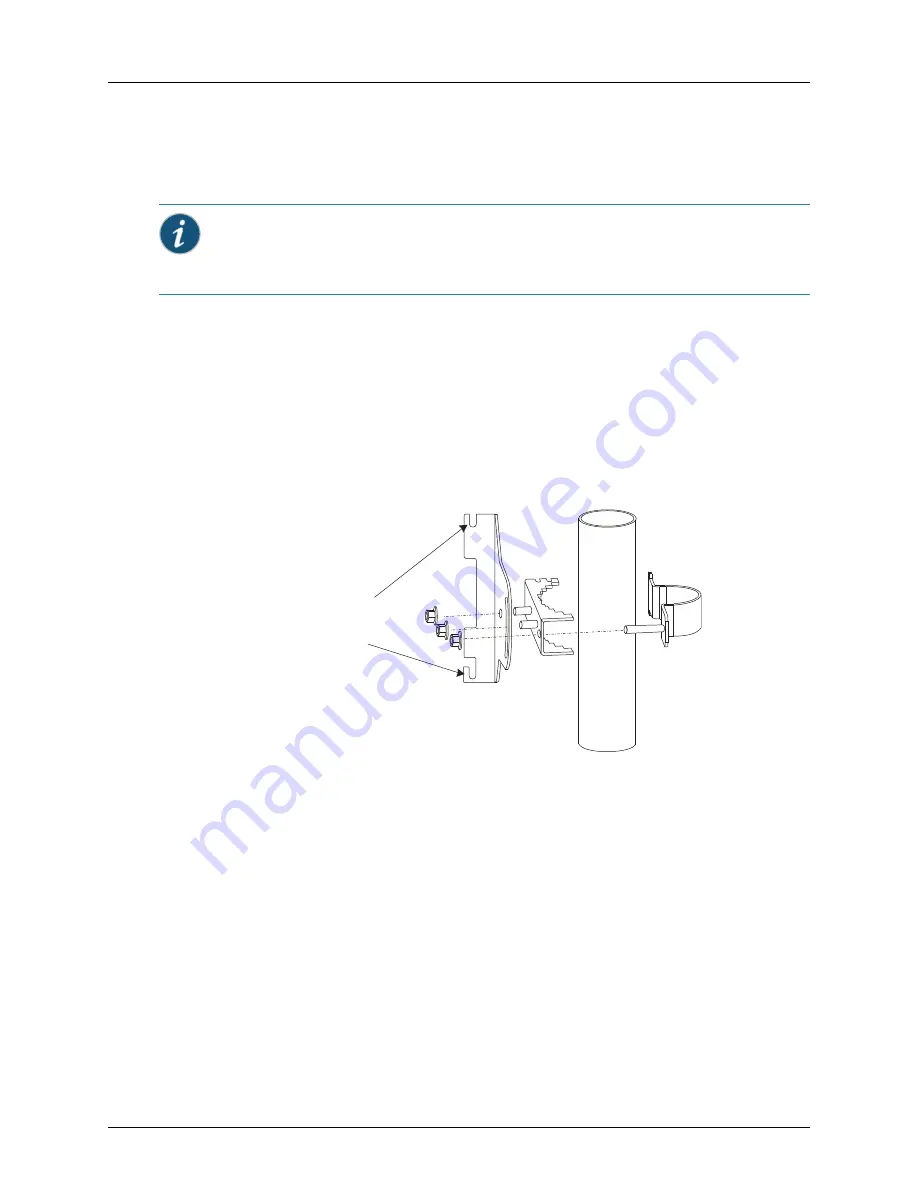
Always attach the bracket to a pole with the open end of the mounting grooves
facing up.
2.
Place the U-shaped part of the bracket around the pole and tighten the securing nut
just enough to hold the bracket to the pole. (The bracket may need to be rotated
around the pole during the alignment process.)
Figure 3–1. Attaching the Bracket to the Pole
3.
Use the included nuts to tightly secure the WLA620 to the bracket.
Mounting on Larger Diameter Poles
In addition, there is a method for attaching the pole-mounting bracket to a pole that is
5.08 to 12.7 cm (2 to 5 inches) in diameter using an adjustable steel band strap (not
included in the kit). A steel band strap up to 0.5 inch (1.27 cm) wide can be threaded
through the main part of the bracket to secure it to a larger diameter pole without using
the U-shaped part of the bracket. This method is illustrated in the following figure.
Figure 3–2. Attaching the Bracket Using a Steel Band Strap
Informational Note:
If you are installing the WLA620 as a Mesh WLA in a WLAN Mesh or
wireless bridge configuration, and the WLA will not have a wired link to a WLA, you must
configure the WLA connection using a wired link to an WLC switch before deploying the
WLA620 in a final location.
Attach bracket to
pole with mounting
grooves facing up


