background image

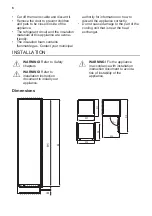
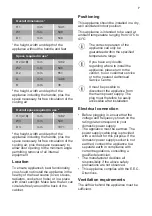
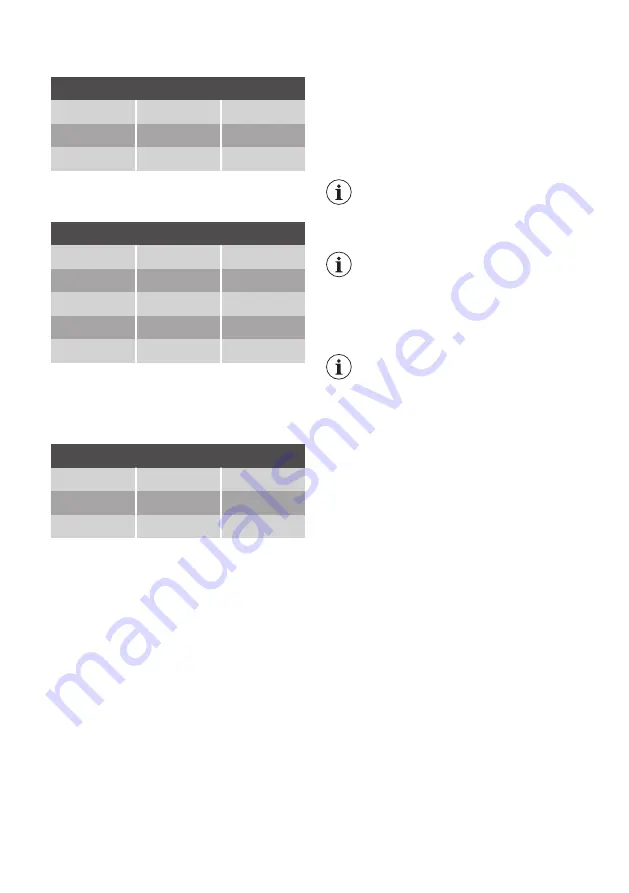
Overall dimensions ¹

H1

mm

1441

W1

mm

548

D1

mm

549

¹ the height, width and depth of the

appliance without the handle and feet

Space required in use ²

H2 (A+B)

mm

1482

W2

mm

548

D2

mm

551

A

mm

1446

B

mm

36

² the height, width and depth of the

appliance including the handle, plus the

space necessary for free circulation of the

cooling air

Overall space required in use ³

H3 (A+B)

mm

1482

W3

mm

548

D3

mm

1071

³ the height, width and depth of the

appliance including the handle, plus the

space necessary for free circulation of the

cooling air, plus the space necessary to

allow door opening to the minimum angle

permitting removal of all internal

equipment

Location

To ensure appliance's best functionality,

you should not install the appliance in the

nearby of the heat source (oven, stoves,

radiators, cookers or hobs) or in a place

with direct sunlight. Make sure that air can

circulate freely around the back of the

cabinet.

Positioning

This appliance should be installed in a dry,

well ventilated indoor position.
This appliance is intended to be used at

ambient temperature ranging from 10°C to

43°C.

The correct operation of the

appliance can only be

guaranteed within the specified

temperature range.

If you have any doubts

regarding where to install the

appliance, please turn to the

vendor, to our customer service

or to the nearest Authorised

Service Centre.

It must be possible to

disconnect the appliance from

the mains power supply. The

plug must therefore be easily

accessible after installation.

Electrical connection

• Before plugging in, ensure that the

voltage and frequency shown on the

rating plate correspond to your

domestic power supply.

• The appliance must be earthed. The

power supply cable plug is provided

with a contact for this purpose. If the

domestic power supply socket is not

earthed, connect the appliance to a

separate earth in compliance with

current regulations, consulting a

qualified electrician.

• The manufacturer declines all

responsibility if the above safety

precautions are not observed.

• This appliance complies with the E.E.C.

Directives.

Ventilation requirements

The airflow behind the appliance must be

sufficient.

7

Summary of Contents for 933 033 545

Page 1: ...JCU145F0S1 User Manual Fridge Freezer Benutzerin formation K hl Ge frierschrank...

Page 2: ...tions in a safe and accessible location for future reference Children and vulnerable people safety This appliance can be used by children aged from 8 years and above and persons with reduced physical...

Page 3: ...efrigerator so that it is not in contact with or drip onto other food WARNING Keep ventilation openings in the appliance enclosure or in the built in structure clear of obstruction WARNING Do not use...

Page 4: ...ance close to radiators or cookers ovens or hobs Do not expose the appliance to the rain Do not install the appliance where there is direct sunlight Do not install this appliance in areas that are too...

Page 5: ...mps are intended to withstand extreme physical conditions in household appliances such as temperature vibration humidity or are intended to signal information about the operational status of the appli...

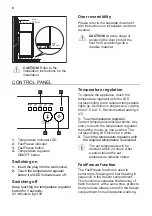
Page 6: ...t your municipal authority for information on how to discard the appliance correctly Do not cause damage to the part of the cooling unit that is near the heat exchanger INSTALLATION WARNING Refer to S...

Page 7: ...well ventilated indoor position This appliance is intended to be used at ambient temperature ranging from 10 C to 43 C The correct operation of the appliance can only be guaranteed within the specifie...

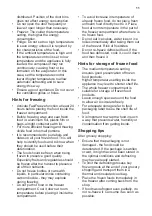
Page 8: ...regulation To operate the appliance touch the temperature regulator until the LED corresponding to the required temperature lights up Selection is progressive varying from 2 C to 8 C Recommended sett...

Page 9: ...storage of food packages of various sizes the door shelves can be placed at different heights 1 Gradually pull the shelf up until it comes free 2 Reposition as required This model is equipped with a...

Page 10: ...asy to find the food package you want If large quantities of food are to be stored remove all drawers except for the bottom drawer which needs to be in place to provide good air circulation Keep the f...

Page 11: ...e they may explode during freezing Do not put hot food in the freezer compartment Cool it down at room temperature before placing it inside the compartment To avoid increase in temperature of already...

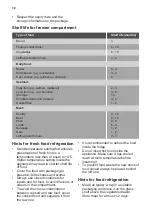
Page 12: ...perature less than or equal to 4 C Higher temperature setting inside the appliance may lead to shorter shelf life of food Cover the food with packaging to preserve its freshness and aroma Always use c...

Page 13: ...hey will damage the finish CAUTION The accessories and parts of the appliance are not suitable for washing in a dishwasher Periodic cleaning The equipment has to be cleaned regularly 1 Clean the insid...

Page 14: ...e the supplied ice scraper for this purpose 5 When defrosting is complete dry the interior thoroughly Keep the ice scraper for the future use 6 Switch on the appliance and close the door 7 Set the tem...

Page 15: ...w food products to cool to room temperature before storing The door is not closed cor rectly Refer to Closing the door section The FastFreeze function is switched on Refer to FastFreeze func tion sect...

Page 16: ...en the door only when necessary Door was not closed com pletely Make sure the door is closed completely Stored food was not wrap ped Wrap food in suitable pack aging before storing it in the appliance...

Page 17: ...Hints and Tips chapter Some specific surfaces in side the fridge compartment are warmer at some times This is a normal state Temperature setting LEDs flash at the same time An error has occurred in m...

Page 18: ...this appliance It is also possible to find the same information in EPREL using the link https eprel ec europa eu and the model name and product number that you find on the rating plate of the applian...

Page 19: ...ainers to recycle it Help protect the environment and human health by recycling waste of electrical and electronic appliances Do not dispose of appliances marked with the symbol with the household was...

Page 20: ...ller keine Haftung Bewahren Sie die Anleitung zum Nachschlagen an einem sicheren und zug nglichen Ort auf Sicherheit von Kindern und schutzbed rftigen Personen Das Ger t kann von Kindern ab 8 Jahren u...

Page 21: ...die folgenden Hinweise ffnen Sie die T r nicht ber l ngere Zeit hinweg Reinigen Sie regelm ig Oberfl chen die mit Lebensmitteln in Kontakt kommen k nnen und zug ngliche Ablaufsysteme Lagern Sie rohes...

Page 22: ...n Sie das Ger t aus Sicherheitsgr nden nicht bevor es in den Einbauschrank gesetzt wird Halten Sie sich an die mitgelieferte Montageanleitung Seien Sie beim Umsetzen des Ger tes vorsichtig da es sehr...

Page 23: ...llen Sie keine elektrischen Ger te z B Eisbereiter in das Ger t wenn solche Ger te nicht ausdr cklich vom Hersteller f r diesen Zweck zugelassen sind Wird der K ltekreislauf besch digt stellen Sie bit...

Page 24: ...dukteinstellung des Modells erh ltlich Thermostate Temperatursensoren Leiterplatten Lichtquellen T rgriffe T rscharniere Ablagen und K rbe Bitte beachten Sie dass einige dieser Ersatzteile nur an Repa...

Page 25: ...A mm 1446 Platzbedarf im Betrieb B mm 36 H he Breite und Tiefe des Ger ts einschlie lich Griff und zuz glich des notwendigen Freiraums f r die Zirkulation der K hlluft Platzbedarf insgesamt im Betrie...

Page 26: ...trennen Daher muss der Stecker nach der Installation zug nglich bleiben Elektroanschluss Kontrollieren Sie vor dem Einschalten des Ger ts ob die Netzspannung und frequenz Ihres Hausanschlusses mit den...

Page 27: ...ngestellte Temperatur gespeichert Funktion FastFreeze Die FastFreeze Funktion dient dazu das Gefrierfach auf das Vorgefrieren und anschlie ende Schnellgefrieren der Lebensmittel vorzubereiten Sie ist...

Page 28: ...gen bieten Die Glasablage ber der Gem seschublade sollte jedoch nicht verstellt werden um eine korrekte Luftzirkulation zu gew hrleisten Obst Gem seschubladen Im unteren Teil des Ger ts befinden sich...

Page 29: ...n bevor Sie Lebensmittel in das Fach legen Die Gefrierschubladen sorgen daf r dass Sie die Lebensmittel schnell und einfach finden Wenn gro e Mengen an Lebensmitteln gelagert werden sollen entfernen S...

Page 30: ...rische Lebensmittel in Aluminiumfolie Kunststofffolie oder beutel luftdichte Beh lter mit Deckel Teilen Sie die Lebensmittel in kleine Portionen um das Einfrieren und Auftauen zu erleichtern Es wird e...

Page 31: ...gen gelagert und das Auftauen hat eventuell bereits begonnen Um den Auftauprozess zu minimieren kaufen Sie Tiefk hlware am Ende Ihres Einkaufs und transportieren Sie diese in einer Isoliertasche Legen...

Page 32: ...hlt sind bevor Sie sie einlegen Um eine Verschwendung von Lebensmitteln zu vermeiden sollten die neuen Lebensmittel immer hinter die alten gelegt werden Hinweise f r die K hlung von Lebensmitteln Fle...

Page 33: ...ft durch eine Abfluss ffnung in einen speziellen Beh lter an der R ckseite des Ger ts ber dem Kompressor wo es verdampft Eine regelm ige Reinigung des Abtauwasser Ablauflochs in der Mitte des K hlfach...

Page 34: ...eraturregler auf eine h here Einstellung um die maximal m gliche K hlung zu erreichen und lassen Sie das Ger t mindestens 3 Stunden mit dieser Einstellung laufen Legen Sie das Gefriergut erst nach die...

Page 35: ...te Le bensmittel waren noch zu warm Lassen Sie die Lebensmittel auf Raumtemperatur abk h len bevor Sie sie einlagern Die T r ist nicht richtig ge schlossen Siehe Abschnitt Schlie en der T r Die Funkti...

Page 36: ...d Wasser flie t an der R ck wand des K hlschranks hi nunter W hrend des automatischen Abtauprozesses schmilzt Reif auf der R ckwand Dies ist normal Es gibt zu viel Kondenswas ser an der R ckwand des K...

Page 37: ...Ge r t geben Es wurden zu viele Lebens mittel gleichzeitig eingelegt Lagern Sie weniger Lebens mittel zur selben Zeit ein Die Reifschicht ist dicker als 4 5 mm Tauen Sie das Ger t ab Die T r wurde zu...

Page 38: ...chtungen 2 Stellen Sie die T r nach Bedarf ein Siehe Montageanleitung 3 Ersetzen Sie die defekten T rdichtungen falls erforderlich Wenden Sie sich an einen autorisierten Kundendienst GER USCHE SSSRRR...

Page 39: ...g m ssen mit EN 62552 bereinstimmen Die Anforderungen an die Bel ftung die Abmessungen der Aussparungen und die Mindestabst nde auf der R ckseite m ssen den Angaben in diesem Benutzerhandbuch in Kapit...

Page 40: ...211626207 B 232020...

Reviews: