background image

11

O   1   2   3

O   I

Using the hood

The hood 

JDS 3130

 is supplied with a three

speed motor.
To get best efficiency, we suggest to use
slow speeds in normal conditions and the
highest in particular cases of strong smell
and vapour concentration.

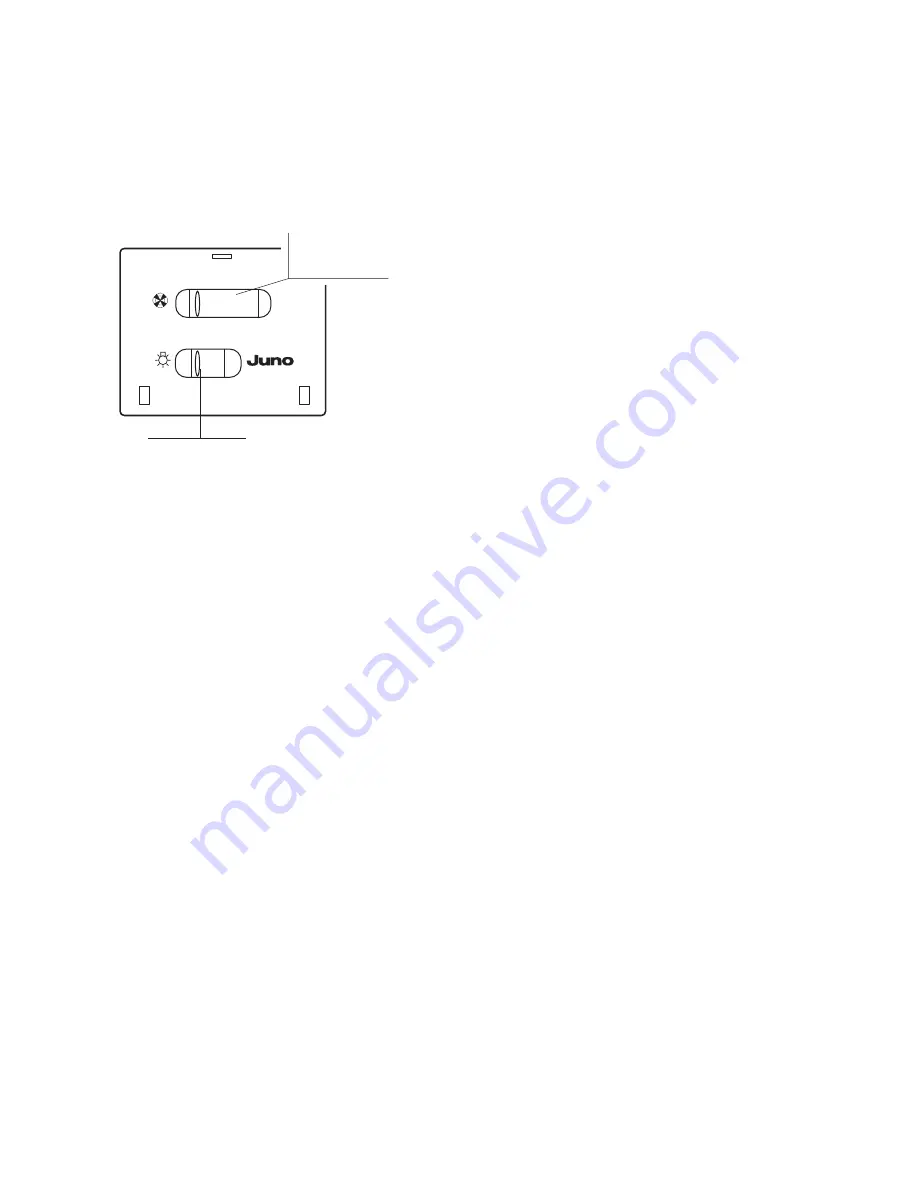
The switching plate is fitted with two switches
one for continuous adjustment of the
ventilator (top switch) and one for illuminating
the work surface (bottom switch) .
Note: Simply close the front panel to switch
off the hood (light and motor).
When you pull up the front panel, the hood
(light and extraction motor) switches on again
as previously set.
It is advisable to switch on the extractor
hood a few minutes before starting cooking
and then to leave it running for approximately
15 minutes afterwards to ensure that all
odours are extracted.

Attention!
The hood doesn't switch-ON if the flap is
not mounted.

Maintenance

Before performing any maintenance
operation, disconnect the hood from the
electricity.

Grease filter

The hood has a metal grease filter.
To clean the filter, proceed as follows:
a. Open the grid by turning locks D (Fig. 3).

b. Extract the filter V after removing the

clamps U (Fig. 14).

The metal grease filter lasts forever and
must be washed at least once a month either
by hand or in the dishwasher (60°C) with
suitable detergents.

Attention! When washed in a dishwasher,
the metal grease filter may discolour.
Let the filter dry without damaging it before
putting it back into place.
Every time you clean the metal grease filter
also clean the grid with suitable detergents
without abrasive.

Charcoal filter

This hood can be equipped with a circular
charcoal filter.
The charcoal filter cannot be regenerated or
washed.
The charcoal filter must be replaced every
4 months.
To remove the charcoal filter, turn it in the
counter clockwise direction unitl it comes
free.

Attention

Failure to observe the rules for cleaning the
appliance and changing and cleaning the
filters may cause fires. Therefore, we
recommend observing these instructions.

Changing the bulbs

a. Disconnect the hood from the electricity.
b. Remove the inlet grid.
c. Always replace burnout bulbs with olive-

shaped max 40 Watt (E14) bulbs.

d. Refit the inlet grid.
— Before calling for Repair service because

the hood fails to light up, make sure the
bulbs are screwed in tightly.

Cleaning

To clean the outside of the hood use a cloth
moistened with denatured alcohol or neutral
liquid detergents.
Never use products containing abrasive.
Wipe brushed stainless steel in the same
direction as the brushing to avoid scratching.

Light switch

Motor speed
selector

Summary of Contents for JDS 3130

Page 1: ...Montagevorschrift und Gebrauchsanleitung für den Dunstabzug Instructions on mounting and use of the cooker hood JDS 3130 ...

Page 2: ...2 Fig 1 A B Fig 2 Fig 3 5 4 O 1 2 3 O I 1 2 3 3 D E D E ...

Page 3: ...3 Fig 5 Fig 4 G F Fig 7 3 H K N Q Fig 6 Fig 8 J N3 ...

Page 4: ...4 Fig 9 Fig 10 B B2 B1 C C2 C1 Fig 11 Fig 12 N2 N2 T T Fig 14 U V N1 L L M M 0 90 0 54 54 100 Fig 13 L N O P Q R S ...

Page 5: ...gspunkte G und F übereinstimmen Abb 4 drehen Sie den Aktivkohlefilter nun im Uhrzeigersinn so weit bis er einrastet d Setzen Sie den Fettfilterhalter wieder ein e In die Abluftöffnung B Abb 1 das Luftablenkgitter mittels der Schrauben anbringen Abb 5 Das Luftablenkgitter verhindert durch die Ablenkung nach vorne eine Verschmutzung der hinteren Wand Hinweis Das Gerät muss wenigstens in einem Abstan...

Page 6: ...sen werden Die Anordnung der Steckdose muß so sein daß diese gut zugänglich ist Andernfalls ist eine allpolige Trennmöglichkeit z B LS Automat 3 mm Kontaktweite vorzusehen Für Störungen die wegen Nichtbeachtung der o g Anweisungen auftreten wird nicht gehaftet Befestigung des Dunstabzuges Wandbefestigung DiemitgelieferteSchabloneN1anderWand anbringen Die auf der Schablone vorgezeichnete Bohrung vo...

Page 7: ...bei in umgekehrter Reihenfolge wie im Abschnitt Umluftbetrieb beschrieben vorgehen Befestigen Sie nun die Profilbleche N an den unteren Befestigungspunkten des Dunstabzuges mit den Schrauben Q Abb 13 AchtenSiedarauf daßdasProfilblechgegen die Küchenwand drückt Justieren Sie die Schrauben Q entsprechend Bedienung Der Dunstabzug JDS 3130 ist mit einem Motor ausgestattet Die Leistungsregelung erfolgt...

Page 8: ...ehe Seite 8 Zur Beachtung Die Nichtbeachtung der Reinigungs vorschriften des Geräts sowie der Regeln für die Auswechslung und Reinigung des Filters kann zur Brandgefahr führen Wir empfehlen daher die folgenden Anweis ungen zu beachten Bei Ersatzteilbestellellung bitte unbedingt Geräte ldent Nr und Modellbezeichung angeben Sie finden diese Angaben auf dem Typenschild nach Abnahme des Fettfilterhalt...

Page 9: ...t is obtained in the external exhaust model suction therefore in the limits of the possibilities it is advised to use the external exhaust suction type The best performances are obtained with short pipes max 4 m and with few curves GB View of the hood 1 Flap 2 Grease filter supporting grid 3 Cooking surface lighting 4 Motor speed selector 5 Light switch Use Two systems are available External exhau...

Page 10: ...t height to eventually adjust the height work on the screws P fig 13 Fix the hood to the lower angle frame by means of the screws Q For a further adjustment act on the screws R through the holes S fig 13 Fixing the front panel Take off the door H fig 6 turning the rear locking knobs K Apply the scheme N3 on the rear side of the front panel considering that the arrow indicates the upper side fig 7 ...

Page 11: ...e washed at least once a month either by hand or in the dishwasher 60 C with suitable detergents Attention Whenwashedinadishwasher the metal grease filter may discolour Let the filter dry without damaging it before putting it back into place Every time you clean the metal grease filter also clean the grid with suitable detergents without abrasive Charcoal filter This hood can be equipped with a ci...

Page 12: ...LI08JA ELECTROLUX ZANUSSIHAUSGERÄTEGMBH Rennbahnstraße72 74 D 60528Frankfurt ...

Reviews: