background image

40

5 Maintenance

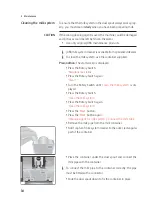
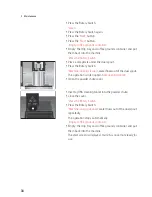
T

  Remove and empty the water tank.

T

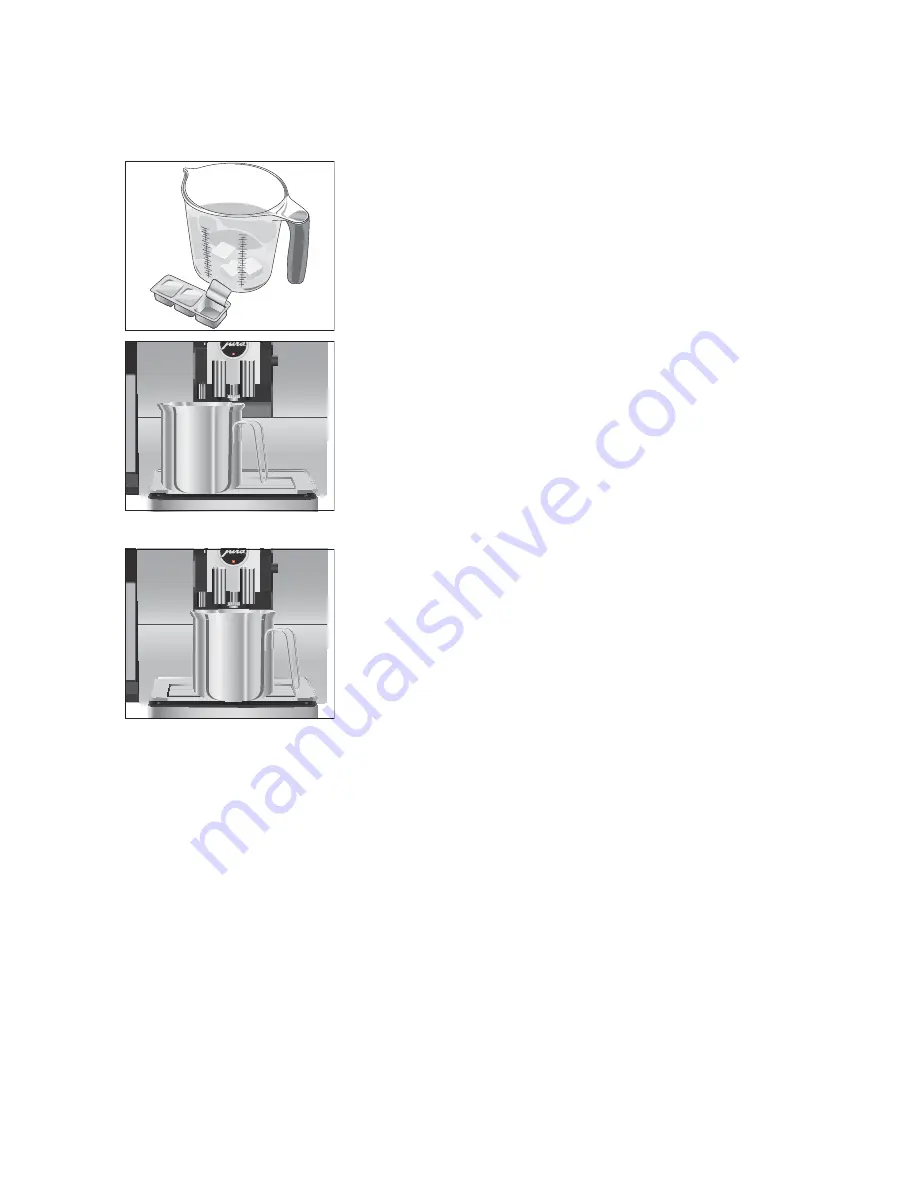
  Completely dissolve 3 JURA descaling tablets in a receptacle 

holding 600 ml of water. This may take several minutes.

T

  Pour the solution into the 

empty

 water tank and insert it 

into the machine.

‘Press the Rotary Switch’

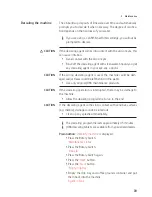
T

  Place a receptacle under the hot-water spout.

T

  Press the Rotary Switch.

‘Machine is being descaled’

, water flows out of the hot-water 

spout repeatedly.
The operation is interrupted, 

‘Empty drip tray’

.

T

  Empty the drip tray and coffee grounds container and put 

them back into the machine.

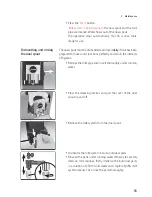
‘Fill water tank’

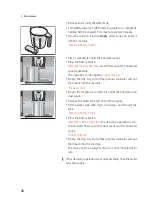
T

  Empty the receptacle and place it under the hot-water and 

dual spouts.

T

  Remove the water tank and rinse it thoroughly.

T

  Fill the water tank with fresh, cold water and reinsert the 

tank.

‘Press the Rotary Switch’

T

  Press the Rotary Switch.

‘Machine is being descaled’

, the descaling operation is con-

tinued, water flows out of the dual spout and the hot-water 
spout.

‘Empty drip tray’

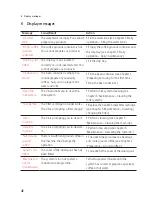
T

  Empty the drip tray and coffee grounds container and put 

them back into the machine.
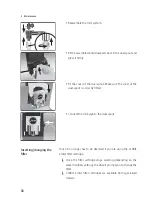
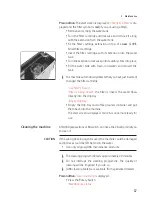
The start screen is displayed. Your Z6 is once more ready for 
use.


E

If the descaling operation stops unexpectedly, rinse the water 
tank thoroughly.

Summary of Contents for Z6

Page 1: ...Z6 Instructions for Use PROFESSI O N A L A R O M A G R I N D E R ...

Page 2: ...ppuccino and other speciality coffees with milk 17 Caffè Barista and lungo Barista 18 Ground coffee 18 Adjusting the grinder 19 Hot water 20 3 Daily operation 21 Filling the water tank 21 Switching on the machine 21 Daily maintenance 21 Regular maintenance 22 Switching off the machine 22 4 Permanent settings in programming mode 23 Product settings 24 Adjusting the product settings 24 Storing and p...

Page 3: ...pted to perform some action E Information and tips to make it even easier to use your Z6 Coffee Display Symbol description 5 Maintenance 33 Rinsing the machine 33 Automatic milk system rinsing 33 Cleaning the milk system 34 Dismantling and rinsing the dual spout 35 Inserting changing the filter 36 Cleaning the machine 37 Descaling the machine 39 Cleaning the bean container 41 Descaling the water t...

Page 4: ...der chute for ground coffee 3 Water tank 4 Mains cable permanently connected or plug in back of the machine 5 Hot water spout 6 Coffee grounds container 7 Drip tray 8 Cover cap for grinder adjustment switch 9 Grinder adjustment switch 10 On Off button Q 11 Bean container with aroma preservation cover 12 Height and width adjustable dual spout 13 Cup grille ...

Page 5: ...s button function depends on what is shown in the display Top of the machine 3 Rotary Switch Back of the machine Service socket with JURA Smart Connect Accessories Container for milk system cleaning Measuring spoon for ground coffee Filler funnel for ground coffee 6 ...

Page 6: ... Keeptheseinstructionsforuseclosetothemachine and pass them on to the next user Please carefully read and observe the important safety information set out below To avoid danger of potentially fatal electric shock U Never use a machine which is damaged or has a defective mains cable U In the event of signs of damage for example if thereisasmellofburning unplugthemachine immediately from the power s...

Page 7: ...lds or burns on the spouts U Place the machine out of the reach of children U Do not touch any hot parts Use the handles provided U Be careful to ensure that the dual spout is cor rectly installed and clean If it is incorrectly fit ted or becomes blocked its parts might come off There is a danger of parts being swallowed A defective machine is not safe and could cause injury or fire To avoid damag...

Page 8: ...ay cause overheating U Please only use original JURA maintenance products Use of products that are not explic itly recommended by JURA could damage the machine U Do not use alkaline cleaning agents only use a soft cloth and mild cleaning agents U Do not use any coffee beans treated with addi tives or caramelised coffee beans U Only fill the water tank with fresh cold water U Switch the machine off...

Page 9: ...tal capabilities to use the machine safely or U are inexperienced or lack knowledge in how to use the machine safely must be supervised by a responsible person when using it or must be instructed in how to use it correctly Safety when handling the CLARIS Smart filter cartridge U Filter cartridges should be kept out of the reach of children U Store filter cartridges in a dry place in the sealed pac...

Page 10: ...water U Choose a spot for your Z6 which protects the machine against overheating Ensure that the ventilation slots are not covered The bean container has an aroma preservation cover This will ensure that your coffee beans retain their aroma for longer Coffee beans which have been treated with additives e g sugar ground coffee or freeze dried coffee will damage the grinder T Only use roasted untrea...

Page 11: ...er of potentially fatal electric shock T Never use a machine which is damaged or has a defective mains cable Milk sparkling mineral water or other liquids can damage the water tank or the machine T Only fill the water tank with fresh cold water Precondition The bean container has been filled T For machines with a plug in mains cable Connect the mains cable to the machine T Insert the mains plug in...

Page 12: ...lter cartridge with its extension into the water tank T Turn the filter cartridge clockwise until it audibly clicks into place T Fill the water tank with fresh cold water and reinsert the tank E The machine automatically detects that you have just inserted the filter cartridge Use filter Saved Filter is being rinsed the filter is rinsed The water flows directly into the drip tray System is filling...

Page 13: ...ipe to a milk container or a milk cooler E Your Z6 is equipped with the HP3 milk system Your Z6 is equipped with the JURA Smart Connect This allows you to connect the machine wirelessly to a compatible JURA accessory e g the Cool Control milk cooler E The Smart Connect can be protected against unauthorised access using a PIN Activate the PIN function via the JURA app You will find more information...

Page 14: ... played E If the programme item Connect accessory is not displayed Smart Connect is not inserted or is not inserted correctly into the service socket T Press the Rotary Switch to enter the programme item Connect accessory T Now follow the instructions on the display to connect the accessory to the Z6 ...

Page 15: ...always refer to the default settings U The star on the display indicates that the Smart mode is activated This means that after some time the products on the start screen will be rearranged according to your personal preferences Coffee tastes best served hot A cold porcelain cup cools the bever age and impairs the taste We therefore recommend prewarming the cups The full coffee aroma can develop o...

Page 16: ...a U Caffè latte U 1 portion milk U 1 portion milk foam U Hot water for green tea U Hot water for black tea U Jug of coffee E The product selector view disappears automatically after 10 seconds if no preparation is started E The last product to be displayed always appears first in the product selector view Example Proceed as follows to prepare one coffee Precondition The start screen is displayed T...

Page 17: ...nder the dual spout T Press the Latte macchiato button The preset amounts of milk and milk foam flow into the glass E There is a short interval while the hot milk separates from the milk foam This allows the typical layers of a latte macchiato to form Coffee preparation starts The preset amount of water for espresso flows into the glass Preparation stops automati cally Your Z6 is once more ready f...

Page 18: ...ng spoons of ground coffee U Use ground coffee which is not ground too finely Very fine coffee can block up the system so that the coffee only comes out in drips U If you did not fill the machine with a sufficient amount of ground coffee Not enough ground coffee is displayed and the Z6 stops the operation U The desired speciality coffee must be prepared within approx imately one minute after filli...

Page 19: ...rinder adjustment switch could be damaged T Only adjust the consistency of grind when the grinder is run ning The consistency of grind is correct if the coffee flows regularly from the coffee spout In addition a fine thick crema forms Example Proceed as follows to change the consistency of grind during the preparation of an espresso Precondition The start screen is displayed T Place a cup under th...

Page 20: ...llows to prepare hot water for green tea using product selector view Precondition The start screen is displayed T Place a cup under the hot water spout T Turn the Rotary Switch to view the product selector T Turn the Rotary Switch until Hot water for green tea is displayed T Press the Rotary Switch Hot water for green tea the preset amount of water flows into the cup Preparation stops automaticall...

Page 21: ... dual spout T Press the On Off button Q to switch the Z6 on Machine is heating Machine is rinsing the system is rinsed The rinse stops automatically The start screen is displayed To ensure that you get many years of reliable service out of your Z6 and to guarantee the optimum coffee quality the machine requires daily maintenance T Pull out the drip tray T Empty the coffee grounds container and the...

Page 22: ...asis approximately every 3 months Replacements are available from specialised dealers Your Z6 is equipped with the HP3 milk system U Clean the inside of the water tank e g with a brush Further information about the water tank is provided in these instruc tions for use see Chapter 5 Maintenance Descaling the water tank U Traces of milk and coffee may stick to the top and bottom of the cup grille If...

Page 23: ...nd hot water Classics T Replace products with your favourites Personalise your favourite speciality coffees by giving them a new product name and individual settings Machine settings Choose language T Select your language Switch off after T Set the time after which the Z6 should switch off automatically Factory setting T Reset the machine to its factory setting Units T Select the unit for the amou...

Page 24: ...ct selector Personalise the products you want by giving them a new product name and individual settings see Chapter 4 Permanent settings in programming mode Storing and personalising products U Add to favourites only displayed when the Smart mode is deactivated Replace the products on the start screen with your favourites The following settings can be set permanently for all speciality cof fees mi...

Page 25: ... Milk foam 0 sec 120 sec Milk foam temperature temperature low normal high product name Flat white caffè latte 10 levels Coffee 25 ml 240 ml Milk foam 0 sec 120 sec Milk 0 sec 120 sec Milk and milk foam tempera ture temperature low normal high product name Pot of coffee 10 levels Coffee 25 ml 200 ml Bypass water 0 ml 200 ml Temperature low normal high product name number of strokes 1 5 set number ...

Page 26: ...your favourites You can personalise the products you want by giving them a new product name and individual settings e g amount and coffee strength E The products on the start screen can only be replaced if the Smart mode is deactivated Example Proceed as follows to add a coffee to the product selec tor view and change the product name to My coffee Precondition The start screen is displayed T Press...

Page 27: ...tomatically switch itself off you can cut down your energy consumption If this function is activated your Z6 switches off automatically after the preset time following the last action on the machine You can set the automatic switch off to 15 minutes 30 minutes or 1 9 hours Precondition The start screen is displayed T Press the Rotary Switch Maintenance status T Turn the Rotary Switch until Machine...

Page 28: ...e programme item Smart mode T Turn the Rotary Switch until Inactive is displayed T Press the Save button Saved appears briefly on the display Smart mode T Press the button until the start screen is displayed again The harder the water is the more frequently the Z6 needs to be descaled It is therefore important to set the water hardness accu rately The water hardness was set when the machine was fi...

Page 29: ...hoose language T Turn the Rotary Switch until Display is displayed T Press the Rotary Switch to enter the programme item Display T Turn the Rotary Switch to change the setting T Press the Save button Saved appears briefly on the display Display T Press the button until the start screen is displayed again In the programme item Machine settings Units you can select the unit used for the amount of wa...

Page 30: ...h Choose language T Turn the Rotary Switch until Factory setting is displayed T Press the Rotary Switch to enter the programme item Factory setting Reset the machine to the factory set tings T Press the Yes button Saved appears briefly on the display Your Z6 is switched off In the programme item Machine settings Water tank illumina tion you can change the setting for water tank illumination U Perm...

Page 31: ...splayed again In this programme item you can set the language used by your Z6 Example Proceed as follows to change the language from English to Deutsch Precondition The start screen is displayed T Press the Rotary Switch Maintenance status T Turn the Rotary Switch until Machine settings is displayed T Press the Rotary Switch Choose language T Press the Rotary Switch to enter the programme item Cho...

Page 32: ...mple Proceed as follows to view the number of speciality coffees prepared Precondition The start screen is displayed T Press the Rotary Switch Maintenance status T Turn the Rotary Switch until Machine settings is displayed T Press the Rotary Switch Choose language T Turn the Rotary Switch until Product counter is displayed T Press the Rotary Switch to enter the programme item Product counter E Tur...

Page 33: ...m daily when you have been preparing milk You can initiate the rinse operation manually at any time Precondition The start screen is displayed T Place a receptacle under the dual spout T Press the Rotary Switch Maintenance status T Press the Rotary Switch again Clean T Turn the Rotary Switch until Rinse is displayed T Press the Rotary Switch to initiate the rinse operation Machine is rinsing Milk ...

Page 34: ...ess the Rotary Switch again Clean T Turn the Rotary Switch until Clean the milk system is dis played T Press the Rotary Switch Clean the milk system T Press the Rotary Switch again Clean the milk system T Press the Next button T Press the Next button again Cleaning agent for milk system Connect the milk tube T Remove the milk pipe from the milk container T Add 1 capful of milk system cleaner to th...

Page 35: ...in the interests of hygiene T Remove the milk pipe and rinse it thoroughly under running water T Press the releasing devices and pull the cover of the dual spout up and off T Remove the milk system from the dual spout T Dismantle the milk system into its individual parts T Rinse all the parts under running water If there are severely dried on milk residues firstly immerse the individual parts in a...

Page 36: ...dual spout is correctly fitted T Connect the milk pipe to the dual spout Your Z6 no longer has to be descaled if you are using the CLARIS Smart filter cartridge E Once the filter cartridge stops working depending on the water hardness setting the Z6 will prompt you to change the filter E CLARIS Smart filter cartridges are available from specialised dealers Inserting changing the filter ...

Page 37: ...ridge Use filter Saved Filter is being rinsed the filter is rinsed The water flows directly into the drip tray Empty drip tray T Empty the drip tray and coffee grounds container and put them back into the machine The start screen is displayed Your Z6 is once more ready for use After 180 preparations or 80 switch on rinses the Z6 will prompt you to clean it If the wrong cleaning agent is used the m...

Page 38: ...chine is being cleaned water flows out of the dual spout The operation is interrupted Add cleaning tablet T Open the powder chute cover T Insert a JURA cleaning tablet into the powder chute T Close the cover Press the Rotary Switch T Press the Rotary Switch Machine is being cleaned water flows out of the dual spout repeatedly The operation stops automatically Empty coffee grounds container T Empty...

Page 39: ...n the water T Use only original JURA maintenance products If the descaling operation is interrupted there may be damage to the machine T Allow the descaling programme to run to the end If the descaling agent comes into contact with sensitive surfaces e g marble damage cannot be ruled out T Clean up any splashes immediately E The descaling programme lasts approximately 45 minutes E JURA descaling t...

Page 40: ... and coffee grounds container and put them back into the machine Fill water tank T Empty the receptacle and place it under the hot water and dual spouts T Remove the water tank and rinse it thoroughly T Fill the water tank with fresh cold water and reinsert the tank Press the Rotary Switch T Press the Rotary Switch Machine is being descaled the descaling operation is con tinued water flows out of ...

Page 41: ...fee beans and close the aroma preservation cover Limescale deposits may form in the water tank To ensure correct function of the machine descale the water tank from time to time T Remove the water tank T If you use a CLARIS Smart filter cartridge remove this T Completely fill the water tank and dissolve 3 JURA descaling tablets in it T Leave the water tank with the descaling solution for several h...

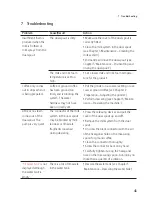
Page 42: ...to clean the milk system T Perform milk system cleaning see Chapter 5 Maintenance Cleaning the milk system Change filter The filter cartridge no longer works The Z6 is prompting a filter change T Replace the CLARIS Smart filter cartridge see Chapter 5 Maintenance Inserting changing the filter Clean machine The Z6 is prompting you to clean it T Perform cleaning see Chapter 5 Maintenance Cleaning th...

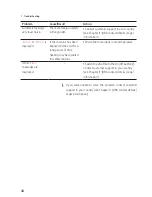
Page 43: ...er setting or use coarser ground coffee see Chapter 2 Preparation Adjusting the grinder T Perform descaling see Chapter 5 Mainte nance Descaling the machine Little or no steam comes out of the dual spout The pump is very quiet The connector of the milk system in the dual spout may be blocked by milk residues or limescale fragments loosened during descaling T Press the releasing devices and pull th...

Page 44: ...the machine has been exposed to the cold for a long period of time heating may be disabled for safety reasons T Warm the machine at room temperature Other Error messages are displayed T Switch the Z6 off with the On Off button Q Contact customer support in your country see Chapter 11 JURA contact details Legal information E If you were unable to solve the problem contact customer support in your c...

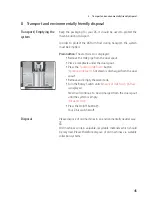
Page 45: ...ss the 1 portion milk foam button 1 portion milk foam hot steam is discharged from the dual spout T Remove and empty the water tank T Turn the Rotary Switch until Amount of milk foam 60 sec is displayed Steam will continue to be discharged from the dual spout until the system is empty Fill water tank T Press the On Off button Q Your Z6 is switched off Please dispose of old machines in an environme...

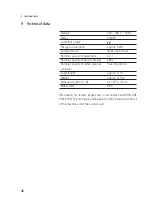
Page 46: ...ter tank 2 4 l Holding capacity of bean container 280 g Holding capacity of coffee grounds container max 20 portions Cable length approx 1 1 m Weight approx 12 5 kg Dimensions W H D 32 37 5 45 cm Milk system HP3 Information for testers repeat test in accordance with DIN VDE 0701 0702 The central grounding point CGP is located on the back of the machine under the service cover ...

Page 47: ...s container 4 Connecting an accessory 13 Consistency of grind Adjusting the grinder 19 Grinder adjustment switch 4 Contact details 52 Cup grille 4 Customer support 52 D Daily maintenance 21 Descaling Machine 39 Water tank 41 Display 5 Display brightness 29 Display messages 42 Disposal 45 Double product 17 Drip tray 4 Dual spout Dismantling and cleaning 35 Height and width adjustable dual spout 4 E...

Page 48: ...reparation 15 17 At the touch of a button 15 Caffè latte 17 Cappuccino 17 Coffee 16 Espresso 16 Espresso macchiato 17 Flat white 17 Ground coffee 18 Hot water 20 Latte macchiato 17 Lungo Barista 18 Ristretto 16 Two coffees 17 Two espressi 17 Two ristretti 17 Two speciality coffees 17 Using the product selector 15 Preparation options 15 Problems Troubleshooting 43 Product selector view 15 Product s...

Page 49: ...spout 4 Hot water spout 4 Storing products 26 Switching off 22 Switching on 21 Switch off Automatic switch off 27 Symbol description 3 T Technical data 46 Milk system 46 Tel 52 Transport 45 Troubleshooting 43 Two products 17 U Unit for amount of water 29 Use First time 11 W Water hardness Determining the water hardness 11 Setting the water hardness 28 Water tank 4 Descaling 41 Filling 21 Water tan...

Page 50: ...50 ...

Page 51: ...51 ...

Page 52: ...ibility U 2009 125 EC Ecodesign Directive U 2011 65 EU RoHS Directive We reserve the right to make technical changes The diagrams used in these instructions for use are for illustration purposes only and do not represent the original colours of the machine Some details of your Z6 may vary Your opinion is important to us Use the contact details at www jura com The instructions for use contain infor...

Reviews: