Part of the VW community since 1989
|
justkampers.com
|
0345 121 5656
N.B. Whilst every attempt is made to ensure that these instructions are as accurate and clear as possible, we cannot be held
responsible for misinterpretation of these instructions or for any subsequent accident or damage caused through mis-fitted parts.
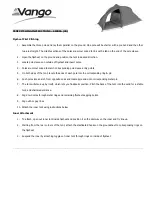
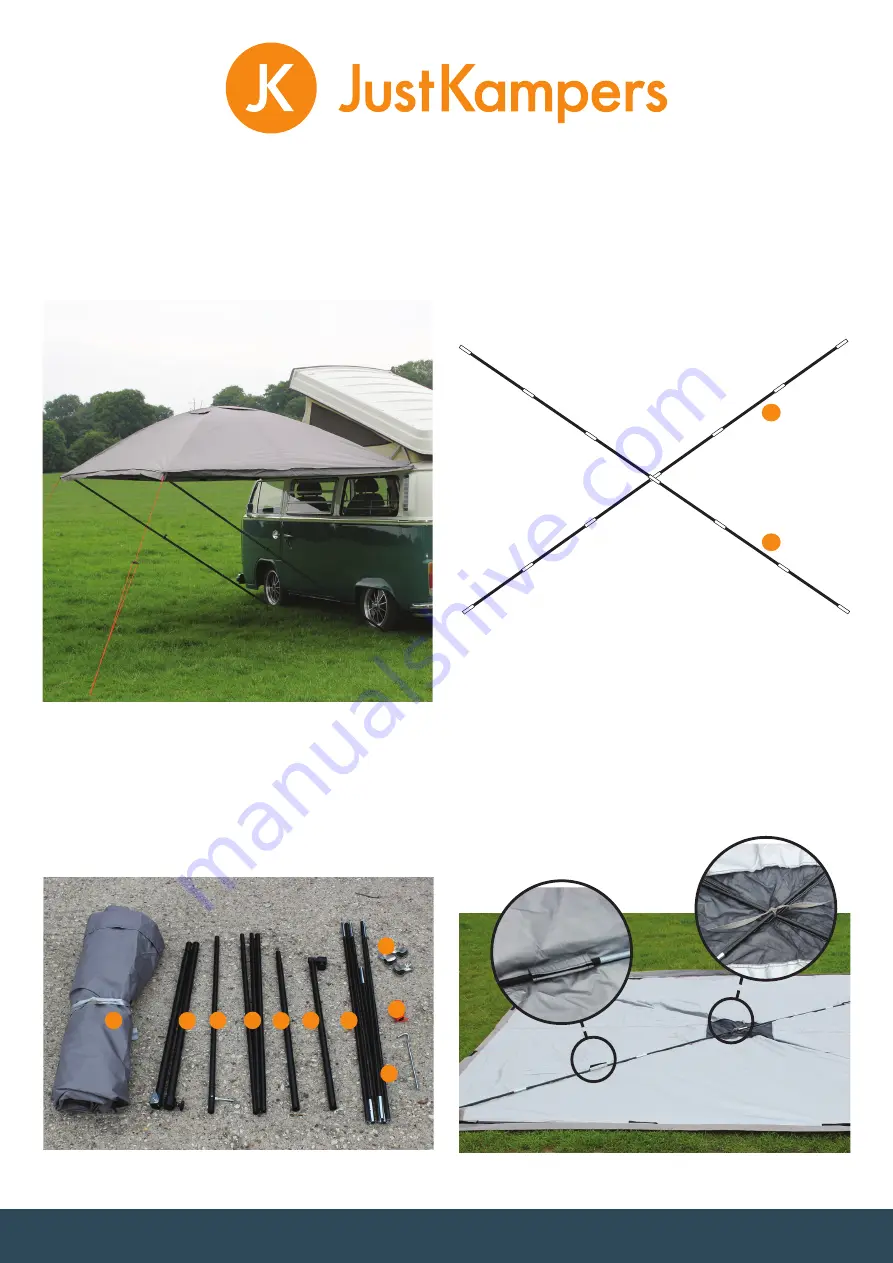
Before you start, check you have all the components:
(a) Canopy
(b) Leg bottoms (x2)
(c) Canopy rail ends (x4)
(d) Canopy rails (x2)
(e) Leg extensions (x2)
(f) Leg tops (x2)
(g) Fibreglass poles (x2)
(h) Guy ropes (x2)
(i) Pegs (x4)
(j) Gutter clamps (x3)
a
b
c
d
e
f
g
j
i
h
1.
Firstly lay the canopy on the ground with the
velcro strips facing up. Make up the two black
fibreglass poles and lay these over the canopy
from corner to corner in the shape of a cross (see
diagram above) then attach these poles to the
canopy using the four velcro strips provided
In the centre of the canopy there is a draw string,
use this to tie the two fibreglass poles together.
Velcro strips
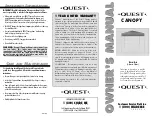
SUN CANOPY
JK Part Numbers
J39631, J39632
Please read these instructions carefully before setting up your canopy and retain them for future reference.
NOTE: This Sun Canopy is intended for fair weather use, whilst it resists showers it’s not intended for use in windy conditions or
Fibreglass
roof poles
g
g
FITTING INSTRUCTIONS