background image

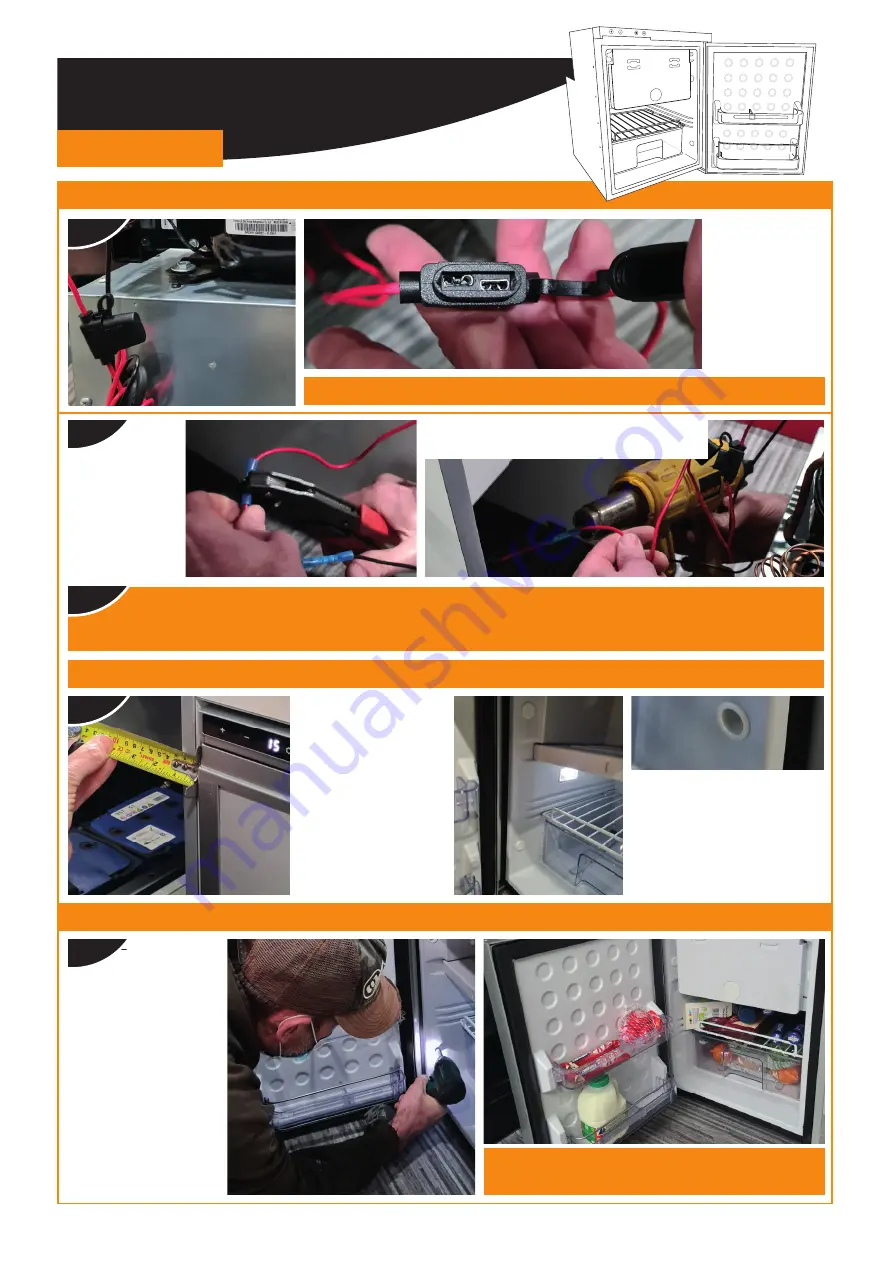
Connect the red 
(positive) wire 
from the fridge to 
the red (positive) 
wire from your 
leisure battery 
using heatshrink 
connectors. 

JKF50 FRIDGE FREEZER 

FITTING GUIDE

01.

02.

Remove the fuse 
from the fridge 
wiring. 
Cut the fridge 
wiring to a length 
that is manageable 
for the install. 

CAUTION: Make sure you have enough, you can always cut more!


Repeat step 2 for the black (negative) wire from the fridge to the black (negative) wire from your leisure battery. 


Ensure the connections are tight so they won’t disconnect over time with vibration.


Pop the fuse back into the fuse holder on the fridge.

Connect the power to your leisure battery. Press the power button on the front of the fridge and it should power up.

BEFORE YOU INSTALL – Ensure the power is disconnected from your leisure battery.

INSTALLATION 

04.

02.

Position the fridge so 
that it is centred with 
specified ventilation 
gaps, be careful to keep 
the fridge upright and 
avoid trapping any 
wires.
Depending on your 
units you may need to 
pull the fridge forward 
to make sure the fridge 
door will open fully. 

Once you are happy with the 
position use wedges to keep 
the fridge in place during the 
fixing.
 You will see four bungs, two 
on each side of the fridge that 
need to be removed.

You can then screw  
the fridge into position. 
Make sure you have 
the correct length of 
screw depending on the 
thickness of your kitchen 
units and remember 
they will be recessed  
in the fixing holes.
If not you could screw 
through your units and 
damage any laminate  
or finish.

Double check the fridge has not moved and the wedges are firmly in place to stop any movement during fitting.

Gently check the fridge is solid in it’s position.
 Your fridge is now installed and ready to enjoy. 

05.

Then the connection should be crimped, use a 
heat gun to shrink the connector to the wiring. 

03.

Summary of Contents for JKF50

Page 1: ...BUY ONLINE AT JUSTKAMPERS COM JKF50 FRIDGE FREEZER FITTING GUIDE INSTALLATION GUIDE SWAPPING THE DOOR OPENING SIDE ...

Page 2: ...ng easy access and that you can remove the fridge freezer divider there is the option to change which side the door opens Tools needed for installation Philips Head Screwdriver Flat Head Screwdriver Heatshrink Connectors X2 Crimping Tool Pliers Wire Cutters Tape Measure Wedges Drill check your battery Phillips head bit for your drill Screws depth depends on your kitchen units X4 Something to prote...

Page 3: ...sition the fridge so that it is centred with specified ventilation gaps be careful to keep the fridge upright and avoid trapping any wires Depending on your units you may need to pull the fridge forward to make sure the fridge door will open fully Once you are happy with the position use wedges to keep the fridge in place during the fixing You will see four bungs two on each side of the fridge tha...

Page 4: ...dle by removing the 3 screws holding the blanker in place from underneath Remove the two screws on the hinge right side of the fridge Remove the two screws on the left side of the fridge Remove the 2 screws on the top hinge right side of the door Take a few minutes to take a look at the fittings on each side top bottom plus the handle on the door Carefully put the fridge on it s back The fridge wi...

Page 5: ...ket Now Refit the Top display panel by screwing the 3 top screws in and then the hinge screw underneath Reattach the blanker to the left side beneath the control panel using the 3 screws Attach the handle again to the right hand side using the 2 screws Attach the non hinge bracket with the two screws to the right hand side of the base of the fridge Return the fridge to the upright position and rea...

Reviews: