background image

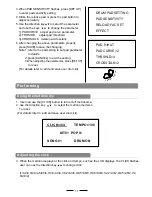
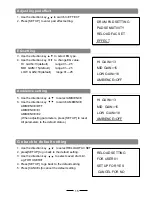
3.When PAD SENSITIVITY flashes, press [SET UP] 

   to enter pad sensitivity setting.

4.Strike the relative pad or press the pad button to 

   adjust sensitivity. 

5.Use the direction key       to select the parameter, 

   and use the keys          to change the parameter. 

1).PAD CURVE   adjust pad curve parameter

2).THRSHLD     adjust pad threshold

3).CROSSTALK   delete pad crosstalk

6.After changing the above parameters properly, 

press [SAVE] to save the changing. 

Note 1.refer to the pad setting to set pad parameter

           in details. 

     2.press [CANCEL] to exit the setting

     3.When adjusting the parameters, press [SET UP] 

        to reset. 

 (For details refer to :edit and save user drum kit)

Performing     

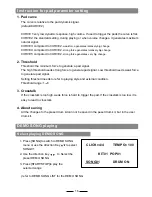
Using the metronome

1. User can use the [CLICK] button to turn on/off metronome.

2. use the direction key            to select the metronome items. 

    To reset. 

 (For details refer to :edit and save user drum kit)

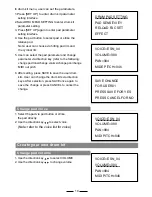
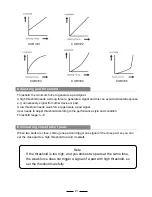
        KIT01  POP01

SONG01              DRUM ON

CLICK=4/4          TEMPO=100

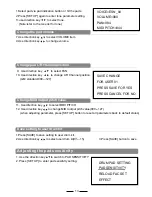
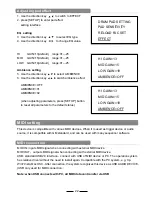
DRUM PAD SETTING
PAD SENSITIVITY
RELOAD FAC SET

 EFFECT

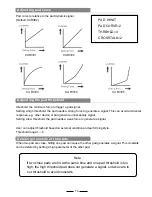
PAD  HIHAT
PAD CURVE=2
THRSHLD=4

 CROSSTALK=2

Adjusting the click

3. When the metronome plays at the click and tempo, such as the LCD displays, the CLICK flashes, 

    user can use the direction key        to change click. 

(1/4,2/4,3/4,4/4,5/46/4,7/4,8/4,9/4,1/8,2/8,3/8,4/8,5/8,6/8,7/8,8/8,9/8,1/2,2/2,3/2,4/2,5/2,6/2,7/2,

    8/2,9/2)

CANCEL

SET UP

11

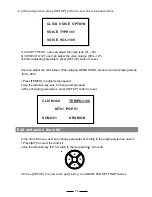
4. In the tempo item, press [SET UP] button to set click tone parameters. 

1).VOICE TYPE=01  user can adjust the voice type (01---03)

2).VOICE VOL=127 user can adjust the voice volume (000---127)

3).When adjusting parameters, press [SET UP] button to reset. 

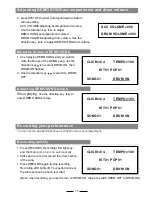
User can adjust the click tempo. When playing DEMO SONG, press tempo and playing tempo

 (030---300)  


1.

Press [TEMPO] to adjust tempo speed. 

2.

Use the direction key         to change tempo speed. 

3.

When changing parameters, press [SET UP] button to reset. 

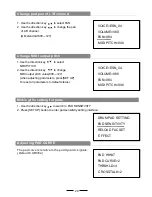
        KIT01  POP01

SONG01              DRUM ON

CLICK=4/4          TEMPO=100

CLICK  VOICE  OPTION

VOICE  TYPE=01

VOICE  VOL=100

Edit and save a drum kit          

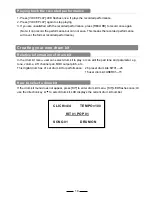
In the drum kit menu, user can change parameter according to the playing style then save it. 

1.

Press [KIT] to select the drum kit

2.

Use the direction key        to switch to the desired drum kit to edit.            

3.Press [SET UP] to enter drum pad setting, and DRUM PAD SETTINGFlashes. 

12

Summary of Contents for JED650

Page 1: ...SKD200 210 220 230 JustIn JED650 E Drumset...

Page 2: ...tric heaters or ovens Also avoid using multi plug adaptors since these can result in reducing the sound quality operation errors and possibly damage Turn Power OFF When Making Connections To avoid dam...

Page 3: ...crosstalk 14 Adjust pad effect 15 EQ setting 5 1 Ambience setting 15 User drum kit default setting 15 Pad parameter setting instruction 16 DEMO SONG playing 16 Select DEMO SONG 16 Adjust volume of ac...

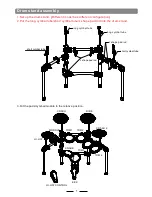
Page 4: ...cymbal tube short cymbal tube L shape pad rod into the drum stand 3 Put the pads cymbal module to the relative position 1 CRASH RIDE HI HAT TOM1 TOM2 KICK SNARE HI HAT CONTROL MODULE TOM3 TOM 4 CRASH...

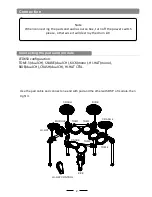
Page 5: ...230 configuration SKD200 210 configuration TOM1 3 dual CH SNARE KICK HI HAT mono RIDE dual CH CRASH dual CH HI HAT CTRL dual CH mono SKD220 230 configuration TOM1 4 dual CH SNARE dual CH KICK mono HI...

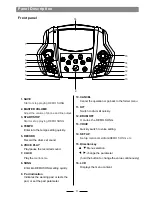
Page 6: ...o DEMO SONG setting quickly Adjust the volume of phone and line output Start or stop playing DEMO SONG 11 KIT Switch to drum kit quickly 13 VOICE Quickly switch to voice setting 14 SET UP Set up drum...

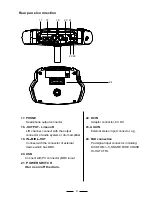
Page 7: ...t connector including KICK TOM1 3 SNARE RIDE CRASH HI HAT CTRL 20 USB Connect with PC connector MIDI in out 19 IN MIDI OUT Connect with the connector of external device which has MIDI 18 OUT PUT L mon...

Page 8: ...hen on tempo parameter indication 3 KIT01 POP01 default value when on drum kit indication 4 SONG01 default value when on demo song indication 5 DRUM ON default value when on mutes the drum sound of de...

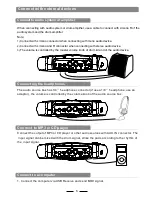
Page 9: ...volume knob of drum kit and of the audio device Connecting the headphones The audio source box has 1 4 headphone connector if use a 1 8 headphone use an adaptor the volume is controlled by the volume...

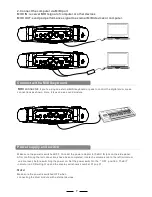
Page 10: ...e Connect with a MIDI keyboard Make sure the power is switched OFF Connect the power adaptor to the DC IN jack on the side panel After confirming that all connections have been completed rotate the vo...

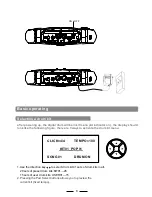
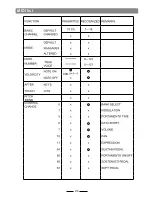
Page 11: ...lowing figure there are 3 ways to activate the drum kit menu KIT01 POP01 SONG01 DRUM ON CLICK 4 4 TEMPO 100 1 Use the direction key to select drum kit 41 sets of drum kits in all 20 sets of preset dru...

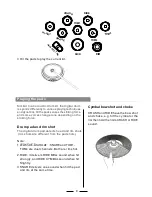
Page 12: ...d and rim shots rim shots Are different from the pad shots Note 1 SKD200 210 220 230 SNARE and TOM1 TOM4 are dual channels Both are rim shot 2 RIDE it delivers RIDE BELL sound when hit strongly and RI...

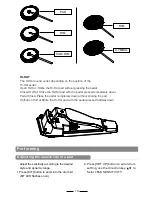
Page 13: ...he pedal completely down without striking the pad Half open Hi Hat Strike the Hi Hat pad with the pedal pressed halfway down Performing Adjusting the sensitivity of a pad PAD RIM PAD RIM CYMBAL Adjust...

Page 14: ...djusting the parameters press SET UP to reset For details refer to edit and save user drum kit Performing Using the metronome 1 User can use the CLICK button to turn on off metronome 2 use the directi...

Page 15: ...300 1 Press TEMPO to adjust tempo speed 2 Use the direction key to change tempo speed 3 When changing parameters press SET UP button to reset KIT01 POP01 SONG01 DRUM ON CLICK 4 4 TEMPO 100 CLICK VOIC...

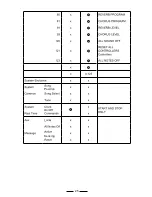
Page 16: ...pitch value 000 127 when adjusting parameter press SET UP button to reset all parameters back to default status 1 Press SAVE to save setting to user drum kit 2 Use direction key to select user drum k...

Page 17: ...orce to generate a signal Note If two close pads are hit at the same time and one pad threshold is too high the high threshold pad does not generate a signal so take care to set threshold to avoid cro...

Page 18: ...N 13 MID GAIN 15 LOW GAIN 18 AMBIENCE OFF Ambience setting RELOAD SETTING FOR USER01 SET UP FOR YES CANCEL FOR NO 5 Use the direction key to select AMBIENCE 6 Use the direction key to switch AMBIENCE...

Page 19: ...the minimum force to generate a pad signal The high threshold needs strong force to generate pad signal Low threshold needs weak force generate pad signal to Setting threshold needs to refer to playi...

Page 20: ...T01 POP01 SONG01 DRUM ON CLICK 4 4 TEMPO 100 ACC VOLUME 090 DRUM VOLUME 090 Adjusting DEMO SONG tempo When playing use the direction key to adjust DEMO SONG tempo KIT01 POP01 SONG01 DRUM ON CLICK 4 4...

Page 21: ...e Creating your own drum kit In the drum kit menu user can select drum kit to play or can edit the pad tone and parameter e g tone volume L R channel pan MIDI output pitch etc This digital drum has 41...

Page 22: ...press SAVE to save the user drum kits User can change the drum kits via direction keys After selection press SAVE once again to save the change or press CANCEL to cancel the change 5 User can select...

Page 23: ...t MIDI PITICH 2 Use the direction key to change MIDI output pitch value 000 127 when adjusting parameters press SET UP To reset all parameters to default status Making the setting for pads 1 Use the d...

Page 24: ...rce to generate a pad signal User needs to adjust threshold according to the performance style and condition Threshold range 1 8 Eliminating crosstalk of pads When two pads are close striking one pad...

Page 25: ...n adjusting parameters press SET UP button to reset all parameters to the default status MIDI connection This device is compatible with various MIDI devices When it is used as trigger device or audio...

Page 26: ...nd recording Playback the recording Setting MIDI note number to be transferred received by each pad 1 Press VOICE button to enter the VOICE menu 2 Strike the relative pad use direction key to select M...

Page 27: ...es t e 24 MIDI list BEND 99H...

Page 28: ...25 Position On Off Sensing...

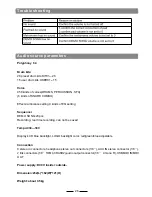
Page 29: ...ting Sequencer DEMO SONG 20 pcs Recording real time recording can not be saved Tempo 030 300 Display LCD blue backlight LOGO backlight color red green blue adjustable Connection 9 stereo in connectors...

Page 30: ...KIT26 KIT25 POP1 POP2 POP3 POP4 POP5 POP6 ROCK2 ROCK3 FUNK1 FUNK2 FUNK3 LATIN1 LATIN2 JAZZ02 JAZZ01 BRUSH ORCH DANCE1 DANCE2 EAST1 EAST2 PERC ROCK1 METAL1 METAL2 METAL3 POP1 POP2 POP3 POP4 POP5 POP6 R...

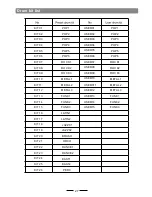
Page 31: ...28 Voice list 407 KICKC1 408 KICKC2 409 KICKC3 410 KICKC4 411 EKICKC1 412 SNAREC1 413 SNAREC2 414 SNAREC3 415 SNAREC4 416 SNAREC5 418 SRIMC1 419 SRIMC2 420 SRIMC3 421 SRIMC4 422 SRIMC5 417 ESNAREC...

Page 32: ...MC4 438 TOMC5 439 TOMC6 440 TOMC7 441 TOMC8 423 CHHC1 424 CHHC2 425 CHHC3 427 OHHC1 428 OHHC2 429 OHHC3 431 PHHC1 PHHC2 432 442 808T1 443 808T2 444 808T3 445 ECRASHC1 446 ECRASHC2 447 ECRASHC3 448 ECR...

Page 33: ...30 Voice list 455 RIDELC1 456 RIDELC2 457 RIDEHC1 458 RIDEHC2...

Page 34: ...31 Voice list...

Page 35: ...Demo Song list 32...

Page 36: ...www soundking com JustIn JED650 E Drumset Distributed by Just Music GmbH PO Box 024676 10128 Berlin Germany www justin music com...

Reviews: