background image

30

ENGLISH

Settings

Settings

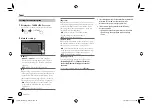
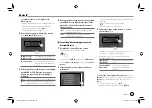
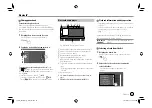
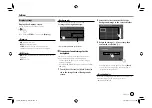
<Fader/Balance>

Touch 

[

J

]

/

[

K

]

/

[

H

]

/

[

I

]

 or drag the 

 mark to adjust.

<Fader>

Adjusts the front and rear speaker output balance. 
When using a two-speaker system, set the fader to the 
center (

0

).

• 

F15

 to 

R15

 (Initial: 

0

)

<Balance>

Adjusts the left and right speaker output balance.
• 

L15

 to 

R15

 (Initial: 

0

)

To clear the adjustment:

 Touch 

[Center]

.

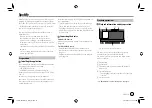
<Volume Offset>

Adjust and store the auto-adjustment volume level 
for each source. The volume level will automatically 
increase or decrease when you change the source.

If you have increased the volume first, then reduced 
the volume using the Volume Offset, the sound 
generated if you suddenly switch to another source 
may be extremely loud.
• 

–5

 to 

+5

 (Initial: 

0

)

To initialize the setting value:

 Touch 

[Initialise]

.

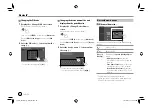
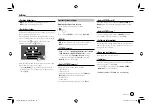
<Sound Effect>

Adjust the sound effect.

<Bass Boost>

Selects the bass boost level.
• 

OFF

 (Initial)/

1

/

2

/

3

<Loudness>

Adjusts loudness. (The LOUD indicator lights up when 
the loudness is adjusted.)
• 

OFF

 (Initial)/

Low

/

High

<Volume Link EQ>

Reduces the driving noise by raising the bandwidth.
• 

OFF

 (Initial)/

ON

<Space Enhancement>

*

Virtually enhances the sound space using the Digital 
Signal Processor (DSP) system. Select the enhance 
level.
• 

OFF

 (Initial)/

Small

/

Medium

/

Large

<Digital Track Expander>

Restores the sound lost due to audio compression to a 
realistic sound.
• 

OFF

/

ON

 (Initial)

<Sound Response>

Virtually makes the sound more realistic using the 
Digital Signal Processor (DSP) system. Select the sound 
level.
• 

OFF

 (Initial)/

1

/

2

/

3

<Sound Lift>

Moves the localization of the sound image to the 
lower or higher point. Select the height.
• 

OFF

 (Initial)/

Low

/

Middle

/

High

*  You cannot change the setting when “Tuner” is selected as the 

source.

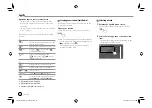
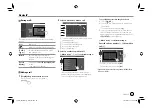
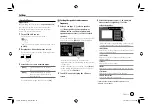
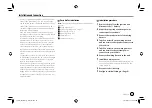
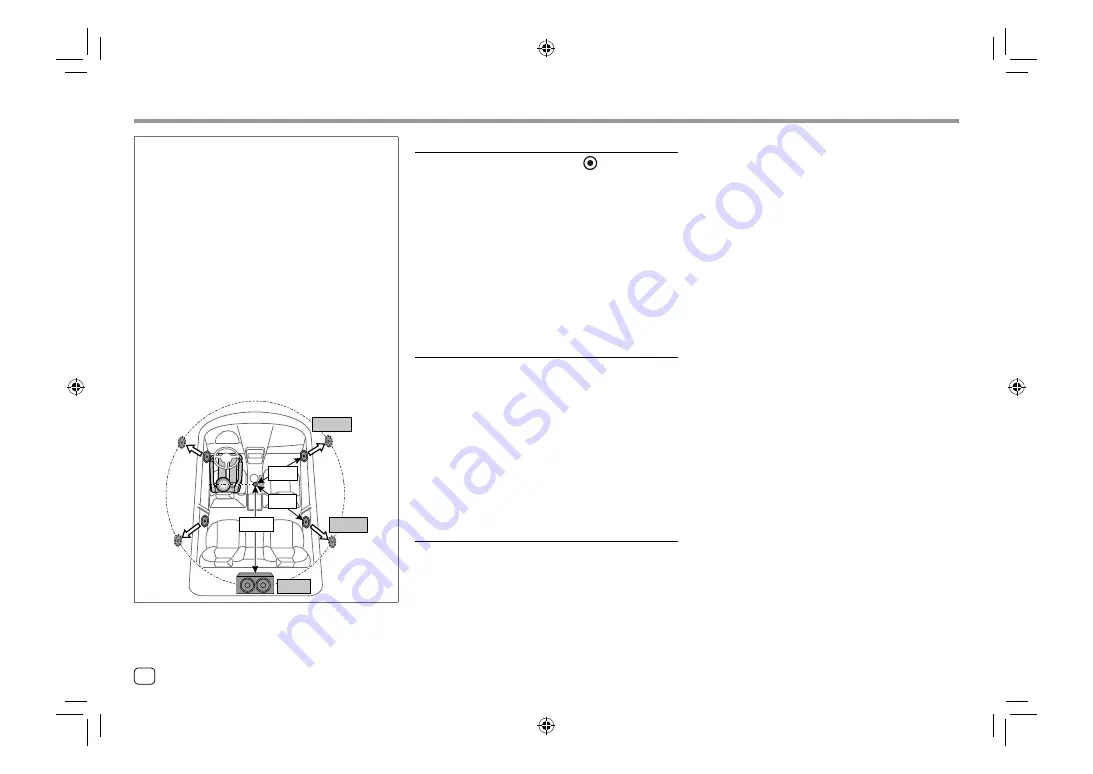
 Determining the value for <Position/DTA> 
adjustment

If you specify the distance from the center of the 
currently set listening position to every speaker, the 
delay time will be automatically computed and set.

1

  Determine the center of the currently set 

listening position as the reference point.

2

  Measure the distances from the reference point 

to the speakers.

3

  Calculate the differences between the distance of 

the furthest speaker and other speakers. 

4

  Set the DTA value calculated in step 

3

 for 

individual speakers.

5

  Adjust gain for individual speakers.

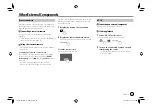
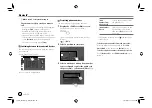
E.g. When 

[Front All]

 is selected as the listening 

position

+90 cm

60 cm

80 cm

+70 cm

150 cm

+0 cm

04_KW_M540BT_E_Body02.indd   30

04_KW_M540BT_E_Body02.indd   30

12/13/2017   11:34:59 AM

12/13/2017   11:34:59 AM

Summary of Contents for KW-M540BT

Page 1: ...GLISH This instruction manual is used to describe the models listed above Model availability and features functions may differ depending on the country and sales area 01_KW_M540BT_E_COVER indd 1 01_KW_M540BT_E_COVER indd 1 12 13 2017 11 33 08 AM 12 13 2017 11 33 08 AM ...

Page 2: ...If you have parked the car for a long time in hot or cold weather wait until the temperature in the car becomes normal before operating the unit To care for the monitor The monitor built into this unit has been produced with high precision but it may have some ineffective dots This is inevitable and is not considered defective Do not expose the monitor to direct sunlight Do not operate the touch p...

Page 3: ...agawa 221 0022 Japan EU Representative JVCKENWOOD Deutschland GmbH Konrad Adenauer Allee 1 11 61118 Bad Vilbel GERMANY English Hereby JVCKENWOOD declares that the radio equipment KW M540BT is in compliance with Directive 2014 53 EU The full text of the EU declaration of conformity is available at the following internet address http www jvc net cs car eudoc Français Par la présente JVCKENWOOD décla...

Page 4: ...nyilatkozat teljes szövege az alábbi weboldalon érhető el http www jvc net cs car eudoc Svenska Härmed försäkrar JVCKENWOOD att radioutrustningen KW M540BT är i enlighet med direktiv 2014 53 EU Den fullständiga texten av EU försäkran om överensstämmelse finns på följande Internetadress http www jvc net cs car eudoc Suomi JVCKENWOOD julistaa täten että radiolaite KW M540BT on direktiivin 2014 53 EU...

Page 5: ...a sljedećoj internet adresi http www jvc net cs car eudoc ROMÂNĂ Prin prezenta JVCKENWOOD declară că echipamentul radio KW M540BT este în conformitate cu Directiva 2014 53 UE Textul integral al declaraţiei de conformitate UE este disponibil la urmatoarea adresă de internet http www jvc net cs car eudoc БЪЛГАРСКИ С настоящото JVCKENWOOD декларира че радиооборудването на KW M540BT е в съответствие с...

Page 6: ...e security code 4 Calendar clock settings 5 Various Screens and Operations 5 Touch screen operations 5 Home screen 5 Source control screen 7 List setting screen 9 Video 9 USB 10 iPod iPhone 11 Apps WebLink Waze 12 Tuner 14 Spotify 17 Other External Components 19 Rear view camera 19 AV IN 19 Bluetooth 20 Information 20 Preparation 20 Connection 20 Bluetooth mobile phone 22 Bluetooth audio player 25...

Page 7: ...n off the power Turning off the AV source 1 Display the source option selection screen On the Home screen touch as follows 2 Turn off the AV source Adjusting the volume You can adjust the volume 00 to 40 by pressing to increase and pressing to decrease Holding increases the volume continuously to level 15 Attenuating the sound On the source control screen touch as follows The ATT indicator lights ...

Page 8: ...camera DEMO ON Initial Activates the display demonstration OFF Deactivates the display demonstration Setting the security code You can set a security code four digit number of your choice to protect your receiver system against theft Once you set the security code you are required to input the security code when the power is on to reconnect the battery 1 Display the Security Code Set screen On the...

Page 9: ...c Touch Touch the screen gently to select an item on the screen Touch and hold Touch the screen and keep your finger in place until the display changes or a message is displayed Flick Slide your finger to the left or right on the screen to change the page Swipe Slide your finger up or down on the screen to scroll the screen Home screen When you turn on the power for the first time the Home screen ...

Page 10: ... Touch Current page is shown by the page indication on the bottom of the screen To return to the Home screen Touch on the source option selection screen Customizing the source option selection screen You can arrange the items to display on the source option selection screen 1 Select an item to move Touch and hold the item you want to move until boxes appear around the icons 2 Drag the selected ite...

Page 11: ...on screen q Operation keys w Secondary screen Each time you touch the items shown on the secondary screen change as follows Indicators Displays the current source conditions etc The followings are the common indicators ATT The sound is attenuated LOUD The loudness is active MUSIC VIDEO Music video file is played back Short cut buttons Changes the source from those you have located on the Home scre...

Page 12: ...kwise Increases decreases the volume Using the pop up short cut menu While displaying the source control screen you can jump to another screen by touching the operation keys on the pop up short cut menu 1 Display the pop up short cut menu 2 Select an item to jump Home Phone DISP Camera ScreenAdjust Equalizer E g Pop up short cut menu screen 1 Displays the Home screen 2 Switches the screen Touch Th...

Page 13: ...the current screen or returns to the previous screen 4 Scrolls the text if not all of the text is shown 5 Play search keys I Play Plays all tracks in the folder containing the current track A Z Enters alphabet search to list the items in alphabetical order When a keypad appears touch the first letter you want to search for Top Returns to the root folder Up Returns to the upper layer 6 Changes the ...

Page 14: ...al with no ratio change Adjustable items are different depending on the current source You can perform this function only when you have applied the parking brake 1 Adjustable only during playback 2 Available only when the AV IN or camera screen is displayed 3 Selectable only when video from a USB device is played back USB USB You can connect a USB mass storage class device such as a USB memory dig...

Page 15: ...ry List 1 Select the file type audio video 2 Select a category then the item in the selected category From Link Search 1 Select the file type audio video 2 Select the tag type to display a list of contents that contains the same tag as the track file currently being played then select the item From Folder List Select the folder then the item in the selected folder iPod iPhone iPod iPhone Connectin...

Page 16: ...g as the track file currently being played then select the item Apps WebLink Waze Apps WebLink Waze You can display and control the App on the unit while your smartphone is connected to the USB input terminal Preparation Be sure to ground the PRK SW lead Page 39 Available Apps You can use the following Apps on this unit Install the WebLink App and or Waze App on your smartphone beforehand WebLink ...

Page 17: ...ce screen you can also operate on the touch panel as follows Displays the main menu of the WebLink source screen Exits the current App Returns to the previous screen Exits the current App 3 Operate on your smartphone When you are asked to communicate between your smartphone and the unit touch Allow to proceed If App does not start while using WebLink start the App on your smartphone Switching to t...

Page 18: ...ata System station reception when the Network Tracking Reception is activated Page 16 Lights in white Radio Data System station is being received Lights in orange Radio data System station is not being received See the following Operation keys on source control screen Operation keys on source control screen The appearance of the operation keys may differ however the similar operation keys have the...

Page 19: ...s set to English Tuner Tuner Storing preset stations in the memory You can preset 15 stations for FM and 5 stations for AM Automatic presetting SSM Strong station Sequential Memory for FM only On the source control screen touch as follows A confirmation message appears Touch Yes The local stations with the strongest signals are found and stored automatically Manual presetting 1 Select the band the...

Page 20: ...ional ON Initial Switches to another station broadcasting the same program 2 OFF Deactivates the function Auto TP Seek When traffic information station reception is poor the unit automatically searches for another station that can be received better Auto TP Seek ON Initial Automatically searches for a station with better reception for traffic information if the current reception of current station...

Page 21: ...tibility may be impaired or some or all of the services may become unavailable Some functions of Spotify cannot be operated from this unit For issues using the application contact Spotify at www spotify com Preparation Installing the application Your smartphone must has built in Bluetooth and the following profiles must be supported SPP Serial Port Profile A2DP Advanced Audio Distribution Profile ...

Page 22: ...Music or Your Library 1 Not available for tracks in a playlist 2 Not available for tracks in the Radio 3 Available only for premium account users Spotify Spotify Creating your station Start Radio Start Radio is to start a radio channel based on the currently played track Create your station On the source control screen touch as follows Station is created and playback starts automatically You can p...

Page 23: ... message appears on the screen To remove the caution message touch the screen Other External Components Other External Components You can also display the picture from the rear view camera manually without shifting the gear to the reverse R position 1 Display the pop up short cut menu 2 Display the rear view camera screen On the pop up short cut menu touch as follows To exit the camera screen Touc...

Page 24: ...gister For a Bluetooth device compatible with SSP Bluetooth 2 1 Confirm the request both on the device and the unit On the device On the unit Touch No to reject the request Bluetooth Bluetooth Information Bluetooth is a short range wireless radio communication technology for mobile devices such as mobile phones portable PCs and other devices Bluetooth devices can be connected without cables and co...

Page 25: ...e No Select this when you do not want to transfer the phonebook Connecting disconnecting a registered Bluetooth device 1 Display the Select Device screen On the Home screen touch as follows Then on the SETUP screen touch Bluetooth On the Bluetooth Setup screen touch Select Device 2 Select the device you want to connect disconnect The icons beside the registered device indicate the following Connec...

Page 26: ...om the rear view camera is displayed Changing the PIN code 1 Display the Change PIN Code screen On the Home screen touch as follows Then on the SETUP screen touch Bluetooth On the Bluetooth Setup screen touch PIN Code 2 Enter the PIN code 1 then confirm the entry 2 To clear the last entry touch BS Changing the device name of the unit displayed on the paired device 1 Display the Change Device Name ...

Page 27: ...contact to make a call A When item 1 2 or 3 is selected in step 2 If the selected contact has several phone numbers the phone number list is displayed Select a phone number to make a call Bluetooth Bluetooth To use alphabet search in the phonebook 1 Touch A Z 2 Touch the first letter you want to search for on the keypad To search for a number touch 1 3 Select a contact you want to call from the li...

Page 28: ... 1 Display the Edit Preset Dial screen On the Home screen touch as follows Then on the phone control screen touch as follows Edit 2 Select a position to store into 3 Select a method to add a phone number to preset list and register the number to the preset list 1 then touch Close 2 Add number from phonebook Select a phone number from the phonebook Add number direct Enter a phone number on the dire...

Page 29: ...eys 1 5 Signal strength and battery level Appears only when the information is acquired from the device 6 Tag data 2 current track title artist name album title Pressing scrolls the text if not all of the text is shown 7 Operation keys 1 1 See Common operation keys on source control screen on page 7 2 Available only for devices compatible with AVRCP 1 3 Playback information and key operation For p...

Page 30: ...manually Auto Pairing ON Initial Establishes pairing automatically with the iOS device such as iPhone connected via USB Auto pairing may not work for some devices depending on the iOS version OFF Cancels Sort Order Select a first name or last name to use when sorting the list in alphabetical order First Sorts the list in the order of first name Last Initial Sorts the list in the order of last name...

Page 31: ...the crossover frequency for the front or rear speakers high pass filter LPF FREQ Adjusts the crossover frequency for the speaker low pass filter Slope Adjusts the crossover slope Gain Adjusts the output volume of the selected speaker TW Gain Adjusts the output volume of the tweeter Phase Inversion Selects the phase for the speaker Speaker location selection is available only when X over Network is...

Page 32: ...age 27 Position DTA You can adjust the sound effects according to your listening position You can also localize the sound image in front of the selected seat Setting the listening position Touch Listening Position 1 then select the listening position Front L Front R Front All or All 2 Front Focus Listening Position Front L Front All Front R All Adjust Position DTA Front All is selectable only when...

Page 33: ...ont All Priority R All Priority R Adjust Position DTA When you are sitting on the Front All front seats or All front and rear seats position select left Priority L or right Priority R to specify the position to localize the sound image 2 Touch Delay 1 then adjust the sound image 2 precisely Initialise Sound Image LR Front Sound Image LR Rear Size of the Virtual Sound Field Subwoofer Delay Level De...

Page 34: ...igital Signal Processor DSP system Select the enhance level OFF Initial Small Medium Large Digital Track Expander Restores the sound lost due to audio compression to a realistic sound OFF ON Initial Sound Response Virtually makes the sound more realistic using the Digital Signal Processor DSP system Select the sound level OFF Initial 1 2 3 Sound Lift Moves the localization of the sound image to th...

Page 35: ...Then on the SETUP screen touch Display Dimmer ON Activates dimmer OFF Deactivates dimmer SYNC Initial Dims the screen and button illumination when you turn on the headlights OSD Clock ON Initial Displays the clock while a video source is playing OFF Cancels 2 Select the folder then the file for the background image in the selected folder User Background Select 3 Rotate the image 1 if necessary the...

Page 36: ... the marks at the lower left 1 then the upper right 2 as instructed Hold Hold To reset the touch position touch Reset To cancel the current operation touch Cancel Clock Select the method to set the date and clock For details see Calendar clock settings on page 5 Time Zone 2 Select the time zone for your area For details see Calendar clock settings on page 5 Clock Adjust 2 Adjust the date and clock...

Page 37: ... SETUP Clear settings The items in the Speaker X over settings cannot be adjusted when Lock is selected Unlock Unlocks the settings Audio SETUP Memory Memorizes the following audio settings Fader Balance Speaker X over Equalizer Adjustment on user preset User1 User4 Subwoofer level adjustment Position DTA Sound Effect A confirmation message appears Touch Yes Audio SETUP Recall Recall the settings ...

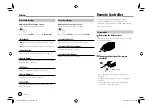
Page 38: ...ws Then on the SETUP screen touch Security Security Code Set Register the security code for the unit Page 4 Security Code Cancellation Clear the security code Page 4 Security Code Change Change the security code Page 4 Remote Controller Remote Controller You can use an optionally purchased remote controller RM RK258 for controlling the unit Refer also to the instruction manual supplied with the re...

Page 39: ...teries might have been swallowed or placed inside any part of the body seek immediate medical attention CAUTION Do not leave the battery near fire or under direct sunlight A fire explosion or excessive heat generation may result Do not set the remote controller in hot places such as on the dashboard Danger of explosion if Lithium battery is incorrectly replaced Replace only with the same or equiva...

Page 40: ...re red and the battery wire yellow to the power source running through the fuse box CAUTIONS Install this unit in the console of your car Do not touch the metal parts of this unit during and shortly after the use of the unit Metal parts such as the heat sink and enclosure become hot Before installation Precautions on installation and connection Mounting and wiring this product requires skills and ...

Page 41: ...ors either to the front output terminals or to the rear output terminals do not mix front and rear For example if you connect the ª connector of the left speaker to a front output terminal do not connect the connector to a rear output terminal Parts list for installation Note This parts list does not include all the package contents Wiring harness 1 ø Extension parking cable 2 m 1 π Microphone 3 m...

Page 42: ...SW Woofer preouts When connecting an external amplifier connect its ground wire to the chassis of the car otherwise the unit may be damaged Installing the unit Installing the unit using the mounting sleeve Bend the tabs of the mounting sleeve with a screwdriver or similar utensil and attach it in place Installing the trim plate Remove the separator of the trim plate then attach the trim plate to t...

Page 43: ...OE remote adapter not supplied which is compatible with your car If no connections are made do not let the cable come out from the tab Extension wire ø To the car s parking brake detection switch harness For best safety be sure to connect the parking sensor For 3 way speaker system connection see page 38 Pin Color and Function Connector A A4 A5 A6 A7 A8 Yellow Blue White Orange White Red Black Bat...

Page 44: ...files with following codec and extension code For USB mass storage class device MP3 mp3 WMA wma WAV wav AAC m4a FLAC flac This unit can play back files that meet the conditions below Bit Rate For USB MP3 WMA AAC 8 kbps 320 kbps Sampling Frequency For USB MP3 WMA AAC 16 kHz 48 kHz WAV FLAC 16 kHz 96 kHz Files recorded in VBR variable bit rate and have a discrepancy in elapsed time indication This u...

Page 45: ...xpose to direct sunlight or high temperatures to prevent deformation or damage to the device Unplayable USB device This unit may not play back files in a USB device properly when using a USB extension cable USB devices equipped with special functions such as data security functions cannot be used with the unit Do not use a USB device with 2 or more partitions Depending on the shape of the USB devi...

Page 46: ...his unit or the iPod iPhone A lot of noise is generated Turn off uncheck VoiceOver on the iPod iPhone For details visit http www apple com No operations are available when playing back a track containing artwork Operate the unit after the artwork has loaded Authorization Error appears Check whether the connected iPod iPhone is compatible with this unit Page 41 Troubleshooting Troubleshooting What ...

Page 47: ... Move the car to a place where you can get a better signal reception The sound is interrupted or skipped while using a Bluetooth audio player Reduce the distance between the unit and the Bluetooth audio player Disconnect the device connected for Bluetooth phone Turn off then turn on the unit When the sound is not yet restored connect the player again Troubleshooting Troubleshooting The connected a...

Page 48: ...ight approx 10 m 32 8 ft Audio Codec SBC AAC Multi Profile Support Multi Profile Profile HFP Hands Free Profile 1 6 A2DP Advanced Audio Distribution Profile 1 3 AVRCP Audio Video Remote Control Profile 1 5 GAP Generic Access Profile PBAP PhoneBook Access Profile 1 2 SPP Serial Port Profile 1 2 Troubleshooting Troubleshooting Please Wait appears The unit is preparing to use the Bluetooth function I...

Page 49: ... Input Level RCA jack mini jack 1 Vp p 75 Ω External Audio Max Input Level mini jack 2 V 25 kΩ Video Output Level RCA jack 1 Vp p 75 Ω Audio section Maximum Power Front Rear 50 W 4 Full Bandwidth Power Front Rear 22 W 4 at less than 1 THD Preout Level 4 V 10 kΩ Preout Impedance 600 Ω Speaker Impedance 4 Ω to 8 Ω Equalizer 13 Band Band Frequency Hz 62 5 100 160 250 400 630 1k 1 6k 2 5k 4k 6 3k 10k ...

Page 50: ...SE OF A CONSUMER OR OTHER USES IN WHICH IT DOES NOT RECEIVE REMUNERATION TO i ENCODE VIDEO IN COMPLIANCE WITH THE AVC STANDARD AVC VIDEO AND OR ii DECODE AVC VIDEO THAT WAS ENCODED BY A CONSUMER ENGAGED IN A PERSONAL ACTIVITY AND OR WAS OBTAINED FROM A VIDEO PROVIDER LICENSED TO PROVIDE AVC VIDEO NO LICENSE IS GRANTED OR SHALL BE IMPLIED FOR ANY OTHER USE ADDITIONAL INFORMATION MAY BE OBTAINED FRO...

Page 51: ...ED WARRANTIES INCLUDING BUT NOT LIMITED TO THE IMPLIED WARRANTIES OF MERCHANTABILITY AND FITNESS FOR A PARTICULAR PURPOSE ARE DISCLAIMED IN NO EVENT SHALL THE FOUNDATION OR CONTRIBUTORS BE LIABLE FOR ANY DIRECT INDIRECT INCIDENTAL SPECIAL EXEMPLARY OR CONSEQUENTIAL DAMAGES INCLUDING BUT NOT LIMITED TO PROCUREMENT OF SUBSTITUTE GOODS OR SERVICES LOSS OF USE DATA OR PROFITS OR BUSINESS INTERRUPTION ...

Page 52: ... For updated information the latest Instruction Manual system updates new functions etc please visit the following website http www jvc net cs car 05_KW_M540BT_E_REAR indd 1 05_KW_M540BT_E_REAR indd 1 12 13 2017 11 35 29 AM 12 13 2017 11 35 29 AM ...

Reviews: