Chapter 5---Electronics
5-66
Model 250 Service Manual
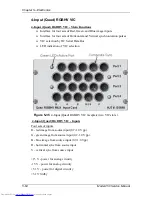
4-Input (Quad) RGBHV VIC - Outputs
RED_VIC - red image to the Video Processor PCB (0.7-1.0 Vpp).
GRN_VIC - green image to the Video Processor PCB (0.7-1.0 Vpp).
BLU_VIC - blue image to the Video Processor PCB (0.7-1.0 Vpp).
H_VIC - horizontal sync to the Video Processor PCB
V_VIC - vertical sync to the Video Processor PCB
/SEL_VIC - VIC select line to the Video Processor PCB
4-Input (Quad) RGBHV VIC - Operation
The 4-Input (Quad) RGBHV VIC accepts four sets of RGBHV inputs. It has a
Multiplexer (switcher) that selects one set of RGBHV inputs at a time. The VIC
receives a SELECT command from the System Controller PCB through the IIC
data bus to activate the VIC and select an input. The VIC sends a /SEL_VIC
signal to an internal Input Switcher (Mux) on the Video Processor PCB. This tells
the Video Processor PCB which VIC is selected and which set of inputs is
selected. An operator selects the VIC and input in the Channels Menu (see section
4-6 in the User’s Guide).
A green LED illuminates when the VIC is selected.
The 4-Input (Quad) RGBHV VIC uses two VIC slots.
4-Input (Quad) RGBHV VIC - Service Adjustments
There are no service adjustments on the RGBHV VIC
4-Input (Quad) RGBHV VIC - Remove and Replace
Tools Needed
#0 Posi-drive Phillips-head screwdriver
Parts Needed
4-Input (Quad) RGBHV VIC p/n 103668
To remove the RGBHV VIC:
1.
Power off the projector by IR Remote or PC, and allow the cooling fans to
run until they shut off automatically.
2.
Turn the AC Circuit Breaker to the OFF position and unplug the AC
Power Cord.
3.
It is not necessary to remove the rear cover.
4.
Disconnect the all the red, green blue, horizontal and vertical input BNC
cables from the VIC.
5.
Remove the four retaining screws from the faceplate of the VIC.
6.
Pull the VIC out of the Electronics Module.
7.
Reverse the process to install the VIC.
Summary of Contents for 250
Page 16: ...Chapter 2 System Description Model 250 Service Manual 2 9 ...
Page 43: ...Chapter 4 Optical 4 10 Model 250 Service Manual Figure 4 6 Optical Path ...
Page 55: ...Chapter 5 Optical 3 4 22 Model 100 Service Manual ...
Page 91: ...Chapter 5 Electronics 5 36 Model 250 Service Manual Figure 5 22 Scan Reversal PCB I O Diagram ...
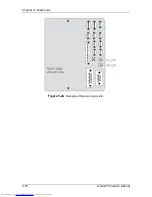
Page 131: ...Chapter 5 Electronics 5 76 Model 250 Service Manual Figure 5 44 Backplane Diagram right side ...
Page 132: ...Chapter 5 Electronics Model 250 Service Manual 5 77 ...
Page 138: ...Chapter 6 Miscellaneous Items 6 6 Model 250 Service Manual ...
Page 167: ...Chapter 7 Troubleshooting Model 250 Service Manual 7 29 ...
Page 181: ...Chapter 8 Software and Protocol 8 14 Model 250 Service Manual ...
Page 185: ...Chapter 9 Parts List 9 4 Model 250 Service Manual ...

