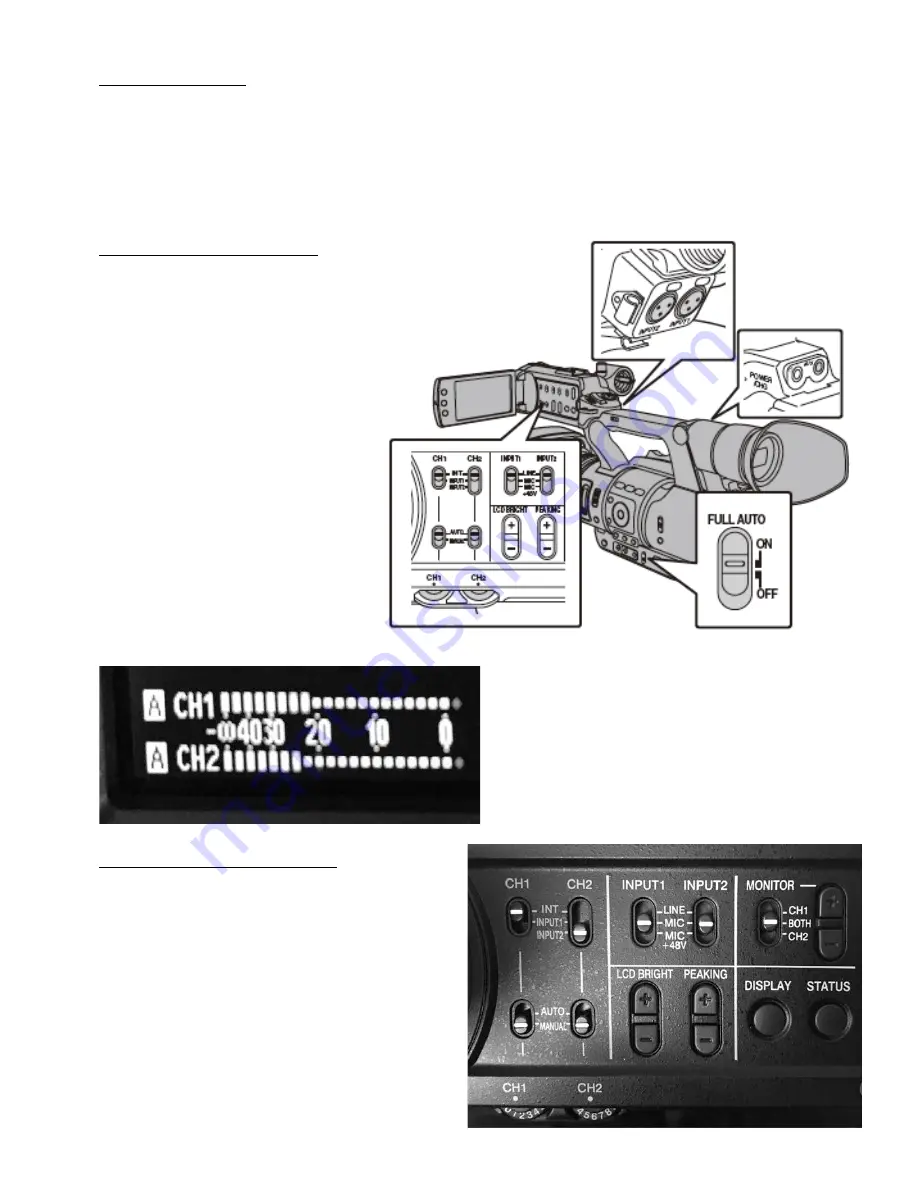
Fully Automatic Mode
The Camera will take over control over Focus, Exposure, Gain, Iris, White Balance and Sound Levels.
You still need to point the camera at your subject, zoom the lens to frame and press the start record button.
The results may be adequate in ‘normal’ conditions however the camera will give better results if adjusted manually
to the suit the prevailing conditions at the time.
Setting the Audio Record Levels
You can record using four different inputs:
•
The Built in Microphone
•
A Microphone attached to the AUX input
•
A Microphone attached to the Channel 1 XLR input
•
A Microphone attached to the Channel 2 XLR input
For the best results use an external XLR microphone
whenever possible & connect it to either
Channel 1 or 2 and adjust the
settings manually or set to Auto Levels
if you are shorthanded or pressed for time.
Press the Display Button to bring up the sound level
monitor on the LCD Screen. This will help you check
the sound levels in a visual way, its good practise to
plug in headphones & use these too check both the
sound levels as well as good microphone
positioning.
An example of a good starter setup
A good starter setup might be where you use the cameras
internal microphone to record ambient sound on
Channel 1 & then attach the kits XLR shotgun
microphone to Channel 2.
This would mean setting CH1 to INT & CH2 to INPUT2.
Then set INPUT 2 to MIC
Set the Channel Levels to MANUAL
See Photo for how this would look:
Adjust the wheels so that the sound level shown on the
LCD screen does not go above the last dot before
the 0db mark. So -2db off 0db


