background image

27

28

ENGLISH

MENU

PICTURE
SOUND

DTV

FEATURES
SET UP

DTV Menu

Timer

Edit PR

Configuration

Setup

Installation

PR

ZDF


Start

17:15

End

18:00

Date

05/05/2006

Mode

Once

Audio

PCM / Analogue

Subtitle

Off

Maturity Rating

Lock

PR

ZDF

Start

17:15

Date

05/05/2006

Mode

Once

Timer

14:00 05/05/2006

PR

Start

Mode

1 : 

ZDF

- - - - -

Once

17 : 15

Date

End

05/05/2006

Please select timer

Record

Remind

Timer

14:00 05/05/2006

PR

Start

Timer list empty

End

Date

Mode

PR

14:00 05/05/2006

Start

End

Date

Mode

1 : ZDF

17 : 15 18 : 00 05/05 /2006 Once

IMPORT

ANT!

PREP

ARE

USE

SETTINGS

TROUBLE?

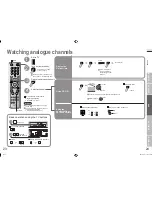
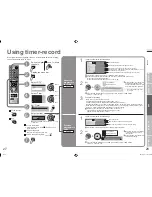
Using timer-record

To the previous 

screen

Exit

1

2
3

4

5
6

7

Display the menu bar

Select “DTV”

Select “Timer”

Switch to digital 

channels

Select an item

Reserve a 

programme 

to record

Record

Reserve a 

programme to 

watch

Remind

1

 select

2

 next

1

 select

2

 next

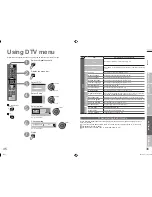
DTV original function and setting, such as a recorder-linked timer-record setting, 

can be selected from the DTV menu.

Switch TV / RADIO

(red)

1

 select

2

 next

Cancel a reservation

Select the reservation. Press “ ”. Select “Yes” and 

press “OK” button.

Change a reservation

Select the reservation and press “OK”.

Up to 20 programmes can be 

reserved.

Search a channel using EPG

Press “ ”

Select the channel

Enter the time and date with number buttons

Select the reservation mode (Once / Daily / Weekly)

Normally set to “PCM” (PCM / Analogue, Dloby Digital) 

 (P. 55)

Set subtitle recording (Off / On)

Lock the recording with the maturity rating (Lock / Unlock)

A message will be displayed if there is problem with the reservation

In the following cases, enter the PIN code 

 “When entering the PIN Code” (P. 36)

  ·  When changing the “Maturity Rating”

  ·  When reserving a channel which is set to “Lock” (P. 45)

·  Make sure not to turn off the main power.  

The Record will not function when the power lamp is unlit.

·  Set the recording device to external input mode before the start time.

·  Manually set the timer on “T-V LINK” incompatible devices. For details, refer to the device’s manual.

·  Make sure that recording times on the recording device do not overlap with recording times on the TV.

·  Some “T-V LINK” compatible DVD recorders may not work correctly.

When Rec Timer has been set, the power lamp on the TV will :  

Start blinking 3 minutes before the start time (green or red)  

Light during recording (green or orange)

TV programme
Radio programme

A message will be displayed if there is problem with the reservation

If you reserved the programme using EPG, the screen will return to EPG instead.  

 Step 3 in “Timer” (P. 20)

(blue)

Set “Timer”

Prepare for recording

1

Input / confirm timer-record settings

TV programme
Radio programme

At the start time, the channel will 

automatically change and the 

device connected to “EXT-2” will 

begin recording the programme.

(red)

Set

2

3

Set

1

Input / confirm timer-record settings

2

If you reserved the programme using EPG, the screen will return to EPG instead.  

 Step 3 in “Timer” (P. 20)

Select the channel
Enter the time and date with number buttons
Select the reservation mode (Once / Daily / Weekly)

Make sure not to turn to standby 

or turn off the main power on 

time of onset.

At the start time, the channel will 

automatically change.

(green)

(yellow)

:  When “Maturity Rating” is set 

to “Unlock”

   27-28

6/30/2006   11:50:38 AM

Summary of Contents for AV-29DL6SGE

Page 1: ... 001A U EN FARBFERNSEHGERÄT BEDIENUNGSANLEITUNG COLOUR TELEVISION INSTRUCTIONS Trade Mark of the DVB Digital Video Broadcasting Project 1991 to 1996 Number 3994 AV 29DL6SGE LCT2003 001A U_Cover indd 1 2 LCT2003 001A U_Cover indd 1 2 6 22 2006 10 29 35 AM 6 22 2006 10 29 35 AM ...

Page 2: ... Landesgesetzgebung einer entsprechenden Sammelstelle für das Recycling elektrischer und elektronischer Geräte zugeführt werden Die korrekte Entsorgung dieses Produkts dient dem Umweltschutz und verhindert mögliche Schäden für die Umwelt und die menschliche Gesundheit welche durch unsachgemäße Behandlung des Produkts auftreten können Weitere Informationen zu Sammelstellen und dem Recycling dieses ...

Page 3: ...eful functions 29 Subtitle Audio selection Sleep timer Zoom etc Just the way you like it Customising your TV 33 Using DTV menu 35 Advanced picture adjustment 37 Reduce noise Watch a more natural picture etc DTV configuration 39 DTV setup 41 DTV installation 43 Editing digital channels 45 Editing analogue channels 47 When you have trouble Troubleshooting 49 CH CC List 53 Technical information 54 Spe...

Page 4: ... shock Take care when children are near Hold the TV so as not to scratch the screen Do not touch the screen when carrying the TV Do not carry the TV on your own In order to prevent accidents ensure that the TV is carried by two or more people Never dismantle the rear panel It may cause an electric shock Never obstruct the ventilation holes It may cause overheating or a fire Handle TV screen with ca...

Page 5: ...Power On Off Change the channel page Watch video etc P 25 Select and confirm settings in menus To the previous channel Digital channels View teletext P 21 Volume Switch between VCR TV DVD P 25 When watching TV Video Mute Channel information P 17 To menu P 33 The coloured buttons can perform different functions according to the situation When viewing teletext P 21 Follow on screen instructions Other...

Page 6: ...r all the connections have been made insert the plug into an AC outlet When using an aerial which needs external power Power supply for the indoor aerial P 54 AERIAL EXT 1 Power requirements Connect the power cord only to a 220 240V 50Hz AC outlet Installation requirements To avoid overheating ensure the unit has ample room Care when setting 150mm 100mm 100mm 150mm Subscribe to a broadcasting comp...

Page 7: ...ubbing videos Using T V LINK Output Input Composite signal Sound L R Composite signal S VIDEO Sound L R T V LINK Use S VIDEO S IN P 26 Select dubbing sources DUBBING P 26 Connect a decoder DECODER EXT 2 P 34 EXT 3 Watching videos Output Input Composite signal Sound L R DIGITAL AUDIO OUT Listening to the digital audio of digital channels on external speakers Output Digital sound P 55 The sound from...

Page 8: ...ter Digital channel settings Configuration P 39 Installation P 43 Analogue channel settings SET UP P 34 Shown only when powering on for the first time 2 1 Set digital channels Select a language 1select 2set Confirm Germany is set Scan digital channels Register digital channels 1 2 4 5 What is T V LINK Connecting the TV to a T V LINK compatible device allows Analogue channels to be instantly registere...

Page 9: ...t When change a country When the TV cannot find the digital channels Is the TV connected correctly to the aerial Change the direction of the indoor aerial Is there a digital channels transmission tower nearby Turn ATTENUATOR to ON P 34 since the radio waves are too strong Check the following points Register digital channels again Service Scan P 43 If you still cannot watch digital channels after fo...

Page 10: ...o S VIDEO Name connected devices Dub videos Using EPG 19 PAGE View the programme list for 8 days Search from a genre Reserve a programme to watch record Watching videos DVDs Personal preferences Watching digital channels Watching analogue channels 23 PAGE Display the current time Using the PR list TV mode Text mode Adjust the picture Adjust the sound Basic settings channel settings etc Advanced se...

Page 11: ...ramme Symbols No indication 2view 1select PR List EPG Channels Channels registered in Initial settings will appear here You can select only from your favourite channels Favourite Mode P 39 3view 2select a channel Display only programmes which match your selected genre Genre P 20 up down Move up or down a channel You can select only from your favourite channels Favourite Mode P 39 E g 1 15 Enter a ...

Page 12: ...mme select a date a channel a programme 3 2 Date Channel Programme Display only programmes which match your selected genre Genre Reserve a programme to watch and record Timer You can find a digital channel programme from an eight day programme guide check its information and make a reservation Using EPG Electronic Programme Guide Display EPG Close EPG Genre Select a genre Only programmes in the sel...

Page 13: ...e Double the size of the displayed text Leave the current page open while you switch to watch TV Release Useful when running a page search Press the coloured button as in step 2 Press again Move up or down a page Switch digital analogue channels Enter a teletext page Hold the current page HOLD Reveal hidden pages REVEAL Enlarge the text SIZE To the index page INDEX Switch briefly from teletext to T...

Page 14: ... channels 3 2 Using PR LIST Using the number buttons up down buttons Display the Current time Select a channel No indication Time is displayed only when teletext broadcasting can be received 2view 1select PR LIST up down Move up or down a channel E g 1 15 Press a channel number 4 Switch between mono stereo bilingual broadcasting STEREO t u P 34 Time Channels registered in Initial settings will app...

Page 15: ...the blank space in 3 Set up dubbing on EXT 2 DUBBING Edit names of connected devices ID LIST 1Select the EXT 2 3Select a name from the list 1Select the arrow 2Select the dubbing source 2Set S VIDEO input Switch to S VIDEO input S IN select 1Select an EXT to assign a name to 2Show the name list 1select 2set select select Operate the connected device and play a video Select the video source Operate ...

Page 16: ...reservation In the following cases enter the PIN code When entering the PIN Code P 36 When changing the Maturity Rating When reserving a channel which is set to Lock P 45 Make sure not to turn off the main power The Record will not function when the power lamp is unlit Set the recording device to external input mode before the start time Manually set the timer on T V LINK incompatible devices For ...

Page 17: ...t Special subtitles for the hearing impaired Undefined When the subtitle s language cannot be identified The language that can be selected depends on the broadcast By default German is automatically selected When not broadcast in German another broadcast language is automatically selected Switch to another language Special audio track for the visually impaired Undefined When the audio s language cann...

Page 18: ...R Stop children from watching specific channels CHILD LOCK select CHILD LOCK select a channel to lock Remaining time You can confirm the remaining time at step 2 after repeating this process Lock more channels Repeat steps 3 and 4 2next 1select SLEEP TIMER 1select a time in minutes Display the menu Select FEATURES Select To the previous screen Exit 1 2 3 BLUE BACK Analogue channels Display blue scre...

Page 19: ...CONTRAST Contrast Lower Higher To reset to default settings BRIGHT Brightness Darker Brighter SHARP Sharpness Softer Sharper COLOUR Colour Lighter Deeper HUE NTSC only Tint Reddish Greenish COLOUR TEMP Colour temperature WARM NORMAL COOL FEATURES Finer picture adjustments P 37 SOUND STEREO t u Mode Language s STEREO v MONO t SUB1 u SUB2 BASS Low tones Weaker Stronger TREBLE High tones Weaker Stron...

Page 20: ...Code Change PIN code P 39 Favourite Mode Enable your favourite channels P 39 Maturity Rating Restrict programmes according to the age P 39 Setup Digital Audio Output When the Dolby Digital signal is received you can select to output the signal from the DIGITAL AUDIO OUTPUT terminal P 41 Banner Duration Select the display time for channel information 2 sec 5 sec 8 sec Receiver Upgrade Upgrade your ...

Page 21: ...n item Change settings E g DIGITAL VNR E g DIGITAL VNR Finish Advanced picture adjustment 1 The menu disappears after one minute of inactivity 2 3 4 5 6 2next 1select 2next 1select 2next 1select 2set 1select To the previous screen Exit When the picture loses sharpness When noise appears OFF Function is turned off MIN AUTO MAX level When the picture loses sharpness When noise appears OFF Function i...

Page 22: ...Language German Teletext Language German Enter PIN Code Favourite Mode Off Maturity Rating Country D Menu Language Audio Language Subtitle Language Teletext Language D Enter PIN Code Favorite Mode Maturity Rating None Maturity Rating Age 4 Age 5 Age 6 Age 7 Age 8 Age 9 Age 10 Age 11 Age 12 4 5 6 7 8 9 10 11 12 IMPORTANT PREPARE USE SETTINGS TROUBLE 1 2 3 4 5 6 select Display the menu bar Select DT...

Page 23: ...s on the screen to set up pay TV The content of the menu is different depending on the broadcasting company For details consult your broadcasting company The language shown in the menu may differ to the Language set for the TV Available for setting power supply for the aerial and upgrading the tuner software etc Please read Dolby Digital output from the DIGITAL AUDIO OUT terminal P 55 before setti...

Page 24: ...nel Service Scan Check the signal Signal Check Initialise the DTV settings Factory Settings Scan Automatic Scan automatically Manual Scan a specified channel range Network You can select and register only necessary networks Start Channel Specify a scanning channel range E5 E69 For Manual Stop Channel Mode Add Add a new channel to the registered channel Reinstall Register all channels again 2change ...

Page 25: ...nt to proceed No Yes 8 TERRA NOVA The selected PR will be permanently Edit PR List 14 00 05 05 2006 TV Name Delete Favourites Number Lock 4 VOX 5 Doku KiKa 6 Info 3sat 7 ZDF 1 RTL Television 2 RTL2 3 Super RTL 8 TERRA NOVA Edit PR List 14 00 TV Name Delete Favourites Number Lock 1 RTL Television 2 RTL2 3 Super RTL p 4 VOX 5 Doku KiKa 6 Info 3sat 7 ZDF 8 TERRA NOVA Edit PR List 14 00 05 05 2006 TV ...

Page 26: ...C 06 ID MANUAL 11 10 PR 12 13 14 15 16 17 18 19 CH CC CH 08 I CC 06 IMPORTANT PREPARE USE SETTINGS TROUBLE Display the menu bar Select SET UP Select EDIT MANUAL Confirm settings Finish When coming from Initial settings P 13 skip to Select a row Edit Editing analogue channels Edit the channels registered with AUTO PROGRAM in Initial settings P 13 To the previous screen Exit 8 7 6 5 4 3 2 If FEATURE ...

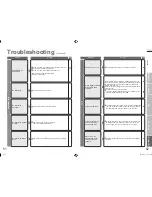
Page 27: ...lems at the aerial radio waves or the area you live in where reception is bad Consult your retailer Not displayed black screen 49 14 Press to turn off the main power Then after few minuites press again to turn the TV back on Remote control stops working Unnatural colour Adjust COLOUR and BRIGHT Check your COLOUR SYSTEM Noise Set to the following functions PICTURE MODE STANDARD DIGITAL VNR AUTO Dig...

Page 28: ... the TV or the audio system connected to the AUDIO OUT terminal When the channel is changed a message will be displayed for a few seconds To listen with the TV or audio system Select a language without Dolby from Audio Selection Switch Digital Audio Output to PCM Dolby Digital selected No analogue audio available 55 29 41 Upgrade the tuner software by using the Receiver Upgrade function When JVC o...

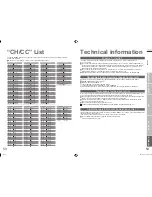
Page 29: ... 236 CC 125 236 244 CC 126 244 252 CC 127 252 260 CC 128 260 268 CC 129 268 276 CC 130 276 284 CC 131 284 292 CC 132 292 300 CC 133 300 306 CC 141 306 311 CC 142 311 319 CC 143 319 327 CC 144 327 335 CC 145 335 343 CC 146 343 351 CC 147 351 359 CC 148 359 367 CC 149 367 375 CC 150 375 383 CC 151 383 391 CH Channel CH 141 F41 CH 142 F42 CH 143 F43 CH 144 F44 CH 145 F45 CH 146 F46 CH 147 F47 CH 148 ...

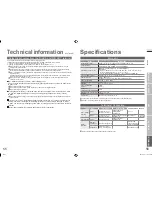
Page 30: ...channels are broadcasted with Dolby Digital signals In these cases Dolby Digital signals can be output from the DIGITAL AUDIO OUT terminal 1 Connect an audio system with a Dolby Digital decoder P 10 2 Change the Digital Audio Output setting from PCM to Dolby Digital P 41 When changing the setting the message Dolby Digital selected No analogue audio available may be displayed for a few seconds Each...

Reviews: