1-46 (No.YA318)
4.6.4 VIDEO ADJUSTMENT
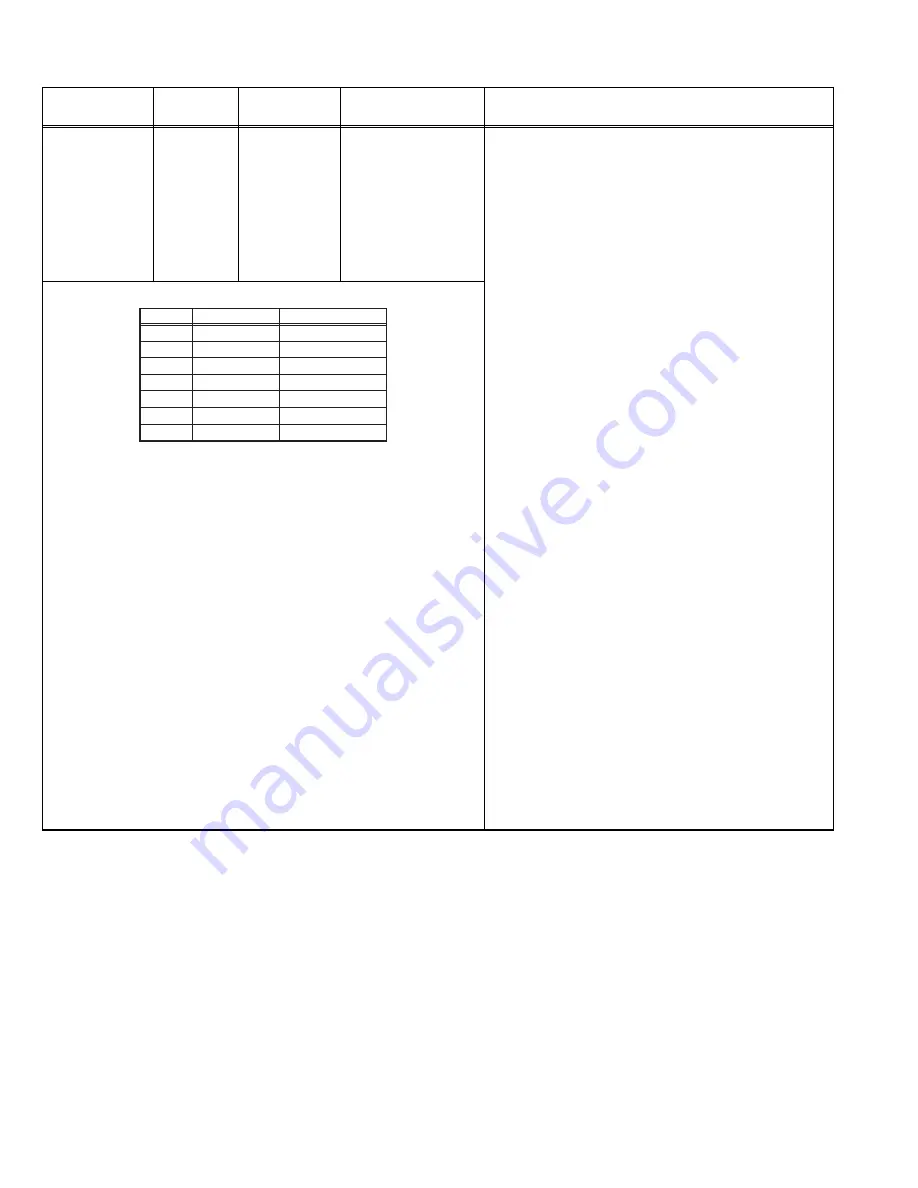
Item
Measuring
instrument
Test point
Adjustment part
Description
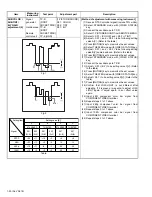
RGB CUTOFF
adjustment
Signal
generator
Oscilloscope
Remote
control unit
TP-R
[R CRT
SOCKET PWB]
TP-G
[G CRT
SOCKET PWB]
TP-B
[B CRT
SOCKET PWB]
[1.PICTURE/SOUND]
S14: CUTOF R
S16: CUTOF G
S18: CUTOF B
R SCREEN VR
G SCREEN VR
B SCREEN VR
[FOCUS PACK]
(1) Receive NTSC signal (include 0% or -3% black).
(2) Select STANDARD mode with [VIDEO STATUS]
key.
(3) Select FULL mode with [ASPECT] key.
(4) Set the COLOR TEMP is LOW mode.
(5) Connect the oscilloscope to TP-G.
(6) Select 1.PICTURE/SOUND from SERVICE MENU.
(7) Select < S03 > (BRIGHT).
(8) Set < S03 > to 127.
(9) Select < S16 > (CUTOF G).
(10) Adjust < S16 > so that the 0% or -3% signal portion
and the 100% signal portion of both sides may
become the 180V.
(11) Press [MUTING] key to memorize the set value.
(12) Receive 480i component signal (include 0% or -3%
black).
(13) Select < S03 >.
(14) Set < S03 > to 127.
(15) Select < S16 >.
(16) Set < S16 > same as memorized NTSC value.
(17) Select STANDARD mode with [VIDEO STATUS]
key.
(18) Select FULL mode with [ASPECT] key.
(19) The COLOR TEMP set at the LOW mode.
(20) Set 1080i component signal (include 0% or -3%
black).
(21) Select < S03 >.
(22) Set < S03 > to 127.
(23) Select < S16 >.
(24) Set < S16 > same as memorized NTSC value.
(25) Connect the oscilloscope to TP-R and < S14 >
(CUTOF R) adjust same manner as for (6.) to (11.)
above.
(26) Connect the oscilloscope to TP-B and < S18 >
(CUTOF B) adjust same manner as for (6.) to (11.)
above.
(27) Adjust SCREEN VR for RGB respectively, so that
the black (3%) becomes faintly whitish.
NOTE :
If it is difficult to adjust the SCREEN precisely,
adjust the SCREEN VR for one of 3 colors while
masking other 2 colors.
BRIGHT
CUTOF R
CUTOF G
CUTOF B
CUTOFSWR
CUTOFSWG
CUTOFSWB
127
185
185
185
001
001
001
S03
S14
S16
S18
S20
S21
S22
Item No.
Item name
Initial setting value
Summary of Contents for AV-48P776/H
Page 1: ......
Page 92: ... No YA318 2 4 ...
Page 135: ...2 47 No YA318 PATTERN DIAGRAMS MAIN PWB PATTERN SOLDER SIDE ...
Page 136: ... No YA318 2 48 FRONT ...
Page 137: ...2 49 No YA318 MAIN PWB PATTERN PARTS SIDE ...
Page 138: ... No YA318 2 50 FRONT ...


