background image

12

Using your TV

Picture & Display

Picture Adjustment

Adjust the picture settings such as Brightness, color and hue.

Settings

Picture & Display

Adjust the picture and screen settings.

Display Setting

Adjust the aspect ratio and viewable screen area.

Sound Ajustment:

Adjust sound and speaker-related

options.

Sound Mode:Optimize sound quality for general

content.Use ▲/▼ to scroll through the sound preset

settings:Sports,Standard,Cinema,Music and News.

Surround:Reproduces life-like surround sound when

playing 5.1-channel audio sources.Include On and Off.

Advanced Setting:Access advanced sound enhancing

options.

Volume Setting:

1)Auto Volume:Keeps the volume level constant for all 

programs and inputs.Include On and Off.

2)Balance:Adjust the speaker balance.

3)Digital Audio Out Volume:Applied for PCM only.The

volume levels between PCM and compressed audio will

differ.

4)Digital Audio Out Delay:Set the delay time for Digital

Audio.

5)Volume offset:Adjust the sound level of the current

input relative to other inputs.

Sound mode related:

1)Surround effect:Use◄/► to scroll through Surround

effect. 

2)Equalizer: Use◄/► ▲/▼ to scroll through Equalizer. 

Reset:

To return all sound settings to factory default.

Digital Audio Out:

Optical out for audio signals from the

Digtal Audio Out.

Sound

Sound Ajustment

Adjust sound and speaker-related options.

Settings

Sound

Adjust sound and speaker-related options.

Digital Audio Out

PCM

Picture Adjustment:

-  

Picture Mode:Optimize picture quality for general

content.Use ▲/▼ to scroll through the Picture preset

settings:Standard,Dynamic,Movie,Sport and Personal.

- Advanced Settings:

Access advanced picture enhancing options.

Brightness: Adjusts the brightness of the picture.

Color: Adjusts the color saturation.

Clarity:Advanced technique for picture enhancement.

Reset: To reset picture adjustment.

Display Setting:

-  

Screen mode: Adjust the picture size.Use ▲/▼ to scroll

through the Screen mode preset settings.

-  

Auto screen:Automatically adjusts screen mode based

on the signal.Include On and Off.

-  Overscan

Adjust overscan display , include on/off.

HDMI CEC Settings:

Set up CEC compatible devices for 

streamlined control.

CEC Control:Go to CEC device list to register new devices.

Device Auto Power Off:Power off HDMI devices with the TV.

TV Auto Power On:Power on the TV with a connected 

HDMI devices .

CEC Divice List: Turn devices on and select ENABLE to 

enable control of HDMI devices.

Device Control Keys: Pass through additional remote 

buttons to CEC compatible devices.

Support HDMI Mode:

Enhance 4K HDMI signal format.

External Inputs

Settings

External Inputs

Select to configure external inputs

HDMI CEC Settings

Set up CEC compatible devices for streamlined control.

Support HDMI Mode

Enhance 4K HDMI signal format.

Summary of Contents for AV-HQ507115A

Page 1: ...AV HQ657115A 65 class AV HQ557115A 55 class AV HQ507115A 50 class ...

Page 2: ......

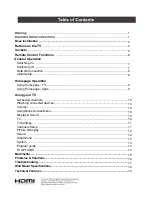
Page 3: ...ps Problems Solutions Using your TV Multimedia Troubleshooting Wall Mount Specifications Technical Features Accessing channels Watching connected devices Volume Using Quick Access Menu TV Settings Channels Setup Picture Display Sound Smart Zone System Program guide TV OPTIONS Display Sound TV 5 6 7 7 8 8 9 9 10 10 10 10 10 10 11 11 12 12 13 13 14 14 15 16 18 19 17 Base Installation 4 ...

Page 4: ......

Page 5: ......

Page 6: ......

Page 7: ...nd must be installed correctly before using the TV unless the TV is wall mounted Incorrect installation can result in damage or injury due to tip over Note Make sure the AC cord is not connected to the power outlet Before starting assembly make sure that you have a clean safe and cushioned space to work in order to avoid any damage to the TV Do not touch or press the TV screen the glass might brea...

Page 8: ...d coming from the TV When earphones are connected sound output from the TV speakers is muted Note Excessive sound pressure from earphones can cause hearing loss ANTENNA IN 5V 500mA USB 2 0 5V 500mA USB 2 0 LAN AV IN OPTICAL OUT HDMI 3 HDMI 2 HDMI 2 0 4K 2K SATELLITE IN 13 18V 500mA MAX SATELLITE socket input This port can be used to connect to the satellite receiver dish Note This option is not su...

Page 9: ... the Smart Zone access Enjoy Music Fast Cast Sleep Timer World Clock Night Mode Enter into Quick Access Menu To activate the virtual keyboard Goes to the YouTube homepage Step 1 Press button to enter the home page Step 2 Press button to enter the RC pairing screen Step 3 Step 4 The screen will display Pairing When pairing is complete the screen will display Success NOTE If you wait more than 2 min...

Page 10: ...ied Make sure you use the correct polarity Do not mix new and used batteries Do not use rechargeable batteries Do not expose batteries to excessive heat such as sunshine fire or the like throw them in a fire recharge them or try to open them as this could cause them to leak or explode Remove the batteries from the remote control if you are not using it for a long period of time 3 Connect an outsid...

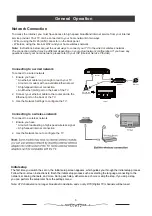
Page 11: ... wireless network To connect to a wireless network 1 Ensure you have A router broadcasting a high speed wireless signal A high speed internet connection 2 Use the Network menu to configure the TV Note Instructions below are just the usual ways to connect your TV to the wired or wireless network The connection method may be different depending on your actual network configuration If you have any qu...

Page 12: ...ces of the contents provider an application s updates or the application itself may be discontinued Depending on your country s regulations some applications may have limited service or not be supported Using Homepage TV Source Select the input source from devices connected to TV through different ports Settings Allows you to adjust TV settings Using Homepage Apps Configure the network settings be...

Page 13: ...rease the volume Sound mute press the button to temporatily mute the sound Press this button again or the VOL button to restore the sound Info Select this option to view TV infomation Picture adjustments Enter to adjust picture mode or Advanced settings Screen Select this option to adjust the picture size Sound adjustments Select this option to set the sound adjustments Speakers To enter TV speake...

Page 14: ...t program TV system or color system item then Press to select Frequency and press OK to search channel Digital Setup Digital Antenna Tuning Press OK to start the automatic search process The search may take a few minutes During the process you can press and choose YES to exit Subtitle Setup 1 Subtitle Setting Include off Basic Hearing impaired 2 Primary Preferred Language Press OK and then use to ...

Page 15: ... Out Sound Sound Ajustment Adjust sound and speaker related options Settings Sound Adjust sound and speaker related options Digital Audio Out PCM Picture Adjustment Picture Mode Optimize picture quality for general content Use to scroll through the Picture preset settings Standard Dynamic Movie Sport and Personal Advanced Settings Access advanced picture enhancing options Brightness Adjusts the br...

Page 16: ...on may be unavailable for some mobile devices Not all file formats are supported 2 Recommendations of working environments A Local Area Network Speed recommendations on 1Mbps to 2 Mbps B Files playable MP4 AVI TS FLV f4v m3u8 subject to chipset supported Sleep Timer The options include Off 10Min 20Min 30Min 60Min 90Min 120Min and 180Min World clock Enter to add World clock Night mode Turn on to ke...

Page 17: ...ill be saved in this folder Recording Error list Shows the programs that cannot be recorded Reminders Shows the programs set up for watch alerts You can set alerts from Program Guide Start recording Press OK to start recording and press again to stop You can choose how long to record the video for example record for 10 minutes 30 minutes 1 hour or 3 hours By pressing the virtual keyboard on the re...

Page 18: ...USB file name and then press OK to enter If no USB device is connected the USB interface will not be displayed Photo 1 Select Picture icon then press OK button to view the picture 2 Press Up Down Left or Right direction button to select your desired picture file and press OK to show 3 While showing picture press OK to display the play console For Previous and Next use remote left and Right key 4 U...

Page 19: ...rk 3 When two mobile hard disks are connected with the TV at the same time they will not be recognized some times All mobile hard disks consume a lot of power which may result in power supply problems We recommend inserting only one hard disk or a low power consumption mobile hard disk 4 The video from a mobile hard disk USB is playing with no sound The audio format of the video in your mobile har...

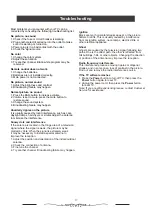
Page 20: ...ed in the fringe area of a television signal where the signal is weak the picture may be marred by dots When the signal is extremely weak it may be necessary to install a special antenna to improve the reception 1 Adjust the position and orientation of the indoor outdoor antenna 2 Check the connection of antenna 3 Fine tune the channel 4 Try another channel Broadcasting failure may happen Ignition...

Page 21: ...18 Model No AV HQ657115A and AV HQ557115A 400 200 6 12 Model No AV HQ507115A 300 300 6 12 ...

Page 22: ...UT 1230 4X71 5X718mm 350 4000 1 65 AC 110 240V 50 60Hz 205W 1451 1X277 8X909 7mm 20kg HEADPHONE OUT 1451 1X74 7X834 9mm WxDxH WxDxH WxDxH WxDxH 50 280 6000 1 AC 110 240V 50 60Hz 120W 1118X259X713mm 10 6kg HEADPHONE OUT 1118X84 5X644 5mm WxDxH WxDxH Model AV HQ507115A AV HQ557115A AV HQ657115A ...

Page 23: ......

Page 24: ......

Page 25: ......

Reviews: