background image

Safety precautions ----------------------------------- 1-2
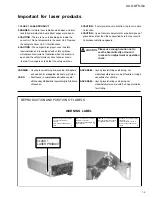
Important for laser products ----------------------- 1-3
Preventing static electricity ------------------------- 1-4
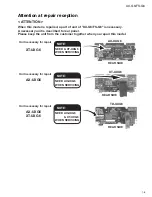
Attention at repair reception ----------------------- 1-5
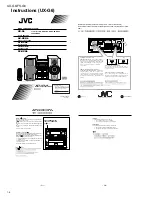
Instructions (UX-G6) --------------------------------- 1-6 - 15
AX-UXG6 ----------------------------------------------- 2-1

XT-UXG6 ----------------------------------------------- 2-11
TD-UXG6 ----------------------------------------------- 2-31
SP-UXG6 ----------------------------------------------- 2-46
Standard schematic diagrams -------------------- 2-47
Printed circuit boards -------------------------------- 2-56 - 60
Parts List ------------------------------------------------ 3-1 - 31

Contents

MICRO COMPONENT SYSTEM

SERVICE MANUAL

UX-G6/FS-G6

No.20808

Feb. 2000

COPYRIGHT 

 2000 VICTOR COMPANY OF JAPAN, LTD.

Unit composition

Contents

Model Name

STEREO AMPLIFIER

AX-UXG6

CD / TUNER

XT-UXG6

CASSETTE DECK

TD-UXG6

SPEAKER SYSTEM

SP-UXG6

M I C R O

C O M P O N E N T

S Y S T E M


U X - G 6 R

MOS - FET

OPEN/CLOSE

AUX

VOLUME

MULTI

FM/AM

STANDBY/ON

JOG

1 B I T

P • E • M

D • D • C O N V E R T E R

PHONES

COMPACT

DIGITAL AUDIO

REC  PAUSE

DOLBY  B  NR

AUTO

REVERSE

REC

>

<

MD

DOWN

SET

UP

ENTER

AUTO PRESET

PLAY  MODE

FM  MODE

CANCEL

BASS

SLEEP

PANEL

OPEN/CLOSE

REMOTE  CONTROL  RM-SUXG6E

AUX

TITTLE/EDIT

REPEAT

TREBLE

DIMMER

CLOCK/TIMER

DISPLAY

/CHARA.

ACTIVE

BASS EX.

PTY/EON

VOLUME

FM/AM

+

CD

TAPE

Area Suffix (UX-G6)

UB ............. Hong Kong

UP ..................... Korea

U ............... Other Areas

UX-G6/FS-G6

< ATTENTION >

When this model is repaired, a part of unit of “UX-G6/FS-G6” is necessary.

(Please refer to page 1-5)

Area Suffix (FS-G6)

J ......... U.S.A./ Canada

We will separately issue the

parts list of J version.

Summary of Contents for AX-UXG6

Page 1: ...PEAKER SYSTEM SP UXG6 M I C R O C O M P O N E N T S Y S T E M U X G 6 R MOS FET OPEN CLOSE AUX VOLUME MULTI FM AM STANDBY ON JOG 1 B I T P E M D D C O N V E R T E R PHONES COMPACT DIGITAL AUDIO REC PAUSE DOLBY B NR AUTO REVERSE REC MD DOWN SET UP ENTER AUTOPRESET PLAY MODE FM MODE CANCEL BASS SLEEP PANEL OPEN CLOSE REMOTE CONTROL RM SUXG6E AUX TITTLE EDIT REPEAT TREBLE DIMMER CLOCK TIMER DISPLAY C...

Page 2: ...ck Electrical shock hazard testing After re assembling the product always perform an isolation check on the exposed metal parts of the product antenna terminals knobs metal cabinet screw heads headphone jack control shafts etc to be sure the product is safe to operate without danger of electrical shock Do not use a line isolation transformer during this check Plug the AC line cord directly into th...

Page 3: ...ålning är denna del är öppnad och spårren är urkopplad Betrakta ej strålen VARO Avattaessa ja suojalukitus ohitettaessa olet alttiina näkymättömälle lasersäteilylle Älä katso säteeseen ADVARSEL Usynlig laserstråling ved åbning når sikkerhedsafbrydere er ude af funktion Undgå udsættelse for stråling ADVARSEL Usynlig laserstråling ved åpning når sikkerhetsbryteren er avslott unngå utsettelse for str...

Page 4: ...uring transport and before installation both sides of the laser diode on the replacement optical pickup are shorted After replacement return the shorted parts to their original condition Refer to the text 2 Do not use a tester to check the condition of the laser diode in the optical pickup The tester s internal power source can easily destroy the laser diode 1 2 Handling the traverse unit optical ...

Page 5: ...the customer together when you repair this model ATTENTION NOTE NEED XT UXG6 WHEN SERVICING REAR SIDE Unit necessary for repair XT UXG6 AX UXG6 NOTE NEED AX UXG6 WHEN SERVICING Unit necessary for repair AX UXG6 XT UXG6 REAR SIDE NOTE NEED AX UXG6 XT UXG6 WHEN SERVICING Unit necessary for repair AX UXG6 XT UXG6 TD UXG6 REAR SIDE Attention at repair reception ...

Page 6: ...revent from a damage or risk of fire electric shock PRECAUCIÓN para la línea de la red CA ANTESDEENCHUFARELEQUIPO compruebesila tensión de la línea de la red CA corresponde con la posición del selector de tensión situado en la parte exterior del equipo y si es diferente reajuste el selector de tensión para evitar el riesgo de incendios descargas eléctricas Notes on B type voltage selector 115 V po...

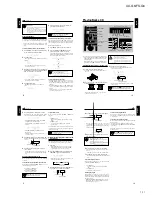
Page 7: ...e parts inside If anything goes wrong unplug the AC power cord and consult your dealer About This Manual This manual is organized as follows The manual mainly explains operations using the buttons and controls on the units You can also use the buttons on the remote control if they have the same or similar names or marks as those on the units If operation using the remote control is different from ...

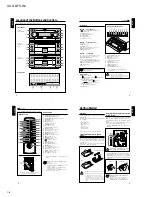
Page 8: ...button 20 u 7 stop button 17 21 i 4 button 14 17 18 21 o DIMMER button 10 standby on button 11 a SLEEP button 28 s FM MODE button 15 d AUTO PRESET button 15 f ENTER button g CANCEL button 10 18 25 h right cursor button 10 17 25 j AUX button 13 24 k CD 6 play pause button 17 l button 14 17 18 21 VOLUME button 12 Used only with MiniDisc recorder XM G6 not supplied To operate the system correctly usi...

Page 9: ...upplied with them To connect audio equipment without a digital output terminal Connect the audio output jacks on the other equipment and theANALOG IN jacks using an audio cable not supplied Be sure that the plugs of the audio cables and the jacks on the rear panel of the unit are color coded White plugs and jacks are for left audio signals and red ones for right audio signals DO NOT connect other ...

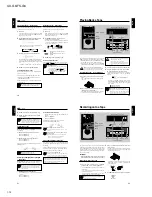
Page 10: ...rom the level setting press the button again 2 Press UP DOWN button to adjust the level Press UP button to increase the treble tone level Press DOWN button to decrease the treble tone level The treble level can be adjusted in seven steps from 3 through 0 to 3 step 0 makes no effect To cancel the effect adjust the level to 0 1 B I T P E M D D C O N V E R T E R PHONES COMPACT DIGITAL AUDIO REC PAUSE...

Page 11: ...stop 17 English To go to another track Before or during playback press 4 button repeatedly Press button Skips to the beginning of the next and succeeding tracks Press 4 button Goes back to the beginning of the current and previous tracks Rotating MULTI JOG dial clockwise also changes the tracks forwards quickly while rotating it counterclockwise the tracks reverses quickly button on the remote con...

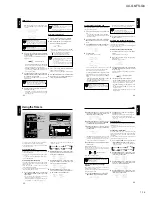
Page 12: ...ITLE EDIT CLOCK TIMER CANCEL ENTER SET 4 Buttons behind the sliding panel 4 REC REC Tape direction indicator VOLUME MD CANCEL DISPLAY CHARA TAPE FM AM DOWN SET UP AUX CD 4 7 stop TAPE playback 21 English To skip forward to the next music Press the button same as the tape direction indicator as follows 3 Press button 2 Press 4 button During Music Scan progressed the tape direction indicator starts ...

Page 13: ...eck unit Tape direction indicator stops blinking in the display window To resume recording press playback button again To end the recording press 7 stop button on the cassette deck unit Recording stops and REC indicator goes off in the display window REC Tape direction indicator 25 English Each time you press the button the timer mode changes as follows 2 Rotate MULTI JOG dial button on the remote...

Page 14: ... time length changes as follows 2 Wait for about 5 seconds after selecting the time length When the sleep timer setting is completed the display window dims and just shows the remaining time until the shut off time minute by minute like SLEEP 30 then SLEEP 29 To change the shut off time press SLEEP button repeatedly until the desired time length appears To cancel the setting press SLEEP button rep...

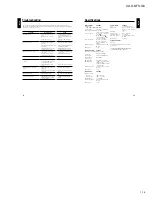
Page 15: ...30 Remove the foreign matters Clean or replace the CD see page 29 Remove the obstruction Replace the batteries see page 6 Plug in the AC power plug Stop the recording if required see pages 23 Put in the CD with the label side up Unplug the system then plug it back in 32 English Specifications Stereo Amplifier AX UXG6 Output power 48 W 24 W 24 W at 6 Ω Max Load impedance 6 Ω 6 Ω to 16 Ω allowance A...

Page 16: ...1 16 UX G6 FS G6 M E M O ...

Page 17: ...2 1 UX G6 FS G6 AX UXG6 ...

Page 18: ... assembly 3 Remove the front panel assembly downward along the front sub panel rails as shown in Fig 4 and 5 ATTENTION Do not lose the two collars of the part a when removing the front panel assembly 4 Disconnect the card wire extending from the upper part of the front panel assembly When reattaching the front panel assembly fit the parts a on both sides of the front panel assembly to the grooves ...

Page 19: ...ing the rear panel and the voltage selector See Fig 9 Prior to performing the following procedure remove the top cover 1 Remove the cord stopper on the rear panel while moving it in the direction of the arrow 2 Remove the two screws E attaching the voltage selector on the rear panel The voltage selector can be removed without removing the rear panel 3 Remove the five screws F attaching the rear pa...

Page 20: ...he transformer assembly See Fig 11 Prior to performing the following procedure remove the top cover 1 Disconnect the harness from connector CN904 CN905 and CN903 on the main board 2 Remove the four screws H attaching the trans former assembly 3 Remove the cord stopper and the voltage selec tor as shown in Fig 9 If necessary unsolder the soldered point and cut off the belt fixing the harness Fig 10...

Page 21: ...rd 2 Remove the two screws I attaching the main board and the screw J attaching the heat sink 3 Remove the screw K attaching the heat sink on the bottom of the body The main board will come off along with the heat sink ATTENTION When reattaching make sure that the part f micro switch on the main board is correctly attached to the elbowed slide bracket When removing the heat sink 4 Disconnect the h...

Page 22: ...regulator board 1 Disconnect the harness from connector CN907 on the main board 2 Remove the two screws O attaching the slide gear motor assembly 3 Remove the belt from the motor pulley 4 Remove the two screws P and the screw Q attaching the motor assembly Fig 19 Fig 20 Fig 21 O O Slide gear motor assembly Main board CN907 P Motor pulley Belt Q ...

Page 23: ...sub panel assembly Removing the system control board operation switch board See Fig 25 and 26 Prior to performing the following procedure remove the top cover the front panel assembly and the front sub panel assembly 1 Disconnect the harness from connector CN710 on the system control board 2 Remove the five screws T attaching the system control board 3 Remove the four screws U attaching the opera ...

Page 24: ...jor ICs LB1641 IC901 DC Motor driver 1 2 3 4 5 6 7 8 9 10 GND OUT1 P1 VZ IN1 IN2 VCC1 VCC2 P2 OUT2 Input Output Mode IN1 IN2 OUT1 OUT2 Brake 0 0 0 0 1 0 1 0 0 1 0 1 1 1 0 0 CLOCKWISE COUNTER CLOCKWISE Brake 1 Pin Layout 2 Pin Functions ...

Page 25: ... F System micom I F to XT UXG6 Status signal output System micom I F to XT UXG6 Clock signal input System micom I F to XT UXG6 Ready input System micom I F to XT UXG6 Power ON control output H Power ON System mute Power supply Connect to GND Speaker protector Panel lock 95h 00h 200ms Connect to GND Key input S7001 S7004 Power supply 5V Standard AD Power supply 5V Connect to Vdd Reset input Non con...

Page 26: ... Q1015 Q1011 Q1013 Q1017 RCH POWER AMP Q1016 Q1012 Q1014 Q1018 RELAY RY201 MOTOR DRIVER IC901 KEYI1 4 KEYO1 3 POWERLED STBYLED JOG1BLU JOG2BLU PANELKEY JOG1A B JOG2A B L R IN RESET COMMAND CLK STATUS AXRESET READY INH SW912 CLOSESW OPEN CLOSE LM LO RO DOOR OPEN CLOSE MOTOR M9001 SW911 OPENSW IC101 SPK L SPK R SPEAKER TERMINAL J2001 SUB WOOFER OUT J2002 CN908 CN907 FW904 FW701 CN710 CN702 CN701 CN7...

Page 27: ...2 11 UX G6 FS G6 XT UXG6 ...

Page 28: ...over in the direction of the arrow while pulling it Removing the front panel assembly See Fig 2 to 4 Prior to performing the following procedure remove the top cover 1 Cut the tie band fixing the harness on the side of the body Remove the screw C and the harness on the side of the analog in digital out board Disconnect the harness from connector CN451 2 Disconnect the harness from connector CN501 ...

Page 29: ...n the back of the rear panel and pull out the harness outward Removing the system control board See Fig 7 Prior to performing the following procedure remove the top cover and the rear panel 1 Disconnect the harness from connector CN501 and CN506 on the system control board respec tively 2 Remove the two screws F attaching the system control board 3 Disconnect connector CN502 CN503 CN504 and CN507 ...

Page 30: ... CN455 CN456 and CN457 on the analog in digital out board from the connector on the main CD servo board 3 Disconnect connector CN443 on the relay board from the connector on the main CD servo board Removing the tuner board See Fig 11 Prior to performing the following procedure remove the top cover and the rear panel 1 Disconnect CN506 on the system control board 2 Remove the screw H attaching the ...

Page 31: ...2 Remove the three screws K attaching the main CD servo board 3 Disconnect the harness from connector CN440 and CN438 on the main CD servo board on the back of the CD mechanism assembly 4 Remove the card wire from connector CN439 on the main CD servo board Removing the front board See Fig 15 Prior to performing the following procedure remove the top cover and the front panel assem bly 1 Remove the...

Page 32: ... etc are inserted in the hole in the bottom of the mechanism and turns counterclockwise and the CD tray is drawn out 3 Two screws B which is the fixation of clamper base is removed clamper base is lifted and removes 4 One the screw C which suppresses the traverse mechanism is removed 5 The damper in four places is removed CD tray Tray stopper screw A Hole by which driver is inserted Drive motor bo...

Page 33: ...r by same strength 3 The motor substrate is fixed with the screw and the substrate is soldered with each motor 4 The turntable is installed 5 When the turntable is installed the center of the turntable is vertically pushed on and an accurate turntable is pushed so that height from the mechanism base to the upper surface of the turntable may become 19 4mm Method of bonding motor shaft and turn tabl...

Page 34: ... Automatic measurement of TE amplitude and automatic tuning of TE balance 500mv div 2ms div Fig 1 Approx 3sec pin 25 of IC462 TE Approx 1 8V VREF Tracking error waveform at TOC reading Power ON Play Key Confirm that the Focus error S cuve signal at the pin28 of IC462 is approx 2Vp p Confirm that the signal from pin24 IC461 is 0V as a accelerated pulse during approx 400ms Confirm the waveform of th...

Page 35: ...of the laser diode When the life of the laser diode has expired the following symptoms will appear 1 The level of RF output EFM output ampli tude of eye pattern will below Is the level of RFOUT under 1 25 0 22Vp p Replace it NO YES O K 3 Semi fixed resistor on the APC PC board The semi fixed resistor on the APC printed circuit board which is attached to the pickup is used to adjust the laser power...

Page 36: ... PDBD PDF PDE PDER PDFR TBAL FBAL EF EF OUT TE TE OUT CROSS TE BPF VDET LD OFF VREF ENV 30 24 25 26 23 22 1 4 3 33 32 34 31 36 35 13 14 15 16 20 2 21 6 29 7 28 27 8 9 10 17 11 12 19 ENV CURCUIT RF DET AGC EQ BDO OFTR VCBA VCBA VCBA VCBA 1 Pin layout 1 2 3 4 5 6 7 8 9 10 11 12 13 14 15 16 17 18 36 35 34 33 32 31 30 29 28 27 26 25 24 23 22 21 20 19 2 Block diagram ...

Page 37: ... error Inverse input pin for tracking error amp Tracking error signal output Tracking error cross output Input pin of tracking error through BPF Vibration detection signal output Connect to ground Reference voltage output Description APC amp input terminal APC amp output terminal APC ON OFF control terminal Envelope output Ground RF detection signal output Of track status signal output BDO output ...

Page 38: ...CH3 OUTB CH3 OUTA OP IN OP IN CH2 INB CH2 INA CH2 OUTB CH2 OUTA GND OP OUT 2 3 4 1 5 L S1 S 2 S 3 VSS COM 1 6 7 8 9 S 4 S 5 S 6 COM 2 10 11 12 S 7 S 8 COM3 13 ST 14 GND 27 26 25 28 24 R S1 S 2 S 3 VDD COM 1 23 22 21 20 S 4 S 5 S 6 COM 2 19 18 17 S 7 S 8 COM3 16 DATA 15 CK SHIFT RESISTOR SHIFT RESISTOR LATCH SHIFT RESISTOR LATCH TC9164AN Switch to On Off of S1 to S8 by control of LSI 1 Function 2 T...

Page 39: ...ubcode buffer DSL PLL VCO Digital deemphasis 8tims Over Sampling Digital Filter PLL VCO2 DD Method DAC PEM R PEM L AVDD2 OUT2D OUT2C OUT1D OUT1C AVSS2 FLAG IP FLAG TX ECM PC LRCK SRDATA BCLK DMUTE VREF TRV KICK PLAY TRVSTP ECS TVD TRD FOD TBAL FBAL TLOCK FLOCK LDON TOFS WVEL SENSE VDD VSS DVDD1 DVSS1 RST TEST FE TE RFENV TRCRS VDET BDO RFDET OFT STAT X1 X2 XSEL SMCK FCLK VCFO CK384 MDATA MCLK MLD ...

Page 40: ...output Focus error signal input Analog input Tracking error signal input Analog input RF envelope signal input Analog input Vibration detect signal input H detect Off track signal input H off track Track cross signal input RF detect signal input L detect BDO input pin L detect Laser ON signal output H on I I I I O I O I I I I I I Description Non connect Non connect TOFS PLAY WVEL ARF IREF DRF DSLF...

Page 41: ...Open state after the power on reset Input output port Input output port Data input output Function IF counter signal input IF signal output Not use AM Local OSC signal output FM Local OSC signal input Power suplly VDD 4 5 5 5V When power ON Reset circuit move PLL charge pump output H Local OSC frequency Height than Reference frequency L Low Agreement Height impedance Input for active lowpassfilter...

Page 42: ...t H mono L stereo Output Rch Output Lch Voltage controlled terminal When voltage of terminal is MONO at H and ST at L When voltage of terminal is AM at H and FM at L Multi plex signal input AM detection signal output FM detection signal output Bypass to FMIF Input of AMIF signal Fixed voltage output terminal Output terminal for AM mixer Input of FMIF signal Function Function 2 Pin Function 1 Block...

Page 43: ...IN L TREBLE L INL MUXOUT VOLUME VOLUME TREBLE TREBLE MIDLE MIDLE SPEAKER ATT RIGHT SPEAKER ATT LEFT BASS BASS SUPPLY G G I C BUS DECODER LATCHES 2 0 30dB 2dB STEP INPUT MULTIPLEXER GAIN CSL DIG GND TREBLE R TREBLE L MIN L MOUT L BOUT L BIN L BOUT R BIN R MOUT R MIN R INR MUXOUTR INL SDA CREF Vs AGND ROUT LOUT R IN4 R IN3 R IN2 R IN1 L IN1 L IN2 L IN3 L IN4 MUXOUTL TDA7439 1 2 3 4 5 6 7 8 9 10 11 1...

Page 44: ...hen power is ON INH detection H Non connect Connect to GND 61 62 63 64 65 66 67 68 69 70 71 72 73 74 75 76 77 78 79 80 81 82 83 84 85 86 87 88 89 90 91 92 93 94 95 96 97 98 99 100 AVSS CD OPT MDRESET AVREF MD Rx MD Tx NC SUBQ NC SQCK AXRESET READY STATUS COMMAND CLK NC MCLCK REST SW LSI RST STAT MLD MDATA NC MDRECLED FCD SMUTE HPMUTE LED0 MDINLED NC CLOSESW OPENSW CLOSE OPEN NC FTU TUNERTEST NC SP...

Page 45: ...UT MCLK MDATA MLD SUBQ SQCK STAT LSIRST OPEN CLOSE OPENSW CLOSESW IC434 L4121 L4221 TUO L R TO CD MECHANISM SYSTEM CONTROL IC501 ELECTRIC VOLUME IC435 OPERATION SWITCH S5001 S5003 HEADPHONE AMP IC436 REMOTE CONTROL IC502 FTU TU L R PERIODO MPX TCLK TDATA RDS CLK RDSDATA CLK COMMAND STATUS READY BLKCK RESTSW SUBQ LSIRST SQCK STAT MLD MDATA REM KEY0 CD OPT MDRESET MDKEY AXRESET RESET MDRECLED INH MD...

Page 46: ...2 30 UX G6 FS G6 M E M O ...

Page 47: ...2 31 UX G6 FS G6 TD UXG6 ...

Page 48: ...lowing procedure remove the top cover 1 Disconnect the card wire from connector CN637 on the main board and remove the screw C attaching the ground terminal on the main board 2 Remove the three screws D on the bottom of the body 3 Release the joint a on the bottom and the joints b on both sides of the body and remove the front panel assembly toward the front Fig 1 Fig 2 Fig 3 Fig 4 Fig 5 A x 2 B B...

Page 49: ... out the harness outward Removing the cassette mechanism assembly See Fig 8 Prior to performing the following procedure remove the top cover and the front assembly 1 Disconnect the card wire from connector CN647 and the harness from CN635 on the main board respectively 2 Disconnect the harness from the connector on the motor board in the cassette mechanism assembly 3 Remove the four screws F and d...

Page 50: ...following procedure remove the top cover the rear panel the loading mechanism board and the Dolby board 1 Disconnect the card wire from connector CN637 and CN647 on the main board Then disconnect the harness from CN635 2 Remove the four screws G attaching the main board Removing the front board See Fig 11 Prior to performing the following procedure remove the top cover and the front panel assem bl...

Page 51: ...hanism and capstan motor bracket from the loading section 7 Turn the unit over and remove the four screws C securing the cassette mechanism assembly 8 Loading section Detach the left and right side brackets by pressing their bottoms into the unit and then pulling them towards the back Detach the left side by turning the loading gear 9 To detach the tray without removing the screws D and E securing...

Page 52: ...screws G securing the head block when installing attach to the return gear arm 2 Pinch roller assembly 1 Remove the pinch roller return spring used to prevent particle build up 2 Release the hook securing the pinch roller arm and pull the assembly up 3 Reel disk Press in the tip and pull out the disk The stopper reel feather spring and reel disk are detached at the sometime F F Fig 4 G G Fig 5 Fig...

Page 53: ...arm shaft 3 Remove the four switches I securing the mechanism base unit 4 Pull out the reel idle gear 5 Turn the unit over and remove the screw J Detaching the flywheel 1 Remove the C washers and washers from the capstan 2 Pull out the flywheel Note When assembling be sure to replace the C washers and washers on the same sides they came from H H Unsolder J Fig 8 Guide Reel idle gear I I I I Fig 9 ...

Page 54: ...tion shown by the arrow to position the stud 6 Check the positioning of the plunger 7 Set the cam gear with the screw K 8 Turn the cam gear and make sure that the headbase moves back and forth Cam gear K Turn Fig 11 Spring Insert in the slit Slider This should be positioned here Assembly so that the stud is positioned here Slide the head return slider a little in the derection shown by the arrow d...

Page 55: ...t tapes specified by this division 6 600 resistors and so forth for attenuator matching 7 Distortion meter band pass filter 8 Torque gauge cassette For adjusting the torque related to CTG N TW211 TW2121 TW2231 and TW2241 9 Wow flatter meter 10 Frequency counter 11 M300 gauge Gauge M300 12 Band pass filter 2 Setting of the respective switches and volume knobs Dolby NR switch OFF Reverse mode ON Pow...

Page 56: ...maximum and the output of both of the channels becomes maximum 1 Connect the frequency counter to the LINE OUT terminal 2 Play the test tape VT712 3 With VR671 adjust the counter reading to 3 000Hz 1 Connect the wow flatter meter to the LINE OUT terminal 2 Play the test tape VT712 3kHz 3 Confirm that the wow flatter value is within 0 18 JIS WTD 1 Confirm the playing torque by using the torque test...

Page 57: ...ues at 1kHz and 12 5kHz outputs with VR612 Lch and VR622 Rch Confirm that the input level at the test point TP CN641 terminal is 25 5dB when 1kHz 28 2dBs has been applied to the line input Connect the frequency counter to the test points TP631 and TP632 and adjust the bias frequency to 100kHz with Record 1kHz 12 5kHz with a normal tape and adjust the deviation at 12 5kHz to 0 0 5dB with reference ...

Page 58: ...ding the above erase a part of the recorded portion 3 Measure the ratio of the erased portion to the recorded portion with an electronic voltmeter 1 After loading the test tape TMT6447 press the PLAY and FF buttons or REW button After rewinding the tape perform music scanning and execute the PLAY action 2 After loading the test tape TMT6447 press the PLAY and FF buttons or REW button In this case ...

Page 59: ...6 LO 7 RO 8 VCC VCC 510K 39K VCC VCC VCC VCC 510K 39K MUTE HA12136A IC635 Noise reduction amplifire DET BIAS 16 15 14 13 12 11 10 9 1 2 3 4 5 6 7 8 SW SW BUFFER AMP BUFFER AMP SIDE CHAIN SIDE CHAIN REC OUT PB OUT REC PB BIAS PB IN REC IN GND Vcc REC OUT REC IN DET PB OUT NR ON OFF Vref PB IN ...

Page 60: ...Indicator control output REVERSE Play Indicator control output FORWARD Play Indicator control output REVERSE Indicator control output DOLBY B NR Non connect Key matrix output Non connect Key matrix input Non connect Plunger ON Capstan motor ON Non connect Detect reverse recording Recording prohibition Non connect Tape detecting tape in use L tape ON L Tape detect yes or not Detecting to reel pulse...

Page 61: ...CH CAPSTAN MOTOR CAPSTAN MOTOR CONTROL Q6731 Q6733 DOLBY IC IC635 TAPE SPEED VR671 TRAY CONTROL IC673 PHOTO DETECTOR Q6734 Q6735 OPEN SWITCH CLOSE SWITCH DRIVE MOTOR PB L R REC L R KI0 2 KO0 KO1 NROFF NRREC REC L R REC L R PB L R PB L R RESET REC PB CMA CMB CMA CMB CAPN PLZ DETECT OPEN CLOSE OPEN SW CLOSE SW CN633 CN636 CN635 CN634 CN644 CN648 CN647 CN632 CN642 CN667 CN637 CN646 Connect to CN433 X...

Page 62: ...nvex part of the ornament panel has inserted in the concave part on the cabinet The wound must not adhere by using the cloth etc when it is not easy to remove Removing the tweeter unit See Fig 5 1 The ornament panel is removed 2 T wo plug wires black and yellow connected with the tweeter unit are pulled out 3 Remove the two screws A attaching the tweeter unit Removing the woofer unit 1 The ornamen...

Page 63: ...2 47 UX G6 FS G6 A B C D E F G 3 4 5 2 1 Power transformer section AX UXG6 Standard schematic diagrams Parts are safety assurance parts When replacing those parts make sure to use the specified one ...

Page 64: ...2 48 UX G6 FS G6 A B C D E F G 3 4 5 2 1 Main AMP and power supply section AX UXG6 Parts are safety assurance parts When replacing those parts make sure to use the specified one MAIN SIGNAL CN908 ...

Page 65: ...2 49 UX G6 FS G6 A B C D E F G 3 4 5 2 1 FL Display and micom section AX UXG6 ...

Page 66: ...2 50 UX G6 FS G6 A B C D E F G 3 4 5 2 1 System control section XT UXG6 Main signal ...

Page 67: ...2 51 UX G6 FS G6 A B C D E F G 3 4 5 2 1 CD Servo control section XT UXG6 CD Main signal Tape P B signal Tape REC signal Tuner signal MD Play signal MD REC signal ...

Page 68: ...2 52 UX G6 FS G6 A B C D E F G 3 4 5 2 1 Tuner section XT UXG6 except Ver J FM Tuner signal ...

Page 69: ...2 53 UX G6 FS G6 A B C D E F G 3 4 5 2 1 Tuner section XT UXG6 only Ver J FM Tuner signal ...

Page 70: ...2 54 UX G6 FS G6 A B C D E F G 3 4 5 2 1 Head AMP Mechanism control section TD UXG6 Tape playback signal Tape recording signal ...

Page 71: ...2 55 UX G6 FS G6 A B C D E F G 3 4 5 2 1 Dolby section TD UXG6 Tape playback signal Tape recording signal ...

Page 72: ...2 56 UX G6 FS G6 A B C D E F G 3 4 5 2 1 Printed circuit boards System control Main amplifier board AX UXG6 ...

Page 73: ...2 57 UX G6 FS G6 A B C D E F G 3 4 5 2 1 System control Analog IN digital OUT board XT UXG6 ...

Page 74: ...2 58 UX G6 FS G6 A B C D E F G 3 4 5 2 1 CD Servo Main board XT UXG6 ...

Page 75: ...2 59 UX G6 FS G6 A B C D E F G 3 4 5 2 1 Main board TD UXG6 ...

Page 76: ...2 60 UX G6 FS G6 A B C D E F G 3 4 5 2 1 Tuner board TD UXG6 ...

Page 77: ...3 12 CD loading base assembly and parts list 3 13 Electrical parts list 3 15 TD UXG6 3 20 Exploded view of general assembly and parts list 3 20 Cassette mechanism assembly and parts list 3 22 Electrical parts list 3 27 Packing materials and accessories parts list 3 30 All printed circuit boards and its assemblies are not available as service parts UX G6 AX UXG6 XT UXG6 TD UXG6 Area Suffix UX G6 UB...

Page 78: ... 15 72 71 66 64 65 75 81 63 62 61 6 2 5 7 8 9 7 1 4 3 8 70 30 35 22 22 49 80 48 77 40 49 33 31 29 23 35 34 34 28 26 27 55 39 39 69 69 68 74 73 32 43 46 47 52 52 53 53 36 39 39 42 41 37 41 42 54 48 44 44 78 45 20 20 69 69 59 82 Pulley specified height 6 5mm 0 1mm 2 5mm 0 1mm 29 31 FL Display board Main board Amplifier board Regulator board System control board 83 84 79 Exploded view of general asse...

Page 79: ...EDIT SW PWB 20 E75896 002 FELT SPACER 2 FOR FOOT 21 LV31444 001A JOG KNOB 2 22 QYSBST3006Z T SCREW 2 FOR F BASE B CHASSIS 23 LV31489 001A MOTOR BKT ASS Y 1 26 LV41304 001A WORM WHEEL 1 27 QYREE2000X E RING 1 28 VYH8090 001SC GEAR 1 1 29 LV41303 001A PULLY 1 30 VKB3000 183 BELT 1 31 PWN10EB12A5 DC MOTOR 1 32 QYSPSPT2020Z MINI SCREW 2 FOR MOTOR 33 QYSBST2005Z T SCREW 1 FOR PWB M BKT 34 QYSBST3006Z T...

Page 80: ... 66 QYSDSG3008N T SCREW 1 FOR SYS CONNECT 67 LV41755 001A CAUTION LABEL 1 68 QQT0273 004 POWER TRANSF 1 T001 69 QYSDSTL4008E SPECIAL SCREW 4 FOR TRANS 70 LV31816 002A BARRIER A 1 FOR TRANS 71 QMPK090 205 JN POWER CORD 1 U QMPN100 200 JD POWER CORD 1 UB EMP7000 200 POWER CORD 1 UP 72 QZW0033 001 STRAIN RELIEF 1 73 QMF51E2 R50 J1 FUSE 1 F9801 74 QMF51E2 2R5 J1 FUSE 1 F9001 75 QUQB12 2018BJ FFC WIRE ...

Page 81: ...1CM 222Y C CAPA IM C9101 QCF11HZ 103 C CAPACITOR 010MF 80 20 C9102 QETM1EM 108 E CAPACITOR 1000MF 20 25V C9103 QETC1AM 107Z JB E CAPACITOR 100MF 20 10V C9104 QETC1AM 107Z JB E CAPACITOR 100MF 20 10V C9105 QDYB1CM 103Y C CAPACITOR C9106 QETC1HM 227Z E CAPACITOR 220MF 20 50V C9107 QETC1HM 107Z E CAPACITOR 100MF 20 50V C9108 QETC1HM 226Z E CAPACITOR 22MF 20 50V C9109 QETC1HM 226Z E CAPACITOR 22MF 20 ...

Page 82: ...TOR Q1008 2SC2240 G T TRANSISTOR Q1009 2SC2240 GL T TRANSISTOR 18V Q1010 2SA970 GL T TRANSISTOR 18V Q1011 2SK2382 F E T U UB Q1011 2SK2381 F E T UP Q1012 2SK2381 F E T UP Q1012 2SK2382 F E T U UB Q1013 2SJ334 F E T U UB Q1013 2SJ407 F E T UP Q1014 2SJ407 F E T UP Q1014 2SJ334 F E T U UB Q1015 2SD637 QR TRANSISTOR Q1016 2SD637 QR TRANSISTOR Q1017 2SA970 GL T TRANSISTOR Q1018 2SA970 GL T TRANSISTOR ...

Page 83: ...W R2106 QRE141J 222Y C RESISTOR 2 2K 5 1 4W R2107 QRE141J 102Y C RESISTOR 1 0K 5 1 4W R7001 QRE141J 103Y C RESISTOR 10K 5 1 4W R7002 QRE141J 103Y C RESISTOR 10K 5 1 4W R7003 QRE141J 103Y C RESISTOR 10K 5 1 4W R7004 QRE141J 103Y C RESISTOR 10K 5 1 4W R7005 QRE141J 102Y C RESISTOR 1 0K 5 1 4W R7006 QRE141J 241Y C RESISTOR 240 5 1 4W R7007 QRE141J 102Y C RESISTOR 1 0K 5 1 4W R7008 QRE141J 241Y C RESI...

Page 84: ...0620 001 SWITCH S7001 QSW0674 001Z TACT SWITCH POWER S7002 QSW0674 001Z TACT SWITCH FM AM S7003 QSW0674 001Z TACT SWITCH AUX S7004 QSW0674 001Z TACT SWITCH OPEN CLOSE S7005 QSW0674 001Z TACT SWITCH S7006 QSW0674 001Z TACT SWITCH S7007 QSW0674 001Z TACT SWITCH PLAY MODE S7008 QSW0674 001Z TACT SWITCH REC MODE S7009 QSW0674 001Z TACT SWITCH CLOCK S7010 QSW0674 001Z TACT SWITCH SET S7011 QSW0674 001Z...

Page 85: ...3 9 UX G6 FS G6 M E M O ...

Page 86: ...nd parts list 22 25 23 24 31 31 34 35 43 36 38 38 54 26 28 28 29 30 27 27 27 15 16 17 32 52 40 46 47 45 45 42 41 44 49 50 51 48 44 12 11 11 11 14 13 14 13 20 21 4 3 9 9 9 1 2 6 8 7 5 10 10 18 18 19 39 39 9 9 System control board Tuner board Analog in digital out board Main CD servo control board ...

Page 87: ...R TRAY 25 LV20520 001A CD FITTING 1 26 LV31459 001A FITTING PLATE 1 27 QYSBST3006Z T SCREW 3 FOR CD LOADING 28 QYSBSF2608Z T SCREW 2 PWB CLAMPER BASE 29 QYSBST3006Z T SCREW 1 TUNER CHASSIS 30 QYSBST3006Z T SCREW 1 PWB L CHASSIS 31 QYSBSF2608Z T SCREW 3 LOADING PWB 32 E75896 001 FELT SPACER 1 FS401 34 QYSBST3006Z T SCREW 1 CHASSIS PWB 35 VYSA1R3 049 SPACER 1 36 LV10273 002A S METAL COVER 1 38 QYSDS...

Page 88: ...N300031 001PK CD RACK GEAR 1 5 E307745 332SC MECHA GEAR 1 6 QYSDSP2003N SCREW 4 7 E406750 332SC PINION GEAR 1 8 EPB 001PK TURN TABLE ASSY 1 9 E406784 001 FEED MOTOR 1 10 QAR0130 001 SPPINDLE MOTOR 1 11 EMW10190 001 P C BOARD 1 12 QGA2001F1 06 6P PLUG ASSY 1 FOR P011 13 QSW0506 001 LEAF SWICH 1 FOR S001 14 E75832 221 SPECIAL SCREW 1 12 FG 87HS FG 87HS FG 87HS Grease point FG 87HS Grease to apply ha...

Page 89: ...bly and parts list Block No M 4 M M 16 16 16 16 17 17 15 21 2 19 3 10 18 4 7 5 8 14 9 6 12 11 1 18 13 Dimension gap for motor pulley 6 9 0 2mm 20 3 2 Grease G 474C EBS0006 009B FIG A FIG A Apply grease to groove and support convex FLM 120 1 ...

Page 90: ...T 1 6 E75985 222SS GEAR 1 1 7 E60912 005SS SPEED NUT 1 8 E75986 221SS C D GEAR 2 1 9 E75987 221SS C D GEAR 3 1 10 E307162 331SS LEVER 1 11 E307252 331SS CAM PLATE 1 12 E65923 003 TAPPING SCREW 1 13 E75989 001 SPRING 1 14 QYSBSF3008Z SCREW 1 15 E307179 332 E BASE ASS Y 1 16 E406294 002 INSULATOR 4 17 E406871 001 SPRING 2 18 E65923 003 TAPPING SCREW 2 19 EMW10095 003 C D CIR BOARD 1 20 QGA2001F1 05 ...

Page 91: ...TOR 1 5MF D4361 MTZJ9 1C T2 Z DIODE D4371 1SS133 T2 SI DIODE D4372 1SS133 T2 SI DIODE D4391 1SS133 T2 SI DIODE D5001 1SS133 T2 SI DIODE D5003 1SS133 T2 SI DIODE D5005 1SS133 T2 SI DIODE D5006 1SS133 T2 SI DIODE D5007 1SS133 T2 SI DIODE EP452 QNZ0136 001Z EARTH PLATE FOR H P GND IC435 TDA7439 IC IC436 NJM4580D IC IC501 UPD784214AGF503 IC MCU IH501 VYH7237 002SC IC HOLDER FOR IC501 J4301 QNN0215 001...

Page 92: ...E141J 102Y C RESISTOR 1 0K 5 1 4W R5046 QRE141J 102Y C RESISTOR 1 0K 5 1 4W R5048 QRE141J 101Y C RESISTOR 100 5 1 4W R5049 QRE141J 101Y C RESISTOR 100 5 1 4W R5050 QRE141J 101Y C RESISTOR 100 5 1 4W R5051 QRE141J 101Y C RESISTOR 100 5 1 4W R5054 QRE141J 102Y C RESISTOR 1 0K 5 1 4W R5055 QRE141J 102Y C RESISTOR 1 0K 5 1 4W R5056 QRE141J 102Y C RESISTOR 1 0K 5 1 4W R5057 QRE141J 102Y C RESISTOR 1 0K...

Page 93: ...17 QDGB1HK 102Y C CAPACITOR C4619 QDGB1HK 102Y C CAPACITOR C4620 QDGB1HK 102Y C CAPACITOR C4621 QFVC1HJ 563Z M M CAPACITOR 056MF 5 50V C4622 QFVJ1HJ 104Z TF CAPACITOR 10MF 5 50V C4623 QETC1AM 107Z E CAPACITOR 100MF 20 10V C4624 QDYB1CM 103Y C CAPACITOR C4625 QDXB1CM 472Y C CAPACITOR C4626 QFN31HJ 273Z M CAPACITOR 027MF 5 50V C4627 QCBB1HK 101Y C CAPACITOR 100PF 10 50V C4628 QETC1HM 105Z E CAPACITO...

Page 94: ... RESISTOR 47 1 0W R4334 QRE141J 103Y C RESISTOR 10K 5 1 4W R4335 QRE141J 272Y C RESISTOR 2 7K 5 1 4W R4341 QRE141J 821Y C RESISTOR 820 5 1 4W R4342 QRZ9005 470X F RESISTOR 47 1 0W R4601 QRE141J 271Y C RESISTOR 270 5 1 4W R4602 QRE141J 331Y C RESISTOR 330 5 1 4W R4603 QRE141J 124Y C RESISTOR 120K 5 1 4W R4604 QRE141J 105Y C RESISTOR 1 0M 5 1 4W R4605 QRE141J 102Y C RESISTOR 1 0K 5 1 4W R4606 QRE141...

Page 95: ...CF 2 QAX0419 001Z C FILTER FM IF CF 3 QAX0418 001Z C FILTER CF 4 QAX0409 001 CERA LOCK CN 1 QGF1205F1 10 CONNECTOR D 1 1SS254 T2 SI DIODE D 2 1SS254 T2 SI DIODE D 3 1SS254 T2 SI DIODE D 4 1SS254 T2 SI DIODE IC 1 TA2057N IC IC 2 LC72136N IC J 1 QNB0014 001 ANT TERMINAL AM FM ANT L 1 QQR0796 001 COIL BLOCK MW LW RF OSC L 4 QQL231K 221Y INDUCTOR Q 1 2SC2668 O T TRANSISTOR Q 6 DTA114YKA X TRANSISTOR Q...

Page 96: ...oded view of general assembly and parts list A B a C b c c a b A B C 24 22 25 25 25 24 17 17 14 31 34 30 26 28 29 30 27 17 15 16 17 10 10 32 12 12 12 11 11 20 13 20 18 18 18 21 21 4 3 9 1 6 10 18 10 19 33 2 8 7 5 36 35 Dolby board Loading mechanism board Main board ...

Page 97: ...E MECHA 1 15 LV20522 001A FITTING 1 16 LV31459 002A FITTING PLATE 1 17 QYSBST3006Z T SCREW 4 FOR CASS MECHA 18 QYSBST3006Z T SCREW 4 CHASSIS B PWB 19 LV30064 058A SPACER 1 20 E47227 029 FOOT 2 21 QYSBST3006Z T SCREW 2 FOR FOOT 22 LV10273 002A S METAL COVER 1 24 QYSDSG3008N T SCREW 2 M COVER B CHASSIS 25 QYSDSG3008N T SCREW 4 M COVER R PANEL 26 LV20527 008A REAR PANEL 1 UP LV20527 007A REAR PANEL 1...

Page 98: ...11 116 121 126 109 133 126 126 100 110 112 113 126 139 105 124 139 141 131 141 140 117 139 101 104 90 108 106 139 139 139 119 123 99 90 27 58 57 25 81 83 90 23 24 22 44 43 42 41 40 39 32 33 90 38 90 37 34 79 36 30 45 91 21 91 91 31 28 29 80 82 90 52 1 4 5 84 65 84 3 94 85 69 72 68 66 75 73 1 2 91 91 71 19 64 88 20 67 98 17 25 24 22 23 26 90 96 95 93 75 63 86 97 2 2 LE30642 002A ...

Page 99: ...ainted C D E C D and E are common EM 30L EM 30L EM 30L EM 30L EM 30L The wall side is painted The wall side is painted The wall side is painted EM 30L The upper surface is painted The wall side is painted 98 FLYWHEEL LH ASSY 97 FLYWHEEL RH ASSY 96 CLUTCH ARM ASSY PSL 12 EM 30L PSL 12 PSL 12 EM 30L EM 30L A A A A B B 44 ROTATION HEAD R P 45 HEAD SCREW 40 HEAD PLATE 42 ROTATOR PSL 12 PSL 12 28 HEAD ...

Page 100: ...w N S 2 1 109 TRAY A L L M M M M 62 62 120 CLAMPER ARM EM 30L EM 30L 108 GUIDE BASE L I K J 2 1 K I S 2 1 K K S 2 1 EM 30L 107 GUIDE BASE R F F 2 1 H H S 2 1 G G S 2 1 EM 30L EM 30L G G H H J L L CFD 005H CFD 005H CFD 005H CFD 005H CFD 005H CFD 005H CFD 005H CFD 005H ...

Page 101: ...004 AZIMUTH PLATE 1 38 EGS MOD8005 AZIMUTH SCREW 2 39 EGS E5D6005 EARTH SPRING 1 40 EGS E5D1005 HEAD PLATE 1 41 EGS E5D2004 ROTATOR COLLAR 1 42 EGS E5C3061 ROTATOR 1 43 EGS PD8011 HEAD WIRE CLAMP 1 44 EGS 92432230 ROTATION HEAD 1 R P KC 9242 45 EGS E5D8003 HEAD SCREW 2 52 EGS E5D3023 CASSETTE GUIDE 1 57 EGS E5C3007 BRAKE ARM 1 58 EGS E5D6001 SPRING 1 BRAKE ARM 63 EGS E5D4007 DRIVE BELT H 1 64 EGS ...

Page 102: ...A3041 GUIDE BASE R 1 108 EGS E5A3042 GUIDE BASE L 1 109 EGS E5A3043 TRAY A 1 110 EGS E5B3044 TRAY B 1 111 EGS E5B3045 SLIDER 1 112 EGS E5C3048 LINK A 1 113 EGS E5C3047 LINK B 1 114 EGS E5D3050 GEAR A 1 115 EGS E5D3051 PULLY GEAR 1 116 EGS E5D3052 STOPPER 1 117 EGS E5C1009 MOTOR HOLDER 1 118 EGS E5C1014 CLAMPER ASSY 1 119 EGS E5D1012 EARTH PLATE 1 120 EGS E5D1010 CLAMPER ARM 1 121 EGS E5D6019 STOPP...

Page 103: ...CAPACITOR 820PF 5 50V C6232 QCBB1HK 331Y C CAPACITOR 330PF 10 50V C6271 QETC1HM 475Z E CAPACITOR 4 7MF 20 50V C6272 QCBB1HK 561Y C CAPACITOR 560PF 10 50V C6273 QETC1HM 474Z E CAPACITOR 47MF 20 50V C6274 QFLC1HJ 154Z M CAPACITOR 15MF 5 50V C6275 QETC1EM 106Z E CAPACITOR 10MF 20 25V C6276 QETC1HM 105Z E CAPACITOR 1 0MF 20 50V C6282 QCBB1HK 561Y C CAPACITOR 560PF 10 50V C6301 QETC1CM 476Z E CAPACITOR...

Page 104: ... R6176 QRE141J 223Y C RESISTOR 22K 5 1 4W R6177 QRE141J 102Y C RESISTOR 1 0K 5 1 4W R6178 QRE141J 123Y C RESISTOR 12K 5 1 4W R6179 QRE141J 332Y C RESISTOR 3 3K 5 1 4W R6201 QRE141J 153Y C RESISTOR 15K 5 1 4W R6202 QRE141J 473Y C RESISTOR 47K 5 1 4W R6203 QRE141J 333Y C RESISTOR 33K 5 1 4W R6204 QRE141J 153Y C RESISTOR 15K 5 1 4W R6205 QRE141J 182Y C RESISTOR 1 8K 5 1 4W R6206 QRE141J 221Y C RESIST...

Page 105: ... 0K 5 1 4W R6730 QRE141J 105Y C RESISTOR 1 0M 5 1 4W R6731 QRE141J 104Y C RESISTOR 100K 5 1 4W R6732 QRE141J 473Y C RESISTOR 47K 5 1 4W R6733 QRE141J 122Y C RESISTOR 1 2K 5 1 4W R6734 QRE141J 334Y C RESISTOR 330K 5 1 4W R6735 QRE141J 104Y C RESISTOR 100K 5 1 4W R6736 QRE141J 152Y C RESISTOR 1 5K 5 1 4W R6737 QRE141J 821Y C RESISTOR 820 5 1 4W R6738 QRE141J 473Y C RESISTOR 47K 5 1 4W R6739 QRE141J ...

Page 106: ...3 30 UX G6 FS G6 Packing materials and accessories parts list Block No M 7 M M Block No M 8 M M P1 P16 A12 P10 P2 P3 P4 P5 P6 P7 P8 P9 A1 A11 P16 P14 P15 A14 A13 P13 P12 P11 ...

Page 107: ...11 QPA01001505 POLY BAG 1 UB P 12 LV30246 007A POLY BAG 1 ORANGE FOR XT P 13 LV30246 008A POLY BAG 1 YELLOW FOR TD P 14 8000041101 SPEAKER CUSHION 1 TOP P 15 8000041111 SPEAKER CUSHION 1 BOTTOM P 16 8500028981 POLY BAG 2 SPEAKER Item Parts number Parts name Area Q ty Description Block No M8MM A 1 LVT0377 003A INST BOOK 1 KOR LVT0377 001A INST BOOK 1 ENG CHI SPA A 2 EWPZ01 012 GND WIRE 1 A 3 VMP013...

Page 108: ...UX G6 FS G6 No 20808 VICTOR COMPANY OF JAPAN LIMITED MOBILE ELECTRONICS DIVISION 10 1 1chome Ohwatari machi Maebashi city371 8543 Japan Printed in Japan 2000 02 M ...

Reviews: