10
English
Customizing a Sound Mode ————————————————
You can change an existing sound mode to suit your own preferences. These changed settings can be
stored in the Unit’s sound mode memory.
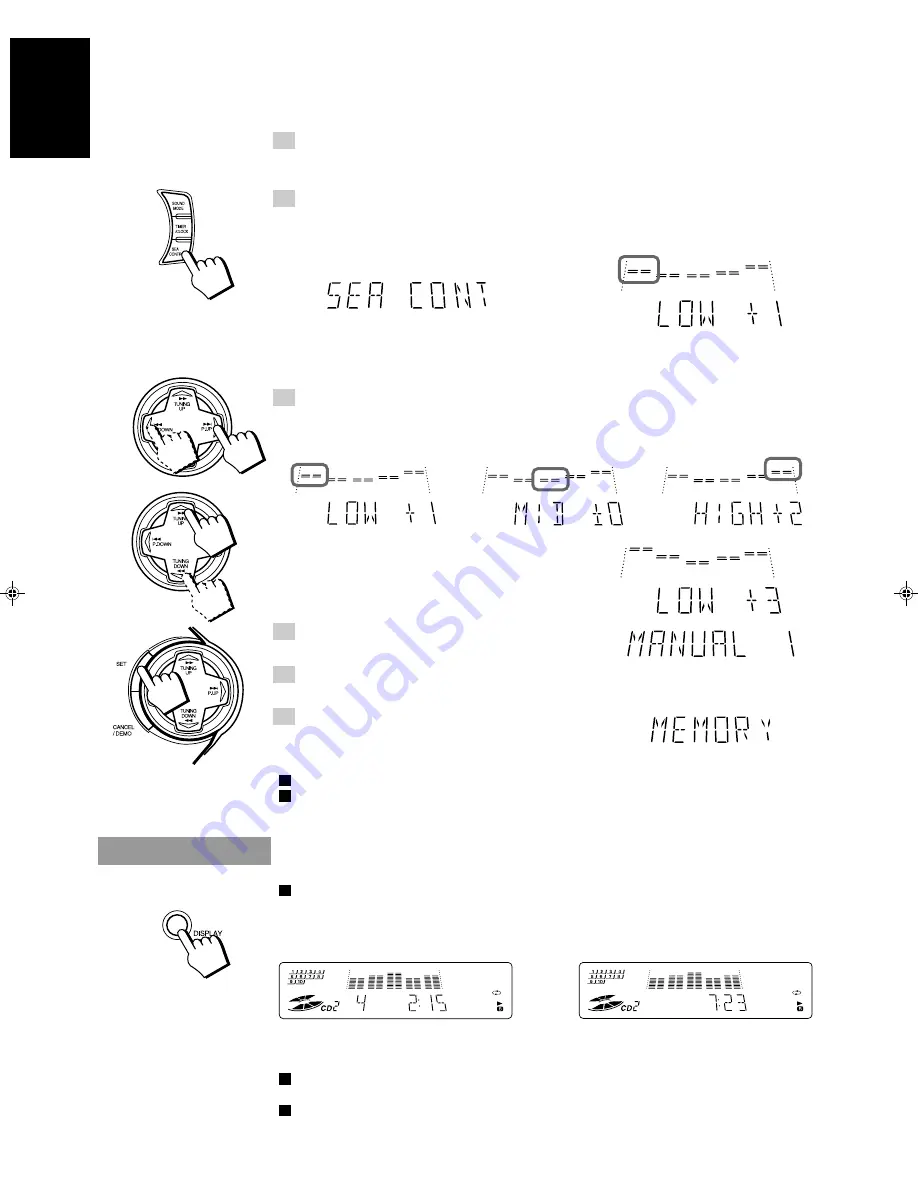
1. Select the Sound Mode you want to change.
If you select D. CLUB, HALL, or STADIUM, the surround effect remains unchanged, but you can
adjust the S.E.A. effect.
2. Press SEA CONTROL.
The low tone section of the tone equalizer flashes. Once “SEA CONT” appears, the low tone levels
will appear.
Note:
If no adjustments are made for 10 seconds after SEA CONTROL is pressed, Sound Mode will
appear on the display then revert to the previous display.
3. Use MULTI CONTROL to adjust to any Sound Mode desired.
Press
4
P. DOWN or
¢
P. UP on the MULTI CONTROL to select the tone range you want to
adjust. You can adjust “LOW”, “MID” or “HIGH” tone.
Press TUNING DOWN
1
or
¡
TUNING UP
on the MULTI CONTROL to adjust the level.
The level can be adjusted between –3 and +3 in 7 steps.
4. Press SET.
“MANUAL 1” appears on the display.
5. Press
4
P. DOWN or
¢
P. UP on the MULTI CONTROL to select
the MANUAL number for the memory.
6. Press SET again.
“MEMORY” appears for 2 seconds.
The setting that has been created is stored in the memory.
The adjustment you have made will apply to the sound you hear.
If you store new settings to a memory number that has already been used, the new settings replace the
existing setting.
Changing the Display
The display normally indicates each source, but it can be switched to the clock time.
Press DISPLAY.
Each time you press the button, the source and the clock time are shown alternately on the display.
The clock indication can be interchanged with the source indication using the Unit or Remote
Control.
The clock indication may change to source indication depending on the operation of the Unit.
\
Flashing
Flashing
Flashing
Flashing
j
Source (example CD Player)
Clock time
EN.CA-D432/452TR[E]/f
98.3.26, 10:56 PM
10


