


– 6 –
English
Continued
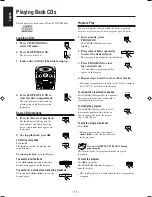
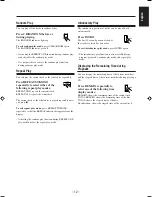
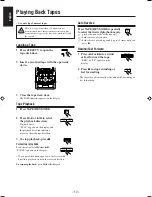
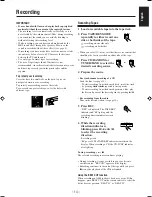
Getting Started
Unpacking
After unpacking, check to be sure that you have all the
following items.
The number in the parentheses following each item name
indicates the supplied quantity.
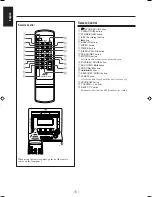
• Remote control (1)
• Batteries (R03 (UM-4)/AAA (24F)) for remote control (2)
• AM loop antenna (1)
If any is missing, consult your dealer immediately.
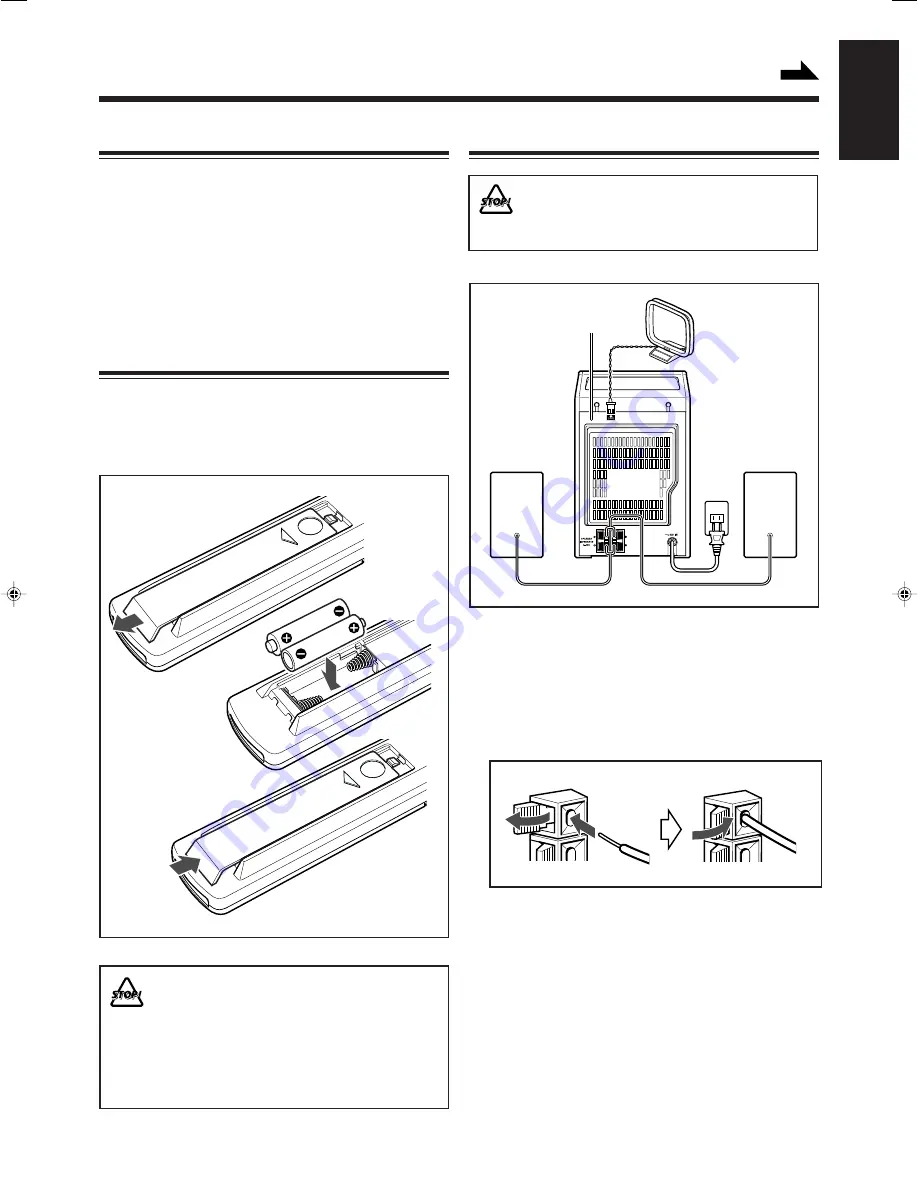
Putting the Batteries into the Remote Control
Insert 2 batteries — R03 (UM-4)/AAA (24F) — into the
battery compartment of the remote control, complying with
the + and – polarity markings inside the battery compartment.
When the remote control can no longer operate the unit,
replace both batteries at the same time.
• DO NOT use an old battery together with a new one.
• DO NOT use different types of batteries together.
• DO NOT expose batteries to heat or flame.
• DO NOT leave the batteries in the battery
compartment when you are not going to use the
remote control for an extended period of time;
otherwise, the remote control may be damaged by
battery leakage.
Connections
• DO NOT connect any equipment to the unit while the
unit is powered.
• DO NOT plug in any equipment until all connections
are completed.
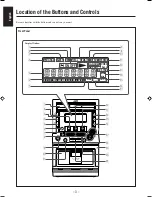
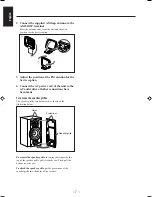
1 Connect the speakers.
Connect the right speaker to the “R” terminals, with the
red wire to + and the black wire to –.
Connect the left speaker to the “L” terminals in the same
way.
Clip the stripped portion of each speaker wire as shown in
the illustration.
1
2
R03(UM-4)/
AAA(24F)
3
AM
LOOP
FM
ANT
R
R
L
L
3
2
1
4
RIGHT
LEFT
02_01_19_FSM5_C_En.p65
4/12/02, 12:37 PM
6
Summary of Contents for CA-FSM5
Page 22: ...MEMO ...
Page 23: ...0402NNMBICORI EN FR ...


