(No.MB196)1-17
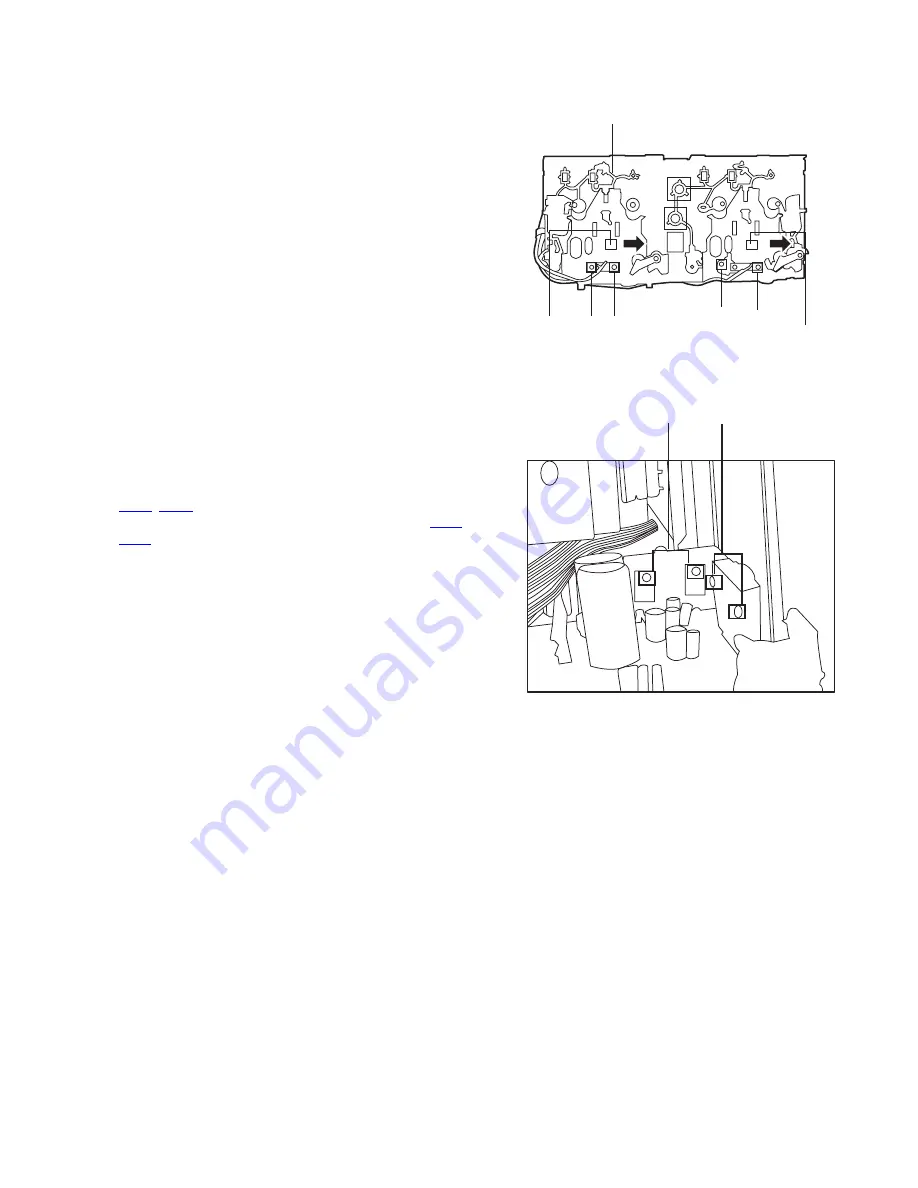
3.2.12 Removing the cassette deck heads
(See Fig. 19 and 27)
• Prior to performing the following procedures, remove the top
cover and both sides board.
• Also remove the CD changer unit.
• Also remove the front panel assembly.
(1) Remove six screws
Z
that retain the cassette deck mecha-
nism. (Fig.19)
(2) Remove the cassette deck mechanism and place it so that
the front side faces up.
(3) Remove the solder from the bottom side of the head termi-
nal and disconnect the wire.
(4) Remove screws
U
that retains the head.
(5) Remove screws
V
that retains the head.
(6) Hold the head and slide it in the direction of the arrow to re-
move it.
Fig.27
3.2.13 Removing the 3-pin regulator and bridge diode
(See Fig. 28)
• Prior to performing the following procedures, remove the top
cover and both sides board.
Remove two screws
A
that connect the heat sink.
(1) Remove two screws
A
that connect the heat sink.
(2) Remove two screws
W
that connect the heat sink.
(3) Remove the solder fixing the the 3-pin terminal regulator
Q604
,
Q608
.
(4) Remove the solder fixing the 4-pin bridge diode (
D614
,
D615
).
Fig.28
Cassette deck mechanism
(Front side)
V U
PB Head
REC/PB Head
V
U
A
W
Summary of Contents for ca-mxkb4
Page 23: ... No MB196 1 23 ...
Page 27: ...2 1 Wiring diagram ...
Page 28: ...2 2 Block diagrams ...
Page 30: ...2 4 Function control section ...
Page 31: ...2 5 System control section ...
Page 32: ...2 6 FL Key control section ...
Page 33: ...2 7 CD MP3 control section ...
Page 34: ...2 8 Tuner section ...
Page 35: ...2 9 Main board forward side Printed circuit boards ...
Page 36: ...2 10 Main board reverse side ...
Page 37: ...2 11 Front board forward side ...
Page 38: ...2 12 Front board reverse side ...
Page 39: ...2 13 Amp board forward side Amp board reverse side ...
Page 40: ...2 14 Power trans board ...
Page 41: ... M E M O ...


