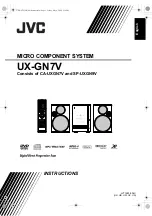
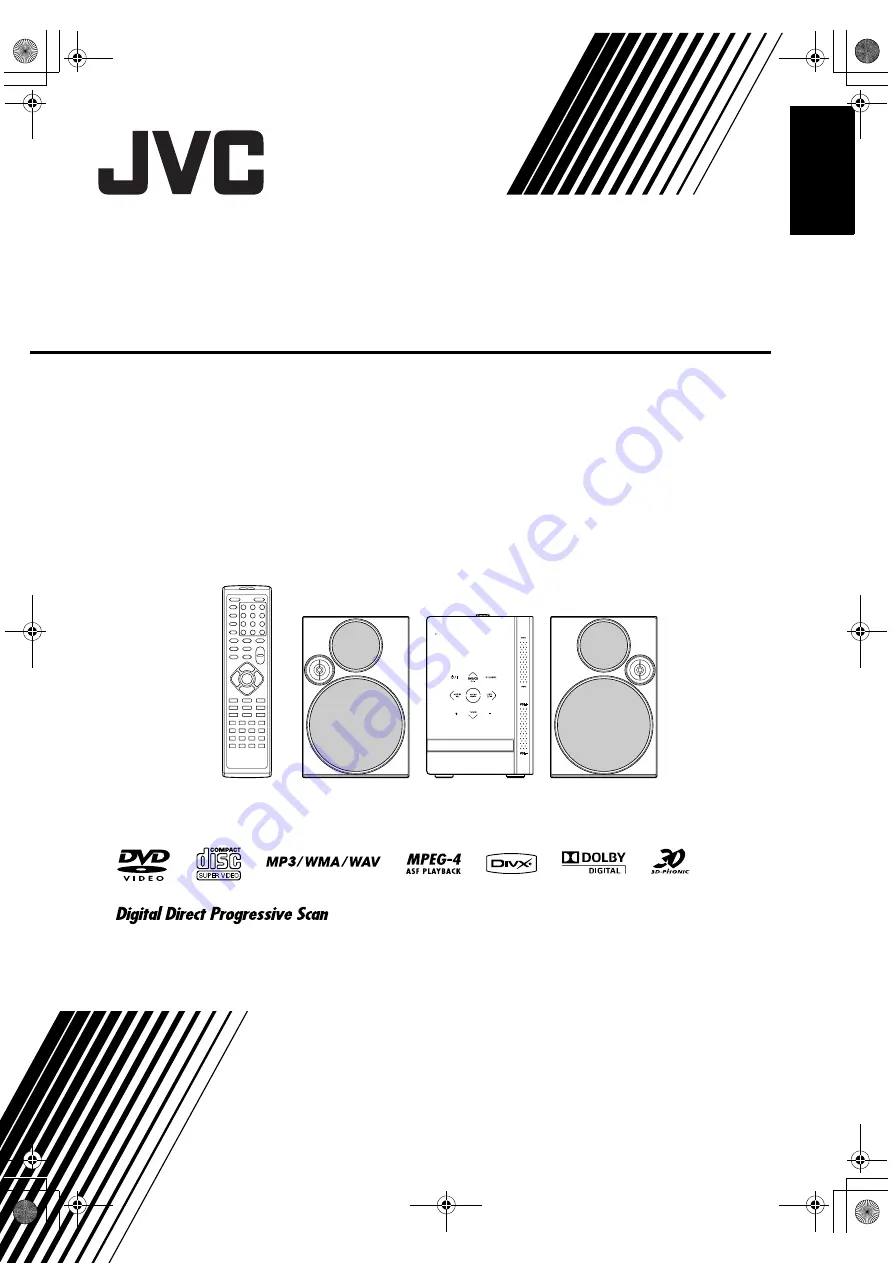
background image

MICRO COMPONENT SYSTEM

UX-GN7V

Consists of CA-UXGN7V and SP-UXGN9V

LVT1990-006C

[US, UB, UW, UX, UA]

INSTRUCTIONS

English

UX-GN7V[US]EN-frontcover.fm  Page 1  Friday, May 8, 2009  5:34 PM

Summary of Contents for CA-UXGN7V

Page 1: ...MICRO COMPONENT SYSTEM UX GN7V Consists of CA UXGN7V and SP UXGN9V LVT1990 006C US UB UW UX UA INSTRUCTIONS English UX GN7V US EN frontcover fm Page 1 Friday May 8 2009 5 34 PM ...

Page 2: ...ut Do not place any naked flame sources such as lighted candles on the apparatus When discarding batteries environmental problems must be considered and local rules or laws gov erning the disposal of these batteries must be followed strictly Do not expose this apparatus to rain moisture dripping or splashing and that no objects filled with liq uids such as vases shall be placed on the apparatus CA...

Page 3: ...ce on the level surface Maintain adequate air path for ventilation by placing on a stand with a height of 10 cm more In addition maintain the best possible air circulation Front view of the main unit and speakers CA UXGN7V and SP UXGN9V Side view of the main unit CA UXGN7V CAUTION Battery shall not be exposed to excessive heat such as sunshine fire or the like European Union only UX GN7V US EN boo...

Page 4: ...e 13 Setting the clock 13 Changing the brightness of the display window 14 Turning off the display window 14 Auto standby function 14 Locking disc ejection 14 Listening to radio broadcasts 15 Setting the AM tuner spacing 15 Selecting a radio station 16 Tuning in to a preset radio station 16 Playing back sources from external devices 17 Playing back sources from external devices 17 Selecting the si...

Page 5: ...h your voice range 43 Adjusting the echo effect 43 Programming karaoke songs Karaoke program playback 44 Timer 45 Using the sleep timer 45 Using the playback timer 46 Notes on operation 47 Suitable locations for the main unit 47 Condensation 47 Cleaning the main unit 47 Notes on handling 47 License and trademark 48 Notes on discs files 49 Playable disc file types 49 Data hierarchy 52 Handling disc...

Page 6: ...erate the 4 control on the right front of the main unit vertically slide your finger on the area between and 4 Similarly to operate the VOL control slide your finger on the area between VOL and VOL Opening the front cover To use the buttons and terminals concealed under the front cover use your finger to pull open the part indicated with 2 PULL OPEN Front view Remote control sensor Refer to Displa...

Page 7: ...r indicators The indicator lights up when the playback timer is ready or being set and flashes when the playback timer is working The 1 2 or 3 indicator lights up when the playback timer is ready or working and flashes when the playback timer is being set The SLEEP indicator lights up when the sleep timer is activated C The REC indicator lights up when recording starts D The MIC indicator lights u...

Page 8: ...trol of this system to operate a TV manufactured by JVC Make sure to hold down SHIFT when you press the desired function button Inserting the batteries into the remote control Operating the system from the remote control Operating a TV manufactured by JVC using the remote control Remote control button Usage AUDIO TV F SHIFT Turns on off the TV TV VIDEO Changes between the TV and video input TV CH ...

Page 9: ...while listening to an actual radio program refer to Listening to radio broad casts on page 15 You cannot receive a radio broadcast without the antenna connection Connecting the antennas AM loop antenna supplied If insulation covers the tips of the antenna cable twist and pull off the insulation Main unit rear view FM antenna supplied Main unit rear view FM antenna Stretch out the FM antenna to the...

Page 10: ...ly 30 minutes before turning on the main power of the TV again CAUTION The supplied speakers are manufactured exclu sively for use with the supplied main unit as parts of this system Do not connect the supplied speakers to devices other than the supplied main unit Doing so may damage the speakers Do not connect external speakers together with the supplied speakers The change in imped ance may dama...

Page 11: ...sound from a connected portable digital audio player Connecting a TV Connecting a TV with the COMPONENT terminals Main unit rear view TV To component input terminals Component video cable not supplied Connecting a TV with the VIDEO terminal TV Composite video cable supplied Main unit rear view To a video input terminal Connecting a portable digital audio player Main unit Direct connection TV or mo...

Page 12: ...r to the manual of the subwoofer for details Connect the power cable after you complete the other connections The STANDBY lamp on the main unit lights up Connecting an external digital audio device Main unit rear view Output Optical digital cable not supplied To an optical digital input terminal Input AV amplifier with a built in decoder Connecting a subwoofer Connecting the power cable Audio cabl...

Page 13: ...ble with a PAL interlaced video signal Select PAL PRG for a TV equipped with a component terminal and compatible with a PAL progressive video signal Select NTSC for a TV only compatible with an NTSC interlaced video signal Select NTSC PRG for a TV equipped with a component terminal and compatible with an NTSC progressive video signal NOTE When PAL PRG or NTSC PRG is selected the PRGR indicator lig...

Page 14: ...on the main unit Press FADE MUTING Press FADE MUTING again to restore the sound A combination of JVC sound technologies enables you to select the desired sound pattern This func tion is called sound mode Press SOUND MODE repeatedly Each time you press SOUND MODE the dis play changes as follows ROCK For acoustic sound POP For vocal oriented music CLASSIC For classic music JAZZ For jazz music REGGAE...

Page 15: ...T NOTE You can cancel the setting by pressing MY SOUND Press MY SOUND Each time you press MY SOUND the preset equalization pattern changes To deactivate the stored equalization pattern select OFF NOTE This function does not work for some files You can boost both high and low frequencies of the sound This function is called Sound Turbo II Press S TURBO II Each time you press S TURBO II the setting ...

Page 16: ...set the clock when the main unit is on or off 1 Press CLOCK TIMER repeatedly to select the clock in the display window 2 Press or to select the hour 3 Press ENTER SET 4 Press or to select the minute 5 Press ENTER SET The clock starts from 0 seconds in the minute you set NOTE While setting the clock you can return to the previous step by pressing CANCEL or you can stop the setting by pressing CLOCK...

Page 17: ...e source When a loaded disc or a connected USB device is selected as the source Press AUTO STBY The A STBY lights up in the display window Each time you press AUTO STBY the setting turns on and off When playback of a loaded disc or a connected USB device finishes the auto standby function starts a countdown At this time the A STBY indi cator starts flashing When no operation is performed for 3 min...

Page 18: ...n dow 2 Press AUDIO TV F or F on the main unit to turn off the power 3 Hold down CD 3 USB REC on the main unit Each time you hold down CD 3 USB REC the setting toggles between 9K STEP and 10K STEP in the display window NOTE When ECO ON is selected you cannot operate this function Refer to page 14 Number buttons Setting the AM tuner spacing Main unit front view Listening to radio broadcasts UX GN7V...

Page 19: ...p to 15 AM radio station 1 Select a radio station you want to store Refer to Selecting a radio station shown on the left You can also preset selected stereo or mon aural reception for an FM broadcast 2 Press ENTER SET SET flashes in the display window for a few seconds 3 While SET is flashing press the number buttons to select the pre set number you want to assign 4 Press ENTER SET STORED appears ...

Page 20: ... the volume of this system to the minimum You can also use the VOL control on the main unit You can select the gain of the signal from the AUDIO IN terminal Press DVD AUDIO IN LEVEL while holding down SHIFT Each time you press DVD AUDIO IN LEVEL the signal gain setting toggles between NOR MAL and HIGH in the display window Select NORMAL for normal operation Playing back sources from external devic...

Page 21: ...on the main unit The disc tray ejects 2 Place a disc on the disc tray To play back an 8 cm disc place it on the inner hollow of the disc tray 3 Press DVD CD 6 NOTE A menu screen may appear on the TV screen after DVD playback starts In such a case oper ate the menu screen Refer to Selecting a chapter track from the menu screen on page 24 Number buttons Playing back a disc Printed surface Disc tray ...

Page 22: ...ble use the USB 2 0 cable whose length is less than 1 m Before connecting or disconnecting a USB device press VOLUME repeatedly to set the volume of this system to the minimum You can also use the VOL control on the main unit 2 To play back files on a disc Press DVD CD 6 To play back files on a USB device Press USB 6 3 Press 7 to stop playback The menu screen appears on the TV screen Playing back ...

Page 23: ...only the selected file When files of different types are recorded on a loaded disc or connected USB device select the file type before playback Press FILE TYPE repeatedly Each time you press FILE TYPE the selected source changes to an audio file still picture file or video file NOTE You can also use the menu bar to select the file type Refer to page 34 Slide show playback Containing multi audio la...

Page 24: ... or WMA file the text appears and scrolls in the display window When a WAV ASF DivX MPEG1 MPEG2 or JPEG file is played back Checking the current status in the display window Elapsed playback time Disc type Title number and chapter number Clock Elapsed playback time Disc type Original program play list number and chapter number Clock Track number and PBC 1 Disc type Clock Track number and elapsed p...

Page 25: ...UME on page 35 When a disc file is played back Press or DVD CD 6 or USB 6 To return to normal playback press DVD CD 6 or USB 6 again When a disc file is played back Press 1 or Each time you press 1 or the speed increases To restore the normal speed press DVD CD 6 or USB 6 NOTE For some discs files sound is intermittent or no sound is produced during fast reverse fast for ward search The selectable...

Page 26: ...fer to page 24 When a disc file is played back Use the number buttons to select the chapter number or track number NOTE To cancel the PBC function for a VCD or SVCD refer to page 24 You can skip within a file at 30 second or 5 minute intervals When a disc file is played back Press or Each time you press or the playback posi tion skips to the beginning of the previous or next interval The length of...

Page 27: ... the track number Playback of the selected track starts To reactivate the PBC function press 7 and then press DVD CD 6 When the resuming playback function is activated press 7 twice before pressing DVD CD 6 When a disc is stopped or played back 1 Press TOP MENU PG to display the original program or press MENU PL to display the play list Original program Play list 2 Press or to select the desired t...

Page 28: ...re than once When a disc file is stopped 1 Press TUNER PLAY MODE repeatedly to display PROGRAM in the display window The PRGM indicator lights up in the dis play window Example TV screen for a DVD VIDEO Program screen Number buttons Playing back a disc file in the desired order Program playback only on a loaded disc Convenient functions of disc file playback UX GN7V US EN 07 fm Page 25 Monday Janu...

Page 29: ...ssing CANCEL repeatedly You can erase the whole program by holding down CANCEL 3 Press DVD CD 6 NOTE The resuming playback function does not work in program playback When a disc file is stopped Press TUNER PLAY MODE repeat edly to display an item other than PROGRAM in the display window This operation does not erase the program When a disc file is stopped 1 Press TUNER PLAY MODE repeatedly to disp...

Page 30: ...s REPEAT A B while holding down SHIFT Stopping playback or skipping the chapter or track also cancels A B repeat playback NOTE You can use A B repeat playback only within the same title or track Depending on the disc you can also use the menu bar to set A B repeat playback Refer to page 32 To cancel the PBC function for a VCD or SVCD refer to page 24 Playing back a disc file repeatedly Repeat play...

Page 31: ...isc file is played back 1 Press ZOOM repeatedly Each time you press ZOOM the picture magnification changes on the TV screen 2 Select the area of image you want to magnify by using or To return to normal playback select ZOOM OFF in step 1 NOTE You cannot change the picture magnification during slide show playback of JPEG files During ASF file playback or may not work in step 2 When you magnify a pi...

Page 32: ...hanges on the TV screen as follows GAMMA Controls the brightness of neutral tints while maintaining the brightness of dark and light portions Setting range 3 to 3 BRIGHTNESS Controls the brightness of the display Setting range 8 to 8 CONTRAST Controls the contrast of the display Setting range 7 to 7 SATURATION Controls the saturation of the display Setting range 7 to 7 TINT Controls the tint of th...

Page 33: ...to enjoy a sound effect as if you were watching the movie in a theater Select 3D OFF to cancel the 3D PHONIC function When the audio volume of a DVD VIDEO is lower than that of another source you can increase the audio volume level of the DVD When a disc is played back Press DVD AUDIO IN LEVEL while holding down SHIFT Each time you press DVD AUDIO IN LEVEL the audio volume level display changes to...

Page 34: ...G2 file Example Status bar for a CD The playback status has the same meaning of the guide icons on the TV screen Refer to page 20 Status bar Menu bar Information displayed on the status bar DVD VIDEO Current title number DVD VR Current original program number PG or current play list number PL Current chapter number Time Playback status DVD VIDEO or DVD VR Audio encoding mode Playback mode status V...

Page 35: ... dis play changes on the status bar When a disc is played back TIME Elapsed playback time of the current chapter REM Remaining time of the cur rent chapter TOTAL Elapsed playback time of the current title T REM Remaining time of the cur rent title When a disc is played back TOTAL Elapsed playback time of the current original pro gram play list T REM Remaining time of the cur rent original program ...

Page 36: ...appears on the TV screen 2 Use and ENTER SET to operate the preference screen Follow the description on the TV screen to operate the preference screen Basic operations LANGUAGE Items Contents MENU LANGUAGE Select the language for the DVD VIDEO DivX menu screen AUDIO LANGUAGE Select the audio language for the DVD VIDEO DivX SUBTITLE Select the subtitle language for the DVD VIDEO DivX ON SCREEN LANG...

Page 37: ...e is displayed at the Letterbox ratio 16 9 MULTI NORMAL 16 9 MULTI AUTO 4 3 MULTI LB Letterbox 4 3 MULTI PS Pan Scan These MULTI options should be selected when you connect this system to a TV compatible with multiple video sig nal types If you select one of these options the system outputs a PAL or NTSC video signal according to the disc regardless of the video signal type set ting Refer to page ...

Page 38: ...ND Dolby Pro Logic decoder built in device STEREO Ordinary audio device D Dynamic RANGE COMPRESSION To correct the difference between high volume and low volume when playing back with low volume only for a DVD recorded with Dolby Digital AUTO The D RANGE COMPRESSION function automatically turns on ON The D RANGE COMPRESSION function is always on OTHERS Items Contents RESUME Select ON or OFF Refer ...

Page 39: ...o AY Aymara HR Croatian MS Malay MAY SU Sundanese AZ Azerbaijani HY Armenian MT Maltese SV Swedish BA Bashkir IA Interlingua MY Burmese SW Swahili BE Byelorussian IE Interlingue NA Nauru TA Tamil BG Bulgarian IK Inupiak NE Nepali TE Telugu Tereno BH Bihari IN Indonesian NL Dutch TG Tajik BI Bislama IS Icelandic NO Norwegian TH Thai BN Bengali Bangla IW Hebrew OC Occitan TI Tigrinya BO Tibetan JI Y...

Page 40: ...e number button usage refer to Using the number buttons on page 11 1 Place a CD on the disc tray and connect the USB device Refer to pages 18 and 19 2 Press DVD CD 6 3 Press 7 to stop playback 4 Press CD 3 USB REC on the main unit 5 Press or repeatedly to select the desired group on the con nected USB device TV screen You can create a new group by selecting NEW GROUP on the TV screen After this st...

Page 41: ...rying to record sound from a CD R or CD RW The Serial Copy Management System SCMS protects copyright and allows only first generation digital copies from the digitally recordable source Changes to the volume during recording do not affect the recorded sound or the recorded sound level The sound adjustment functions of this system do not affect the recorded sound Operating this function automatical...

Page 42: ...USB 6 3 Press 7 to stop playback 4 Use GROUP TITLE SKIP 4 or to select the desired track group To select a group press GROUP TITLE SKIP repeatedly while holding down SHIFT To select a track press 4 or repeat edly 5 Press TITLE DELETE repeatedly to select TR TITLE or GR TITLE in the display window Select TR TITLE to add a title to a track Select GR TITLE to add a title to a group 6 Press ENTER SET ...

Page 43: ... 28 characters for the group title When you want to erase a character move the character entry position to the desired character and press CANCEL When you want to enter a space select the space from the symbol Refer to Available char acters shown on the right You can also enter a space at the end of a title by pressing When you want to cancel title entry press 7 The entered characters are not stor...

Page 44: ...on the main unit 3 Connect the microphone The MIC terminal is for connecting a micro phone equipped with a monaural mini plug When a microphone is connected the microphone mixing function and the other karaoke related functions are automatically activated Number buttons Singing a song in karaoke Main unit top view Microphone not supplied Enjoying karaoke UX GN7V US EN 09 fm Page 41 Thursday Februa...

Page 45: ...tedly to adjust the overall sound volume You can also adjust the volume by using the VOL control on the main unit 6 Turn the MIC VOLUME control on the main unit to adjust the micro phone volume Sing into the microphone to find the desired microphone volume CAUTION Before disconnecting a microphone from the main unit turn the MIC VOLUME control to the MIN position on the main unit Do not leave the ...

Page 46: ...in increments of semitones This function is available when a loaded disc or a connected USB device is selected as the source When a microphone is connected 1 Press KARAOKE repeatedly while holding down SHIFT to select KEYCON in the display window Each time you press KARAOKE the set ting changes in the display window KEYCON refers to key control 2 Press KEY or KEY while holding down SHIFT Each time...

Page 47: ... CD 6 to start play back The program screen disappears and play back starts in the programmed order 4 Sing into the microphone NOTE You can activate and deactivate the karaoke program by pressing RESERVE repeatedly while holding down SHIFT Press RESERVE while holding down SHIFT The program screen appears on the TV screen Press CANCEL To cancel the remaining tracks press CANCEL repeatedly Programmi...

Page 48: ...utes Press SLEEP repeatedly to select the time again Press SLEEP once NOTE When you use the sleep timer deactivate the auto standby function otherwise the sleep timer may not work when the specified time elapses The auto standby function overrides the sleep timer Refer to page 14 Using the sleep timer Changing the remaining time Confirming the remaining time Timer UX GN7V US EN 10 fm Page 45 Tuesd...

Page 49: ...ot select the title group chapter track or file number exceeding 150 When a DVD VIDEO is selected as the source playback may not start with this function 5 Press or to adjust the play back volume and then press ENTER SET The 1 2 or 3 indicator lights up 6 Press AUDIO TV F to turn off the main unit NOTE While setting the playback timer you can return to the previous step by pressing CANCEL or you c...

Page 50: ...dirty dust it with a soft dry cloth When the operation panel is very dirty wipe it with a cloth dampened with a small amount of a neutral detergent and then wipe it with a soft dry cloth CAUTION Do not wipe the operation panel with thinners benzenes or other chemical agents Do not spray insecticides onto the operation panel These may discolor and damage the surface Installation of the system Selec...

Page 51: ...SCAN PICTURE PROBLEMS IT IS RECOMMENDED THAT THE USER SWITCH THE CONNECTION TO THE STANDARD DEFINITION OUTPUT IF THERE ARE QUESTIONS REGARDING OUR TV SET COMPATIBILITY WITH THIS MODEL 525p AND 625p DVD PLAYER PLEASE CON TACT OUR CUSTOMER SERVICE CENTER USE OF THIS PRODUCT IN ANY MANNER THAT COMPLIES WITH THE MPEG 4 VISUAL STANDARD IS PROHIBITED EXCEPT FOR USE BY A CONSUMER ENGAGING IN PER SONAL AN...

Page 52: ...onditions or damage or stains on them Only sounds can be played back from the following discs MIX MODE CD CD G CD EXTRA CD TEXT This system accommodates the PAL and NTSC systems When you play back an NTSC disc with the video signal type set to PAL or PAL PRG refer to page 10 the NTSC video signal is con verted to the PAL60 signal and output Region code of DVD VIDEO DVD VIDEO players and DVD VIDEO ...

Page 53: ...ifferent from that of files folders displayed on a computer monitor screen Playing back an MP3 or WMA file that contains a still image may take a long time The elapsed time is not displayed until playback starts This elapsed time may not be displayed correctly When playing back an MP3 or WMA file a disc with a sampling frequency of 44 1 kHz and transmission rate of 128 kbps is recommended This sys...

Page 54: ...ms should conform to MPEG1 Audio Layer 2 MPEG2 Audio Layer 2 or Dolby Digital MPEG2 files only The Non DVD side of a DualDisc does not com ply with the Compact Disc Digital Audio standard Therefore the use of Non DVD side of a DualDisc on this product is not recommended This system is compatible with USB 2 0 Full Speed This system may not play back some USB devices and some files This system does ...

Page 55: ...iles with numbers exceeding 999 and the groups with numbers exceeding 99 these cannot be played back If there are any type of files other than MP3 WMA WAV JPEG ASF DivX MPEG1 or MPEG2 files on a disc those files are also counted in the total number of files Do not use a commercially available non stan dard shape disc like a heart flower or credit card etc because it may damage the system Do not us...

Page 56: ...ectly Connect the speakers correctly 7 Headphones are connected Disconnect the headphone plug 13 No picture is produced Improper connection Connect all cables properly 8 9 The picture is distorted The video signal type setting is not appropriate Select the video signal type suit able for your TV 10 The screen size is abnormal The screen size setting is not appropriate Select the display method sui...

Page 57: ...types MP3 WMA WAV JPEG ASF DivX MPEG1 or MPEG2 Select the file type You can only play back the files of the selected types If the main unit has read the file select the desired file type and then reload the disc or disconnect the USB device and connect it again 20 A certain point on the disc cannot be played back properly The disc is scratched or dirty Clean or replace the disc 52 The produced aud...

Page 58: ...an record up to 999 tracks to a USB device Delete some tracks groups 39 The USB device is not compati ble with this system Use another USB device The USB device is write pro tected Problem Possible cause Possible solution Reference page Some karaoke func tions do not work When the recording function is working you cannot operate any of the karaoke functions Quit recording and then operate the desi...

Page 59: ...e 8 Ω 16 Ω Subwoofer Output power 500 mV 10 kΩ USB Compatible with USB 2 0 Full Speed Compatible device USB mass storage class device Compatible file system FAT16 FAT32 Output power DC 5 V 500 mA General Power source Thailand AC 220 V 50 Hz Power source other countries areas AC 110 240 V 50 60 Hz Power consumption in operation 50 W Power consumption on standby 9 W Power consumption in the ECO ON m...

Page 60: ...2009 Victor Company of Japan Limited EN 0209SKMMODDAT UX GN7V MICRO COMPONENT SYSTEM c UX GN7V US EN book Page 68 Monday January 19 2009 11 51 AM ...

Reviews: