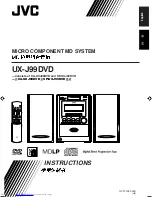
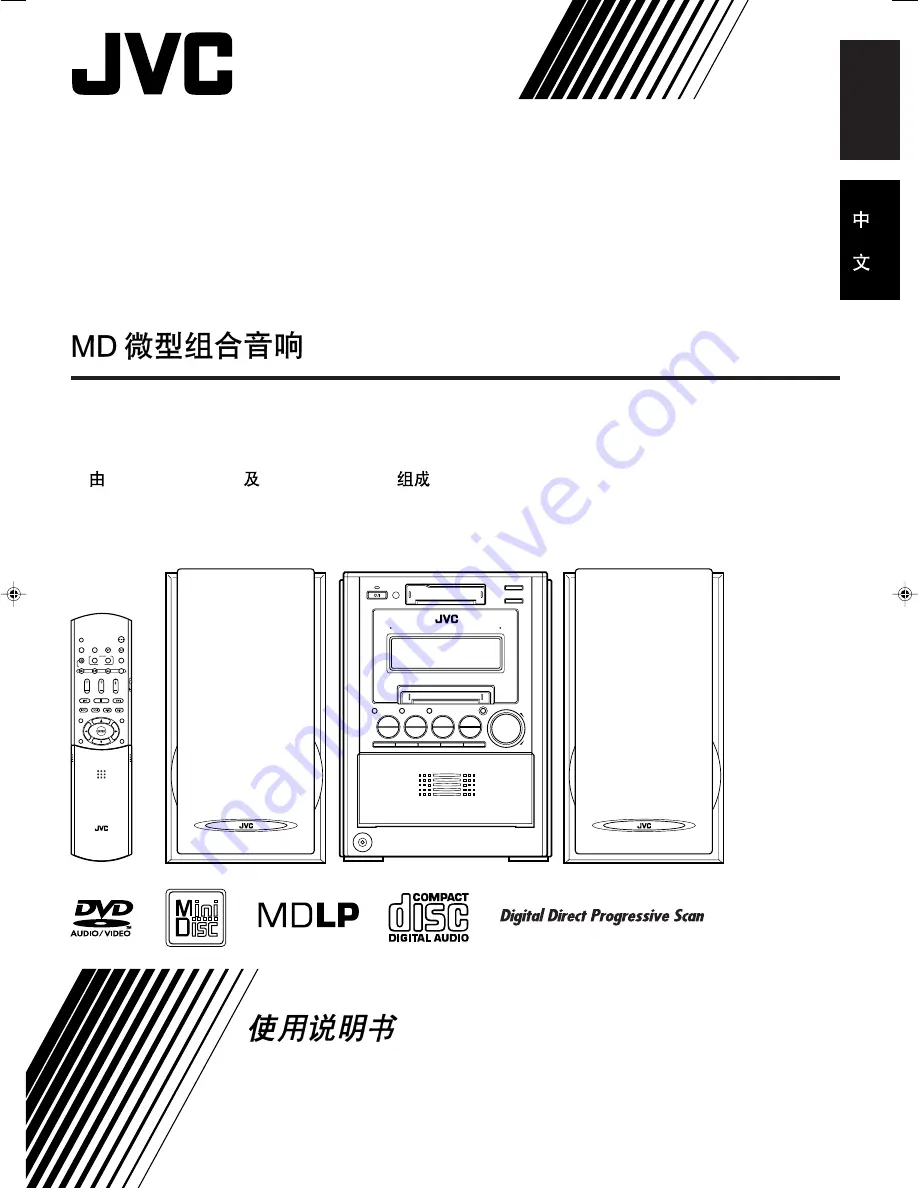
background image

English

GVT0123-002A

[UB]

UX-J99DVD

—Consists of CA-UXJ99DVD and SP-UXJ99DVD

MICRO COMPONENT MD SYSTEM

INSTRUCTIONS

CA-UXJ99DVD 

SP-UXJ99DVD

Cover_UX-J99DVD[UB].p65

03.11.4, 11:31 AM

3

Summary of Contents for CA-UXJ99DVD

Page 1: ...English GVT0123 002A UB UX J99DVD Consists of CA UXJ99DVD and SP UXJ99DVD MICRO COMPONENT MD SYSTEM INSTRUCTIONS CA UXJ99DVD SP UXJ99DVD ...

Page 2: ...en discarding batteries environmental problems must be considered and local rules or laws governing the disposal of these batteries must be followed strictly Do not expose this apparatus to rain moisture dripping or splashing and that no objects filled with liquids such as vases shall be placed on the apparatus CAUTION button Disconnect the mains plug to shut the power off completely the STANDBY O...

Page 3: ...entilation by placing on a stand with a height of 10 cm or more Front view Side view G 2 IMPORTANT FOR LASER PRODUCTS 1 CLASS 1 LASER PRODUCT 2 CAUTION Do not open the top cover There are no user serviceable parts inside the unit leave all servicing to qualified service personnel 3 CAUTION Visible and invisible laser radiation when open and interlock failed or defeated Avoid direct exposure to bea...

Page 4: ...me or similar names or marks unless mentioned otherwise Basic and common information that is the same for many functions is grouped in one place and is not repeated for each procedure For instance we do not repeat the information about turning on off the unit setting the volume changing the sound effects and others which are explained in the section Basic and Common Operations on pages 10 to 12 Th...

Page 5: ...Random Play 40 Playing Tracks in a Group Group Play 40 Repeating Tracks Repeat Play 41 Searching for Tracks to Play MD Title Search 41 Playing Back a Tape 43 Playing Back a Tape 43 Listening to External Equipment 44 Listening to External Equipment 44 Recording on an MD 45 Before You Start Recording on an MD 45 Setting MD Recording Modes 46 Recording discs onto an MD Disc MD Synchronized Recording ...

Page 6: ...imer operation buttons CLOCK TIMER button 10 71 74 SLEEP button 75 q DISP CHARA display character button 10 19 38 41 44 48 49 52 53 69 w RETURN button 20 e SET button r CANCEL button t Play mode buttons PLAY FM MODE button 13 21 22 23 39 41 REPEAT button 23 36 40 41 y Recording mode setting buttons REC SPEED button 47 REC TIME button 46 CD REC MODE button 47 52 GROUP REC ON OFF button 46 54 MD REC...

Page 7: ...ack 11 7 VIRTUAL SURROUND button 31 8 AHB PRO Active Hyper Bass Pro button 11 9 Display window 5 p MD loading slot 37 q MD REC recording button 47 49 w VOLUME control 11 12 44 e Disc eject buttons 10 17 18 23 DISC10 DISC20 DISC30 DISC40 and DISC50 Pressing one of these buttons also turns on the unit and opens the corresponding disc tray if the disc trays are unlocked r Disc trays compartment 5 DVD...

Page 8: ...ndicator RANDOM indicator 6 SURROUND indicator 31 7 AHBPRO Active Hyper Bass Pro indicator 11 8 PBC indicator 9 Timer indicators 71 75 timer REC recording timer SLEEP DAILY 0 Main display Shows the source name and other information TITLE SEARCH indicator 41 42 AUTO STANDBY indicator 11 FM mode indicators 13 STEREO MONO 1 0 2 3 4 5 6 7 8 9 V C D V D SP LP24 x1 5 GROUP PROGRESSIVE TAPE REC MD REC PB...

Page 9: ...ing be sure that you have all the following items The number in parentheses indicates the quantity of each piece supplied FM antenna 1 AM loop antenna 1 Speaker cords 2 Composite video cord 1 Remote control 1 Batteries 2 If any item is missing consult your dealer immediately Putting the Batteries into the Remote Control Insert the batteries R6UW 2STS into the remote control by matching the polarit...

Page 10: ...llustrated 3 Turn the AM loop antenna until you have the best reception To connect an outdoor AM antenna When reception is poor connect a single vinyl covered wire to the AM EXT terminal and extend it horizontally The AM loop antenna must remain connected For better reception of both FM and AM Make sure the antenna conductors do not touch any other terminals or connected cords Keep the antennas aw...

Page 11: ... off 2 Hold the clamp of the speaker terminal 3 Insert the end of the speaker cord into the terminal Match the polarity of the speaker terminals Red cord to red terminal ª and black cord to black terminal 4 Release your finger from the clamp IMPORTANT Use only speakers with the same speaker impedance as indicated by the speaker terminals on the rear of the unit DO NOT connect more than one speaker...

Page 12: ...is on DO NOT plug in any equipment until all connections are complete To connect audio equipment with an optical digital input output terminal such as portable MD recorder By using an optical digital cord not supplied you can connect audio equipment with an optical digital input output terminal Before playing back a disc select DIGITAL AUDIO OUTPUT in the AUDIO menu according to audio equipment co...

Page 13: ...ARA while the unit is on standby off DISPLAY OFF appears on the display for a while then the clock indication goes off To turn on the clock indication press DISP CHARA again while the unit is on standby off DISPLAY ON appears on the display for a while Turning On the Power and Starting Playback To turn on the unit press AUDIO or on the unit The STANDBY ON lamp on the unit lights green When you pre...

Page 14: ...PRO OFF appears on the display The AHBPRO indicator goes off To turn off the unit automatically Auto Standby Using Auto Standby the unit automatically turns itself off on standby if no operation is done for about 3 minutes except when playing back and when FM or AM is selected as the source If an operation is done within this 3 minute period Auto Standby is canceled temporarily even though no soun...

Page 15: ...nition TVs are fully compatible with this system 525p and 480i indicate the number of scanning lines and scanning format of an image signal 525p indicates 525 scanning lines with progressive format 480i indicates 480 scanning lines with interlaced format Ex When you select BASS Current setting Adjusting the Tone You can adjust the bass level low frequency range and the treble level high frequency ...

Page 16: ...e you press the button the band changes as follows On the remote control For operating the external equipment see page 44 and the manuals supplied with it On the unit 2 Press and hold UP or DOWN 4 for more than 1 second UP Increases the frequencies DOWN 4 Decreases the frequencies The unit starts searching for stations and stops when a station of sufficient signal strength is tuned in If an FM pro...

Page 17: ... 10 then 10 4 Press SET again STORED appears on the display for a while The tuned station in step 1 is stored in the preset number selected in step 3 Storing a new station on an already assigned number erases the previously stored one When you unplug the AC power cord or if a power failure occurs The FM and AM preset stations will be erased in a few days If this happens preset the stations again T...

Page 18: ...ded on them However they may not be played back because of their disc characteristics recording conditions or damage or stain on them Especially the configuration and characteristics of an MP3 disc or a JPEG disc is determined by the writing encoding software and hardware used for recording Therefore due to the software and hardware used the following symptoms may occur Some discs may not be playe...

Page 19: ... of titles and each title may be divided into some chapters For example if a DVD VIDEO contains some movies each movie may have its own title number and it may be further divided into some chapters In a DVD VIDEO Karaoke each song may have its own title number but it may not be further divided into chapters DVD AUDIO consists of groups and each group may be divided into some tracks Some DVD AUDIOs...

Page 20: ... you have stopped To stop completely when you use the Resume function press 7 twice When you select another disc tray The stored position where you have stopped will be erased Loading Discs On the unit ONLY 1 Press one of the disc eject buttons DISC10 DISC50 for the disc tray you want to load a disc onto The unit automatically turns on and the selected disc tray comes out if it is unlocked For det...

Page 21: ...o change a disc during playback of another disc On the unit ONLY Press one of the disc eject buttons DISC10 DISC50 to eject one of the disc trays which is not playing currently If discs are changed during play playback will stop after playing all the newly inserted discs To start playing a disc during playback of another disc Press DISC UP or DISC DOWN or DISC SELECT on the unit repeatedly to sele...

Page 22: ...ks on the previous disc On the remote control On the unit UP 4DOWN To change the information shown on the display On the remote control ONLY Press DISP CHARA Each time you press the button the information on the display alternates between the source indication and the clock indication To increase the sound level for DVD VIDEO playback automatically The DVD VIDEO s audio sound is sometimes recorded...

Page 23: ...the number buttons to select the track number you want to play Playback starts from the selected track without the PBC function To activate the PBC function again press 7 twice to show VCD PBC on the display then press DVD 3 Playing Back by Using the Disc Menu Some DVDs are recorded with their own menus which show their contents SVCDs or VCDs with the Playback Control PBC function also have their ...

Page 24: ...rogram Play is still activated To exit from Program Play see To exit from Program Play on the next page To go to the next step press When the PRGM indicator lights in the display You cannot change the disc tray currently selected Programing the Track Playing Order Program Play You can arrange the order in which the chapters or tracks play before you start playing You can program up to 99 steps Pro...

Page 25: ...RACKS USE CANCEL TO DELETE THE PROGRAM PROGRAM No Disc Group Title Track Chapter 1 3 5 2 1 5 5 8 2 1 6 12 7 2 3 4 5 6 7 8 9 10 To exit from Program Play Before or after play press PLAY FM MODE once or twice so that the unit enters another play mode Random Play or Continuous Play The PRGM indicator goes off Turning off the unit also cancels Program Play and changes play mode to Continuous Play The ...

Page 26: ...dicator lights up on the display TRACK STEP Repeats the current track the 1 indicator lights up on the display STEP appears on the TV screen during Program Play or Random Play TITLE Repeats the current title the TITLE indicator lights up on the display DISC Repeats all tracks on the current disc the DISC indicator lights up on the display ALL Repeats all the discs loaded on the disc trays or of th...

Page 27: ...1 3 1 3 TIME 2 3 4 1 DVD VIDEO TITLE 2 DISC 3 TOTAL 1 01 58 CHAP 3 8 5Mbps TITLE 14 TOTAL1 25 58 CHAP 23 DVD VIDEO TITLE 2 TIME OFF CHAP 1 3 2 3 1 1 DISC 3 TOTAL 1 01 58 CHAP 3 8 5Mbps DVD VIDEO TITLE 2 DISC 3 TOTAL 1 01 58 CHAP 3 8 5Mbps The on screen bar goes off back to the beginning For the contents of the on screen bar 1 to 4 see the right column This section explains advanced disc operations...

Page 28: ...urrent chapter track REM Remaining time of the current chapter track The indication on the display window also changes To turn off the on screen bar Press ON SCREEN OFF 1 3 1 3 1 3 TIME CHAP DVD VIDEO TITLE 14 DISC 3 TOTAL 1 25 58 CHAP 23 8 5Mbps On screen guide icons During disc playback the following guide icons may appear for a while on the TV appears at the beginning of a scene containing mult...

Page 29: ...rectly change Repeat Play mode except A B by pressing REPEAT on the remote control See pages 23 and 36 7 Repeating Playback You can repeat playback of the current title or chapter for DVD VIDEO group or track for DVD AUDIO or track for SVCD VCD CD You can also repeat playback of a desired portion A B Repeat To repeat a current title group chapter or all tracks For DVD VIDEO During playback For SVC...

Page 30: ... 1 3 TIME CHAP DVD VIDEO TITLE 14 DISC 3 TOTAL 1 25 58 CHAP 23 8 5Mbps A 1 3 1 3 1 3 TIME CHAP DVD VIDEO TITLE 14 DISC 3 TOTAL 1 25 58 CHAP 23 8 5Mbps 1 3 1 3 1 3 TIME CHAP OFF OFF DVD VIDEO TITLE 14 DISC 3 TOTAL 1 25 58 CHAP 23 8 5Mbps 1 3 1 3 1 3 TIME CHAP DVD VIDEO TITLE 14 DISC 3 TOTAL 1 25 58 CHAP 23 8 5Mbps OFF 1 3 1 3 1 3 TIME CHAP A B DVD VIDEO TITLE 14 DISC 3 TOTAL 1 25 58 CHAP 23 8 5Mbps...

Page 31: ... Press ON SCREEN twice The on screen bar with pull down menu appears on the TV Ex When playing a DVD VIDEO Ex When playing a DVD AUDIO 2 Press cursor 3 2 repeatedly to select highlight CHAP or TRACK on the pull down menu 3 Press ENTER The pop up window appears under the pull down menu 4 Press the number buttons 0 9 to enter the desired chapter track number You can select up to the 99th chapter tra...

Page 32: ...aining subtitles in different languages you can select the subtitle language to display on the TV The icon appears at the beginning of playback when the current scene has plural subtitles Though you can do the following procedure for an SVCD which contains no subtitle it is not effective You can also select the subtitle language using the on screen bar See page 24 for details During playback 1 Pre...

Page 33: ...ENTER Leave the unit for about 5 seconds without any operation 1 1 1 3 1 3 1 1 3 2 2 3 3 3 3 1 1 3 2 2 3 3 3 3 Selecting Browsable Still Pictures recorded on DVD AUDIO Most DVD AUDIOs include browsable still pictures which usually appear in turn automatically during playback according to the playback sequence You can change the picture turn the page manually when the current still picture has sele...

Page 34: ...to normal stereo 2 channel playback L To listen to the L left audio channel R To listen to the R right audio channel You can also use cursor 5 to select the desired audio channel To erase the pop up window Perform one of the following Press ENTER Leave the unit for about 5 seconds without any operation Creating a Realistic Sound Field With supplied two speakers you can enjoy multi channel surround...

Page 35: ... changes as follows Forward 1 32 1 16 1 8 1 4 1 2 Reverse for DVD VIDEO only 1 32 1 16 1 8 1 4 1 2 To pause slow motion playback Press 8 To return to normal playback Press DVD 3 During slow motion playback No sound will be reproduced 7 To replay the previous scenes One touch replay function During playback Press The playback position moves back 10 seconds before the current position NOTES This fun...

Page 36: ... cursor 3 2 repeatedly to select USER1 or USER2 If no operation is done for about 10 seconds The VFP setting screen disappears OFF USER1 GAMMA BRIGHTNESS CONTRAST SATURATION TINT SHARPNESS 0 0 0 0 3 Changing the VFP Setting The VFP Video Fine Processor function enables you to adjust the picture based on the picture tone or personal preference There is a time limit in doing the following steps If t...

Page 37: ...onus group For how to select the group see To go to another title or group on page 18 The key number entry indication appears as follows On the display On the TV screen 2 Enter the key number using the number buttons 0 9 then press ENTER When you enter the correct key number the unit starts playing back the bonus group If you enter the wrong number enter the number again KEY _ _ _ _ KEY _ _ _ _ To...

Page 38: ...s system can play only baseline JPEG files Progressive JPEG files or lossless JPEG files cannot be played Baseline JPEG format Used for digital cameras web etc Progressive JPEG format Used for web Lossless JPEG format An old type and rarely used now This unit may not play back JPEG files properly which are recorded by the devices other than digital still camera Some tracks on an MP3 JPEG disc are ...

Page 39: ...at Play continuous play To stop playing press 7 To cancel Repeat Play press REPEAT repeatedly until Repeat Play mode indicators go off from the display Turning off the unit will also cancel Repeat Play About the MP3 JPEG CONTROL screens Some group and file names may not be displayed correctly because of their recording conditions The order of groups and files on an MP3 JPEG disc may be displayed d...

Page 40: ...dable MDs Basic MD Operations While playing an MD you can do the following operations To pause playback Press MD The elapsed playing time starts flashing on the display To resume playback press MD again To locate a particular point in a track during play On the remote control ONLY Press and hold or 1 Fast forwards the track 1 Fast reverses the track Playing Back the Entire MD Normal Play 1 Insert ...

Page 41: ... press the button the information on the display changes as on the right column While playing or pausing Current track number Current group number Elapsed playing time Current track title Total track number Total group number Remaining recording time Total playing time On the remote control On the unit Current group title MD MD MD Clock indication Recording length mode UP 4DOWN Before playback Whe...

Page 42: ...DE repeatedly so that the unit enters another play mode Random Play Group Play or Normal Play The PRGM indicator goes off Turning off the unit or ejecting MD also cancels Program Play and changes the play mode to Normal Play The program you have made will be erased To check the program contents Before playing you can check the program contents by pressing or 4 Shows the programed tracks in the pro...

Page 43: ...changes the playback mode to Normal Play RANDOM indicator Playing Tracks in a Group Group Play You can play back tracks in a group To make or edit groups see pages 54 to 62 To use Repeat Play see page 41 with Group Play press REPEAT after starting Group Play 1 Load an MD including groups If the current playing source is not MD press MD then 7 before going to the next step On the remote control ONL...

Page 44: ...Play To go to another track press or 4 repeatedly Skips to the beginning of the next or succeeding tracks 4 Goes back to the beginning of the current or previous tracks You can also use the number buttons to select the track number To stop during play press 7 To exit from Repeat play press REPEAT repeatedly to select MD REPEAT OFF Searching for Tracks to Play MD Title Search You can search for the...

Page 45: ...essed in step 4 2 press once to move the character entry position to the right 5 Press ENTER SEARCH flashes on the display The unit starts searching for the track When the track with the desired title is found the unit plays back the track After the track is played the unit starts searching for the next matching track If no track with the desired title is found NOT FOUND appears on the display and...

Page 46: ...t be reproduced properly To prohibit cassette ejection Cassette Lock You can prohibit cassette disc and MD ejection from the unit and lock the cassette See Prohibiting Disc Ejection Disc Lock on page 23 for details Playing Back a Tape You can play back type I tapes 1 Insert a cassette into the cassette loading slot with the exposed part of the tape facing left When the unit is turned on the TAPE i...

Page 47: ...ton the information on the display alternates between the source indication and the clock indication Listening to External Equipment You can listen to external equipment connected to the AUX jacks and OPTICAL DIGITAL IN terminal on the rear of the unit First make sure that the external equipment is properly connected as follows see also Connecting Other Equipment on page 9 DO NOT connect other equ...

Page 48: ...en if there is still enough recording time remaining on it About the track marks When playing an MD you can move among the tracks You can do this because there is a mark recorded at the beginning of each track enabling you to locate the track This mark is called a track mark and the portion between two adjacent track marks is called a track When using disc synchronized recording a track mark is re...

Page 49: ...o obtain the best sound quality it is recommended to use the SP mode when recording Setting MD Recording Modes Before recording on MDs set the recording length mode SP LP2 LP4 LP prefix addition mode and the group recording mode To set the recording length mode On the remote control ONLY The recording length mode can be set and stored for each source 1 Select the source FM AM CD TAPE AUX or AUX DI...

Page 50: ...an start and stop disc play and MD recording at the same time 1 Load discs into the 5 DVD changer If the current playing source is not DISC press DVD 3 or 8 DVD on the unit then 7 before going to the next step You can make a program see page 21 or select Random Play see page 22 if you want Go to step 3 On the remote control ONLY 2 Press DISC UP or DISC DOWN to select the disc you want to record th...

Page 51: ...oup or more than 99 groups G will appear on the display C D x1 REC 1 2 3 4 5 MD GROUP LP2 C D x1 REC 1 2 3 4 5 MD GROUP LP2 C D x1 REC 1 2 3 4 5 MD GROUP LP2 C D x1 REC 1 2 3 4 5 MD GROUP LP2 Elapsed playing time Remaining recording time Current MD track number Current group number Recording Other Sources onto an MD 1 Prepare the source to record from To record from FM AM broadcasts 1 Press FM AM ...

Page 52: ...omatically separates and put a track mark every 5 minutes By pressing SET you can also enter a track mark manually AUTO MARK The unit automatically separates and put a track mark if there is a silence of 3 seconds or more between tracks By pressing SET you can also enter a track mark manually See About the track marks on page 45 for details 4 Press MD REC The REC MD recording indicator starts flas...

Page 53: ...emove these tabs To re record on a protected tape cover the holes with adhesive tape The use of the C 120 or longer tape is not recommended since characteristic deterioration may occur and this tape easily jams in the pinch rollers and the capstans To keep the best recording and playback sound quality You need to clean the heads Clean the heads after every 10 hours of use with a wet type head clea...

Page 54: ...44 For operation of the external equipment see the manuals supplied with it 2 Put a recordable cassette into the cassette loading slot On the remote control On the unit AUX FM AM On the remote control ONLY 3 Press REV MODE to select Reverse Mode Each time you press the button Reverse Mode changes as follows will be shown during recording when you select 4 Press TAPE REC The REC tape recording and ...

Page 55: ...mote control ONLY While playing back a track of a disc or MD you want to record press TAPE REC The playback of the track is stopped and the same track starts playing from the beginning again This time the cassette deck starts recording the track After the track is recorded both playback and recording stop automatically To record from the desired track Select the track before playback then press TA...

Page 56: ...tors start flashing on the display When disc player stops MD recorder and the cassette deck stop automatically To stop recording press 7 WRITING flashes on the display for a while To eject the MD or tape press 7 to stop the recording then press the corresponding eject button To record a single track during play or pause On the remote control ONLY While playing back or pausing a track you want to r...

Page 57: ... You can enjoy playback recording and editing groups Playback see page 40 You can play back and repeat the desired group without making a program For example you can play back repeatedly genre B tracks by selecting Group 1 in the left figure Group Play Recording see page 45 You can form a group while tracks are being recorded Editing You can edit the groups using the following functions Forming a ...

Page 58: ...Introducing Group Editing Functions The groups and tracks can be edited in many ways Group editing functions and Track editing functions From this page to page 62 the group editing functions are explained For details on the track editing functions see pages 63 to 67 Group 1 1 2 3 4 5 6 7 8 9 10 11 12 13 1 2 3 4 5 6 7 8 9 10 11 12 13 Track number 1 2 3 4 5 6 7 8 9 10 11 12 13 14 15 10 11 12 13 14 1...

Page 59: ...tarts playback repeatedly 5 Press SET If the track selected as the first track belongs to another group GROUP TRACK appears on the display Select another track again repeat step 4 If you want to form a group from the selected track only go to step 7 To cancel the setting press CANCEL then repeat from step 4 6 Press UP or DOWN 4 to select the last track of the new group You can also select the trac...

Page 60: ...ons In this case the selected track starts playback repeatedly 5 Press SET If the loaded MD has no group you cannot go to the following steps When the selected track belongs to a group its group number appears on the display To cancel the setting press CANCEL then repeat from step 4 6 Press GROUP TITLE I or GROUP TITLE I to select the group The unit plays back all tracks in the selected group repe...

Page 61: ...laying track number and its group number will appear If the track does not belong to any group the group number will be indicated as 4 Press GROUP TITLE I or GROUP TITLE I to select the group you want to divide 5 Press UP or DOWN 4 to select the track as the dividing point The track selected in this step will be the first track in the divided group You can also select the track using the number bu...

Page 62: ...e following steps During playback The group number of the currently playing track will appear on the right If the track does not belong to any group the group number will be indicated as 4 Press GROUP TITLE I or GROUP TITLE I to select the two adjacent groups you want to join 5 Press SET To cancel the setting press CANCEL then repeat from step 4 6 Press ENTER EDITING appears and the REC MD recordi...

Page 63: ... following steps During playback The group number of the currently playing track will appear If the track does not belong to any group the group number will be indicated as 4 Press GROUP TITLE I or GROUP TITLE I to select the group you want to move 5 Press SET To cancel the setting press CANCEL then repeat from step 4 6 Press GROUP TITLE I or GROUP TITLE I to select the position where you want to ...

Page 64: ... to select the group you want to dissolve 5 Press SET To cancel the setting press CANCEL then repeat from step 4 6 Press ENTER The REC MD recording indicator flashes on the display Then WRITING also flashes while editing you have made is being recorded on the MD Dissolving All Groups UNGR ALL This function allows you to dissolve all the groups You cannot erase the tracks using this function To sto...

Page 65: ...R appears on the display If you want to stop this editing process press CANCEL 3 Press SET If the loaded MD has no group you cannot go to the following steps During playback The group number of the currently playing track will appear If the track does not belong to any group the group number will be indicated as 4 Press GROUP TITLE I or GROUP TITLE I to select the group you want to erase 5 Press S...

Page 66: ...ple it is possible to erase only a part of an existing track Important When the editing is completed WRITING starts flashing after EDITING appeared on the display to store the edited contents on the MD While WRITING is flashing on the display do not give any shock to the unit Otherwise the MD might not be able to play back anymore Introducing Track Editing Functions The groups and tracks can be ed...

Page 67: ... recorded on the MD To join the divided tracks see the JOIN function on page 65 In the following examples of track editing the process is explained from the very first that is inserting a disc You can also edit an MD during playback in Normal Play Dividing a Track DIVIDE This function allows you to divide one track into two separate tracks It is useful for example when you want to add track marks ...

Page 68: ...up the newly joined track will not belong to any group even if the succeeding track belongs to a group Joining Two Tracks JOIN This function allows you to join two adjacent tracks into one track When the tracks have their own titles the title of the preceding track is reassigned to the newly joined track Once two tracks are joined the other tracks and or the groups are renumbered To stop any time ...

Page 69: ...ng a Track MOVE This function allows you to move a track to the position you prefer It is useful to change the order of the tracks as you like Once a track is moved the tracks and or the groups are renumbered To stop any time during the editing process below before step 8 press TITLE EDIT 1 Insert an MD you want to edit into the MD loading slot On the remote control ONLY 2 Press TITLE EDIT repeate...

Page 70: ...you have made is being recorded on the MD BLANK DISC appears on the display Erasing Tracks ERASE This function allows you to erase unwanted tracks You cannot resume the erased tracks Once tracks are erased the other tracks and or groups are renumbered You can erase up to 15 tracks at a time To stop any time during the editing process below before step 8 press TITLE EDIT 1 Insert an MD you want to ...

Page 71: ...rface See page 45 for details About the number of characters entered for an MD The total number of characters that you can enter for an MD is 1792 The maximum number that you can enter for a disc track title is 61 However the actual number you can enter may be slightly less than the maximum numbers due to the MD limitations see page 88 A space can be counted as one character When the stereo long h...

Page 72: ...ter entry button for a character you want to enter Ex To enter an A or a press ABC once To enter a B or b press ABC twice To enter a C or c press ABC three times To enter a symbol press MARK repeatedly until the mark you want appears For available symbols see below To enter a numeral press 0 9 To enter a space while entering a title press UP twice To move the character entry position while enterin...

Page 73: ...s recorded on the MD in sequential order EDITING appears on the display for a while then the next title entry screen appears If you enter 17th track title or more they are ignored When you unplug the AC power cord or if a power failure occurs before step 8 The editing you have made is not recorded on the MD To Change the Title You can make a correction or change the title 1 Follow steps 1 to 4 on ...

Page 74: ... you press the button the timer changes as follows Source indication appears only when the unit is turned on The hour digits of the start time start flashing 2 Set the start time 1 Press cursor 3 2 repeatedly to adjust the hour 2 Press SET The minute digits start flashing Using the Timers REC TIMER Recording Timer on off DAILY TIMER Daily Timer on off DAILY TIMER Daily Timer setting Clock setting ...

Page 75: ... turning off the unit Before the start time the REC recording timer indicator and REC TIMER STANDBY start flashing on the display Before the shut off time the display changes as follows To turn off the Recording Timer after its setting is done 1 Press CLOCK TIMER repeatedly until REC TIMER appears on the display 2 Press CANCEL The timer and REC recording timer indicators go off from the display To...

Page 76: ... on the display Using Daily Timer With Daily Timer you can wake up to your favorite music or radio program You can set Daily Timer whether the unit is turned on or off on standby To correct a mis entry any time during the setting process press CANCEL To exit from the timer setting during the process press CLOCK TIMER repeatedly until the source indication appears How Daily Timer actually works The...

Page 77: ... 5 Adjust the volume level 1 Press cursor 3 2 repeatedly to adjust the volume level You can adjust the volume level to or within the range of 0 silent to 40 maximum When you select VOLUME the volume is set to the volume level when you turn off the unit 2 Press SET The fade setting appears on the display 6 Select the fade setting 1 Press cursor 3 2 repeatedly FADE The volume increases gradually to ...

Page 78: ... when the unit is turned on How Sleep Timer actually works The unit automatically turns off after the specified time length passes On the remote control ONLY Press SLEEP repeatedly The timer and the SLEEP indicators start flashing on the display SLEEP 10 appears on the display for a while Each time you press the button the time length changes as follows About 5 seconds later the timer and the SLEE...

Page 79: ...OTHERS menu For details on each choice menu see Configuration of choice menus on the right column 7 Configuration of the choice menus The choice menu has the following menus 1 LANGUAGE menu see page 78 You can select the initial language for the disc menu audio and subtitle You can also select the language shown on the TV screen while operating this unit 2 PICTURE menu see page 78 You can select t...

Page 80: ... menu Each time you press the button the menu changes 3 Press cursor 5 repeatedly to select highlight MP3 JPEG 4 Press ENTER The pop up window listing the selectable options appears ENGLISH ENGLISH ENGLISH ENGLISH LANGUAGE MENU LANGUAGE ON SCREEN LANGUAGE AUDIO LANGUAGE SUBTITLE USE TO SELECT USE ENTER TO CONFIRM TO EXIT PRESS CHOICE ENTER SELECT 4 3 LB ON MP3 PICTURE MONITOR TYPE SCREEN SAVER MP3...

Page 81: ...ide TV and when the TV has the screen size adjustment function 4 3 LB Letter Box conversion Select when the aspect ratio of your TV is 4 3 conventional TV While viewing a wide screen picture the black bars appear on the top and the bottom of the screen 4 3 PS Pan Scan conversion Select when the aspect ratio of your TV is 4 3 conventional TV While viewing a wide screen picture the black bars do not...

Page 82: ...for all Dolby digital software Loud sound will become low and vice versa 7 Other setting menu OTHERS RESUME You can activate or deactivate the resume play function of the built in disc player See page 17 You cannot use Resume Play for all CD MP3 JPEG discs and some DVD SVCD VCD discs Resume Play may not be able to use with some DVDs SVCDs and VCDs Select one of the following settings ON Select to ...

Page 83: ...k level information Level 1 most restrictive to Level 8 least restrictive Playback of discs containing higher level than the selected level will be restricted Some discs may not be played back at all and others may be played back with higher level scenes skipped Ex When you select 4 discs containing level 5 6 7 or 8 can be played back 7 Setting Parental Lock 1 Press CHOICE then press cursor 3 2 to...

Page 84: ... level remain effective When you enter wrong passwords three times EXIT will be selected highlight automatically and cursor 5 do not work Press ENTER to exit from the PARENTAL LOCK submenu then start from step 1 again If you forget your password enter 8888 7 Releasing Parental Lock temporarily When you set a strict parental level some discs may not be played back at all When you load such a disc a...

Page 85: ...evis KP Korea Democratic People s Republic of KR Korea Republic of KW Kuwait KY Cayman Islands KZ Kazakhstan LA Lao People s Democratic Republic LB Lebanon LC Saint Lucia LI Liechtenstein LK Sri Lanka LR Liberia LS Lesotho LT Lithuania LU Luxembourg LV Latvia LY Libyan Arab Jamahiriya MA Morocco MC Monaco MD Moldova Republic of MG Madagascar MH Marshall Islands ML Mali MM Myanmar MN Mongolia MO Ma...

Page 86: ...perform the following operations on a TV with buttons below 1 9 0 100 Selects the TV channels For channel number 5 press 5 For channel number 10 press 1 then 0 For channel number 23 press 2 then 3 For channel number 135 press 100 3 then 5 TV RETURN will function as the ENTER button if your equipment requires pressing ENTER after selecting a channel number Refer also to the manual supplied for your...

Page 87: ... 2 terminals on a TV using a composite video cord supplied Available operations You can use following functions by using AV COMPU LINK control system One touch DVD play Simply start playing back the unit the TV automatically turns on and changes the input mode to the appropriate position so that you can view the playback picture The TV does not turn off automatically even if you turn off the unit ...

Page 88: ...y the Joint Photographic Expert Group which features little distortion in image quality in spite of its high compression ratio Letter box A method of displaying wide images like movies in on a 4 3 TV screen with no part of the image deleted by placing black bands on the top and bottom of the screen This name has derived from the screen form looking literally like a letter box MP3 A file format wit...

Page 89: ...the MD If the shutter opens accidentally close it again quickly without touching the MD inside Do not place MDs in the following places High temperature areas such as in direct sunlight or inside a car High humidity areas e g in a bathroom On a beach or sandy area Clean MDs regularly If dust or dirt gets on cartridge wipe it off with a soft dry cloth Handling cassette tapes If the tape is loose in...

Page 90: ...ique developed for MD This technology cuts out faint sounds that would not be heard by the human beings This technology based on human sensitivity to sounds reduces recorded data volume up to about one fifth of the original data volume Furthermore this unit takes advantage of the latest ATRAC3 techniques which can reduce the amount of data to record to one 10th or one 20th of the original data vol...

Page 91: ...s total possible recording time MD limitations The MD records data in an original format that differs from that of conventional cassette tapes or DATs Since there are some limitations with this recording format the following types of symptoms may occur These symptoms are not malfunctions 1st Generation 2nd Generation CD R RW CD ABCDEFG ABCDEFG Language Code List AA Afar AB Abkhazian AF Afrikaans A...

Page 92: ...ar PCM 44 1 kHz 16 bit Linear PCM 48 kHz 16 bit Linear PCM DTS bitstream 48 kHz 16 bit Linear PCM Playback disc DVD VIDEO with 48 kHz 16 20 24 bit Linear PCM with 96 kHz Linear PCM with Dolby Digital with DTS Digital Surround DVD AUDIO with 48 96 192 kHz 16 20 24 bit Linear PCM with 44 1 88 2 176 4 kHz 16 20 24 bit Linear PCM with Dolby Digital with DTS Digital Surround SVCD VCD CD CD with DTS Dig...

Page 93: ...hich belongs to another group MD is not loaded correctly There is no MD You are trying to copy a non audio disc like a CD ROM or MP3 You are trying to edit or record on a playback only MD The UTOC fails to be read Digital copy of the 2nd generation is prohibited Solution Change the MD if you want to enjoy playback This is not a malfunction See Adding a Track to a Group ENTRY GR on page 57 This is ...

Page 94: ...ected correctly Incorrect color system is selected An incorrect input has been selected on the TV or monitor The PROGRESSIVE indicator are flashing though the unit is connected to a TV which does not support progressive video input such as a conventional TV The color system is not set correctly Parental lock is in use 4 3 PS is selected when viewing on a conventional TV aspect ratio 4 3 You are us...

Page 95: ...ecorder Section Audio playing system MiniDisc digital audio system Recording system Magneto optical overwrite system Reading system Non contact semiconductor laser pickup λ 780 nm Error correction system CIRC Cross Interleave Reed Solomon Code Recording Playback time when using a 80 minute MD SP 80 minutes LP2 160 minutes LP4 320 minutes Sampling frequency 44 1 kHz Audio compression system ATRAC A...

Page 96: ...VICTOR COMPANY OF JAPAN LIMITED 1203AIMMDWJEM EN CS 2003 VICTOR COMPANY OF JAPAN LIMITED ...

Reviews: